“Thats ambitious“
Is what people would say when I told them about latest phase of my house remodel. I was planning to rip out my staircase and create a very modern steel stair in my home. A while back, when I thought I might get a construction loan to renovate the house I called up a small design shop who has done a lot of really great staircases in the baltimore area. I inquired with them about how much they thought a project like this would cost. They said, I think we could start at 20k, but more realistically around 25k.
So a having a professional do this for me was completely out of the question. I have never worked with steel before, and I was hoping I could keep the material costs under 5k. Here is a photo of the house when I moved in. No construction had been done at this point. Before I dive into the staircase, I will need to explain some basic programming that determined the decisions for the staircase.
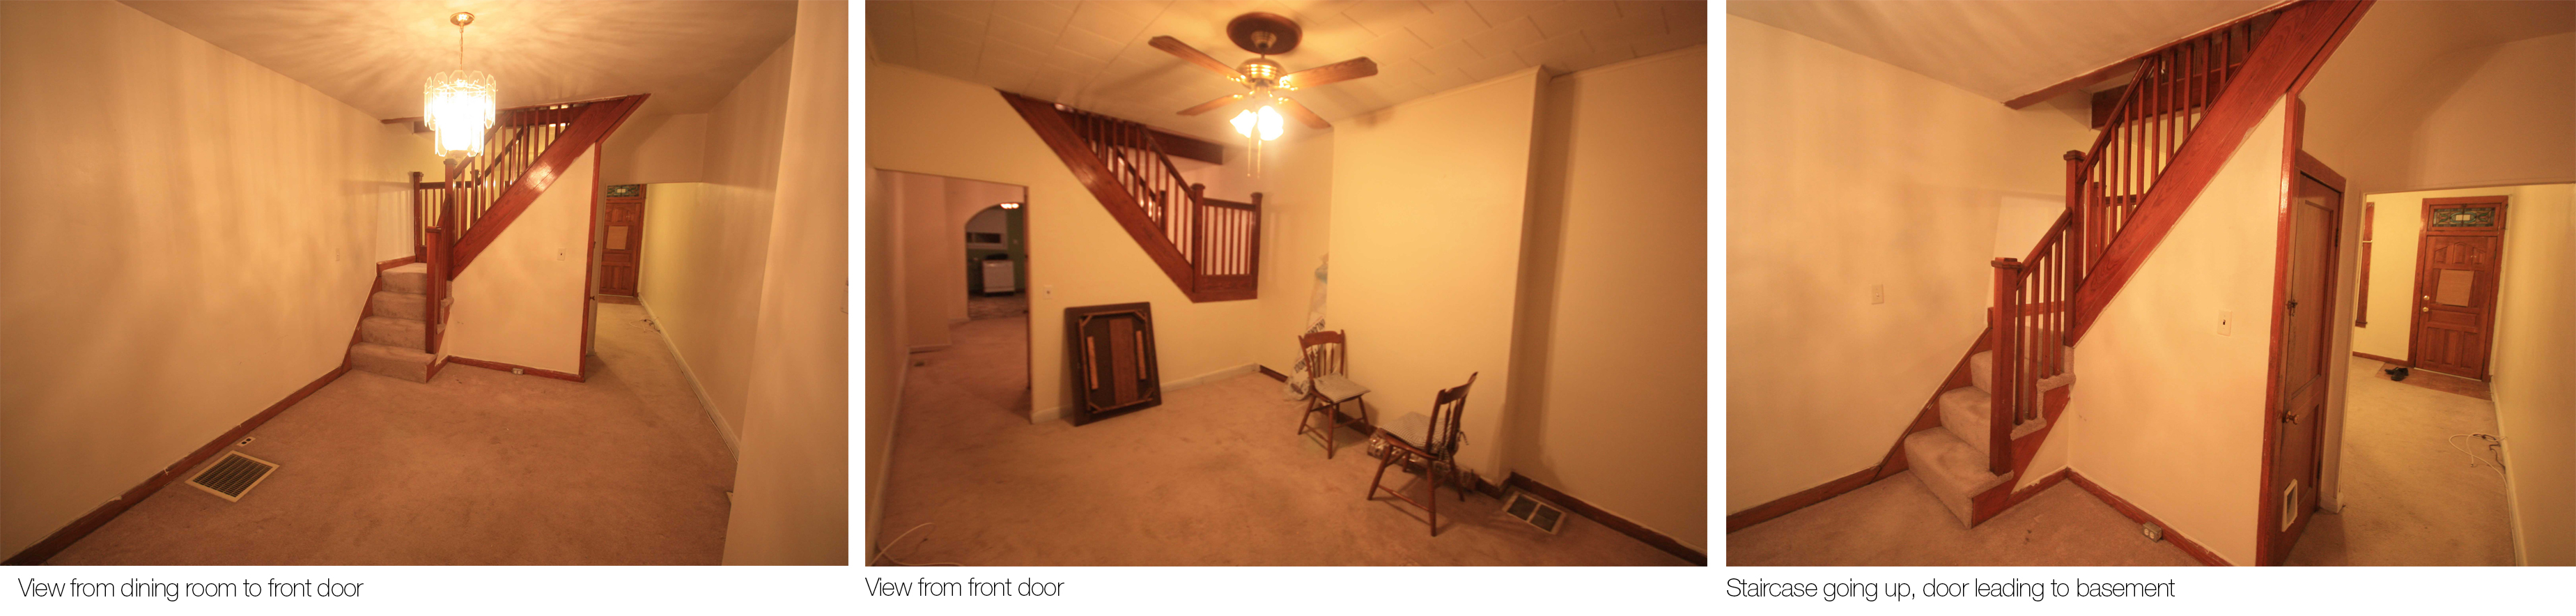
The rowhome I purchased was only 12′ wide. The current stair configuration runs perpendicular to the party walls in the home. Most people who renovate rowhomes in this area change the configuration of the staircase to run perpendicular to the party walls.
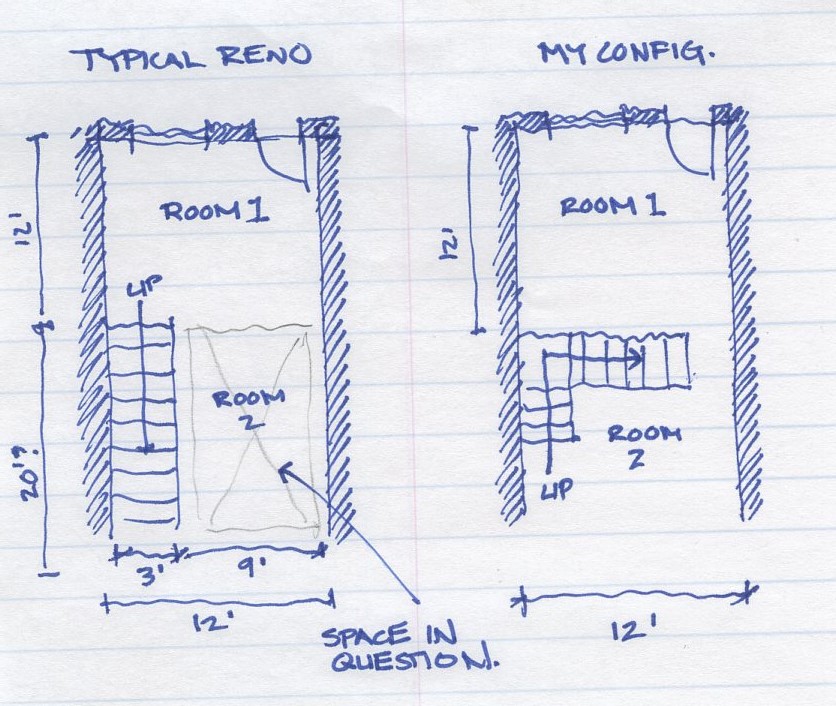
The reason most people do their renovations this way is because they want to fit a half bathroom on the first floor. The real estate industry is fixated on the bedroom / bathroom count to drive up prices. I had decided to keep the restrooms up on the second floor since putting a half bath on the first floor would cramp the flow of the house, and kill my sight lines from the front to the back of the house. With the implementation of a floating metal staircase, I can really open up the first floor, but still keep the rooms defined and separated by the staircase.
Currently the kitchen sits in the rear of the house with a dining room (shown above in the left photo) separates the living room in front, and the kitchen in the back.
With how I intend to live in this house, I want to get rid of the dining room and move the kitchen to that middle room. This way I can keep the service spaces in the center of the house and the living spaces (which daylighting is needed) to the ends of the house. The front room will act as a introduction to the aesthetic of the home. It will have the fireplace and some soft seating in it. its a smaller space, so I don’t think I’ll put a couch in it, just some smaller soft seating, and a bench for entertaining. There will not be a tv in this room. Think of this space as a place to have some friends over and have a drink or two. The staircase will be the main focus of this space.
The living space in the rear of the house will be the informal living room, with a couch and tv. This is the I just got home from work and want to watch some tv room. Also it faces the alley, which is very private and you don’t have to worry about people looking in through the window as the walk down the street, as you do in the front of the house.
Anyways, back to the staircase….
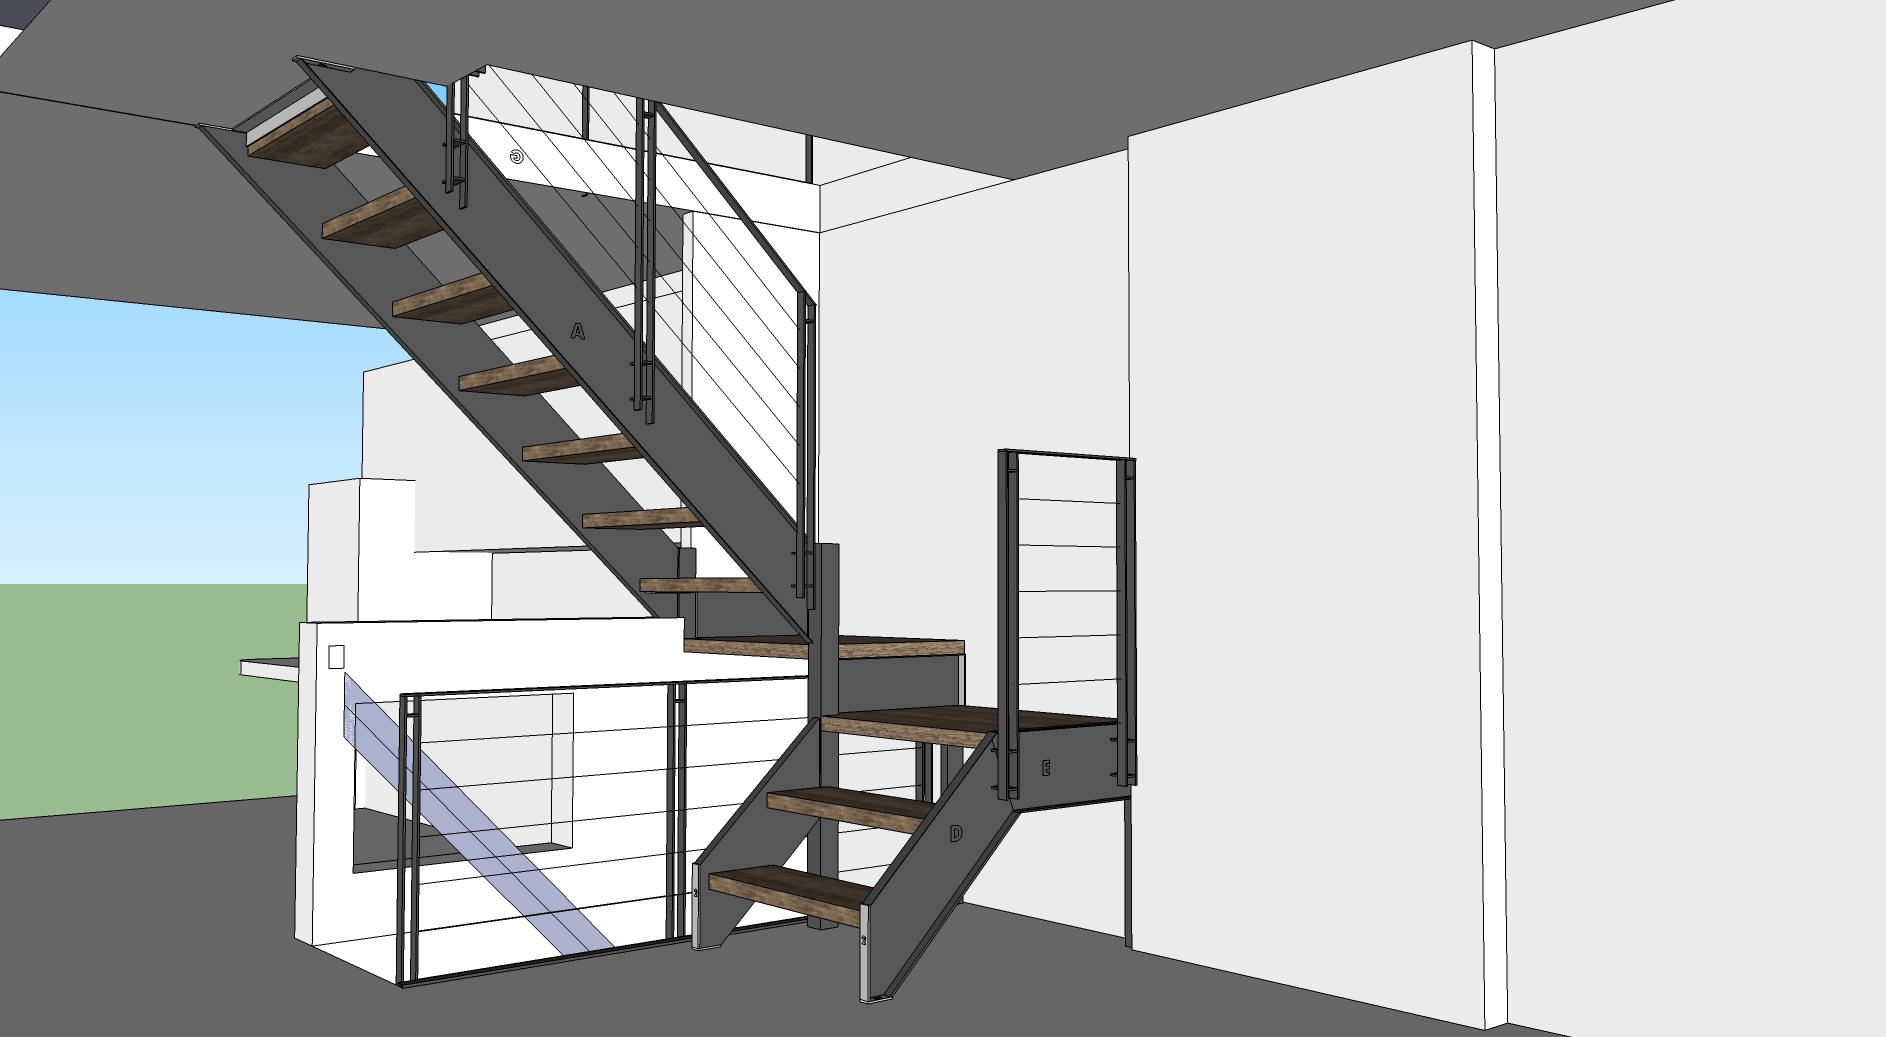
Here was the proposed design, not very simple by any accounts.
why couldn’t I have done the simple straight run configuration??
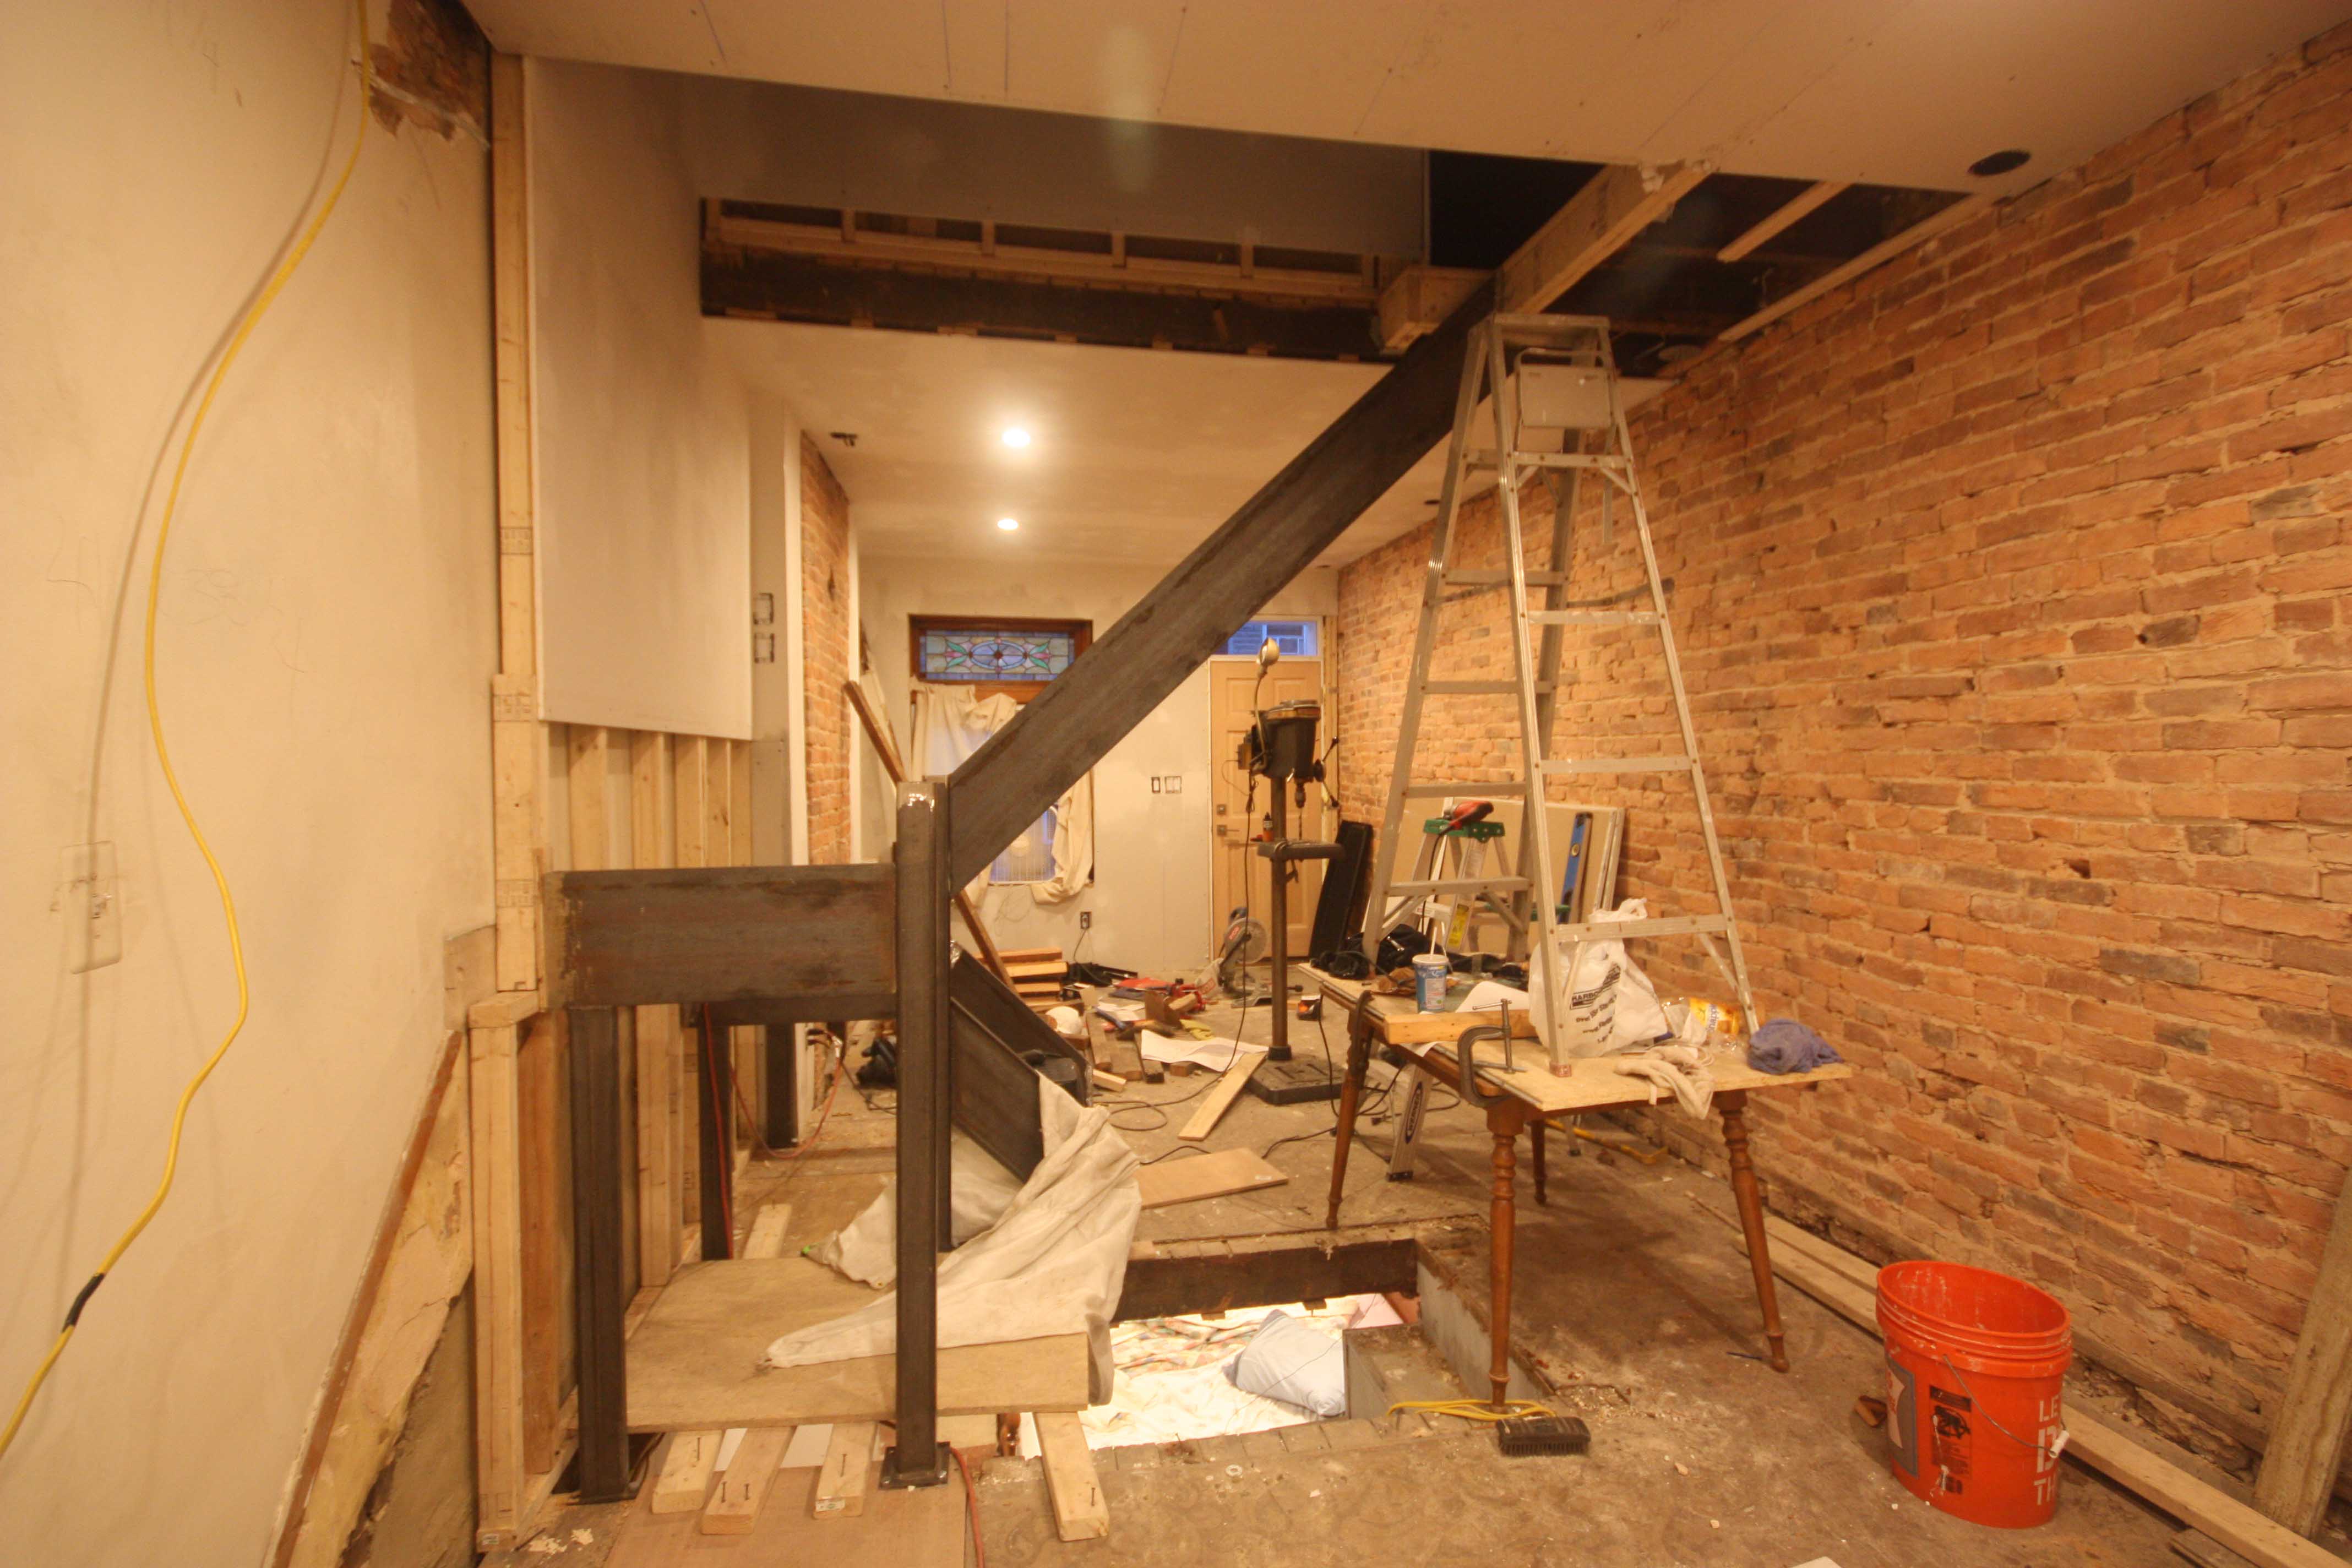
By the time I started on the staircase I had already demoed a lot of the house. I had also removed all the non structural components of the staircase.
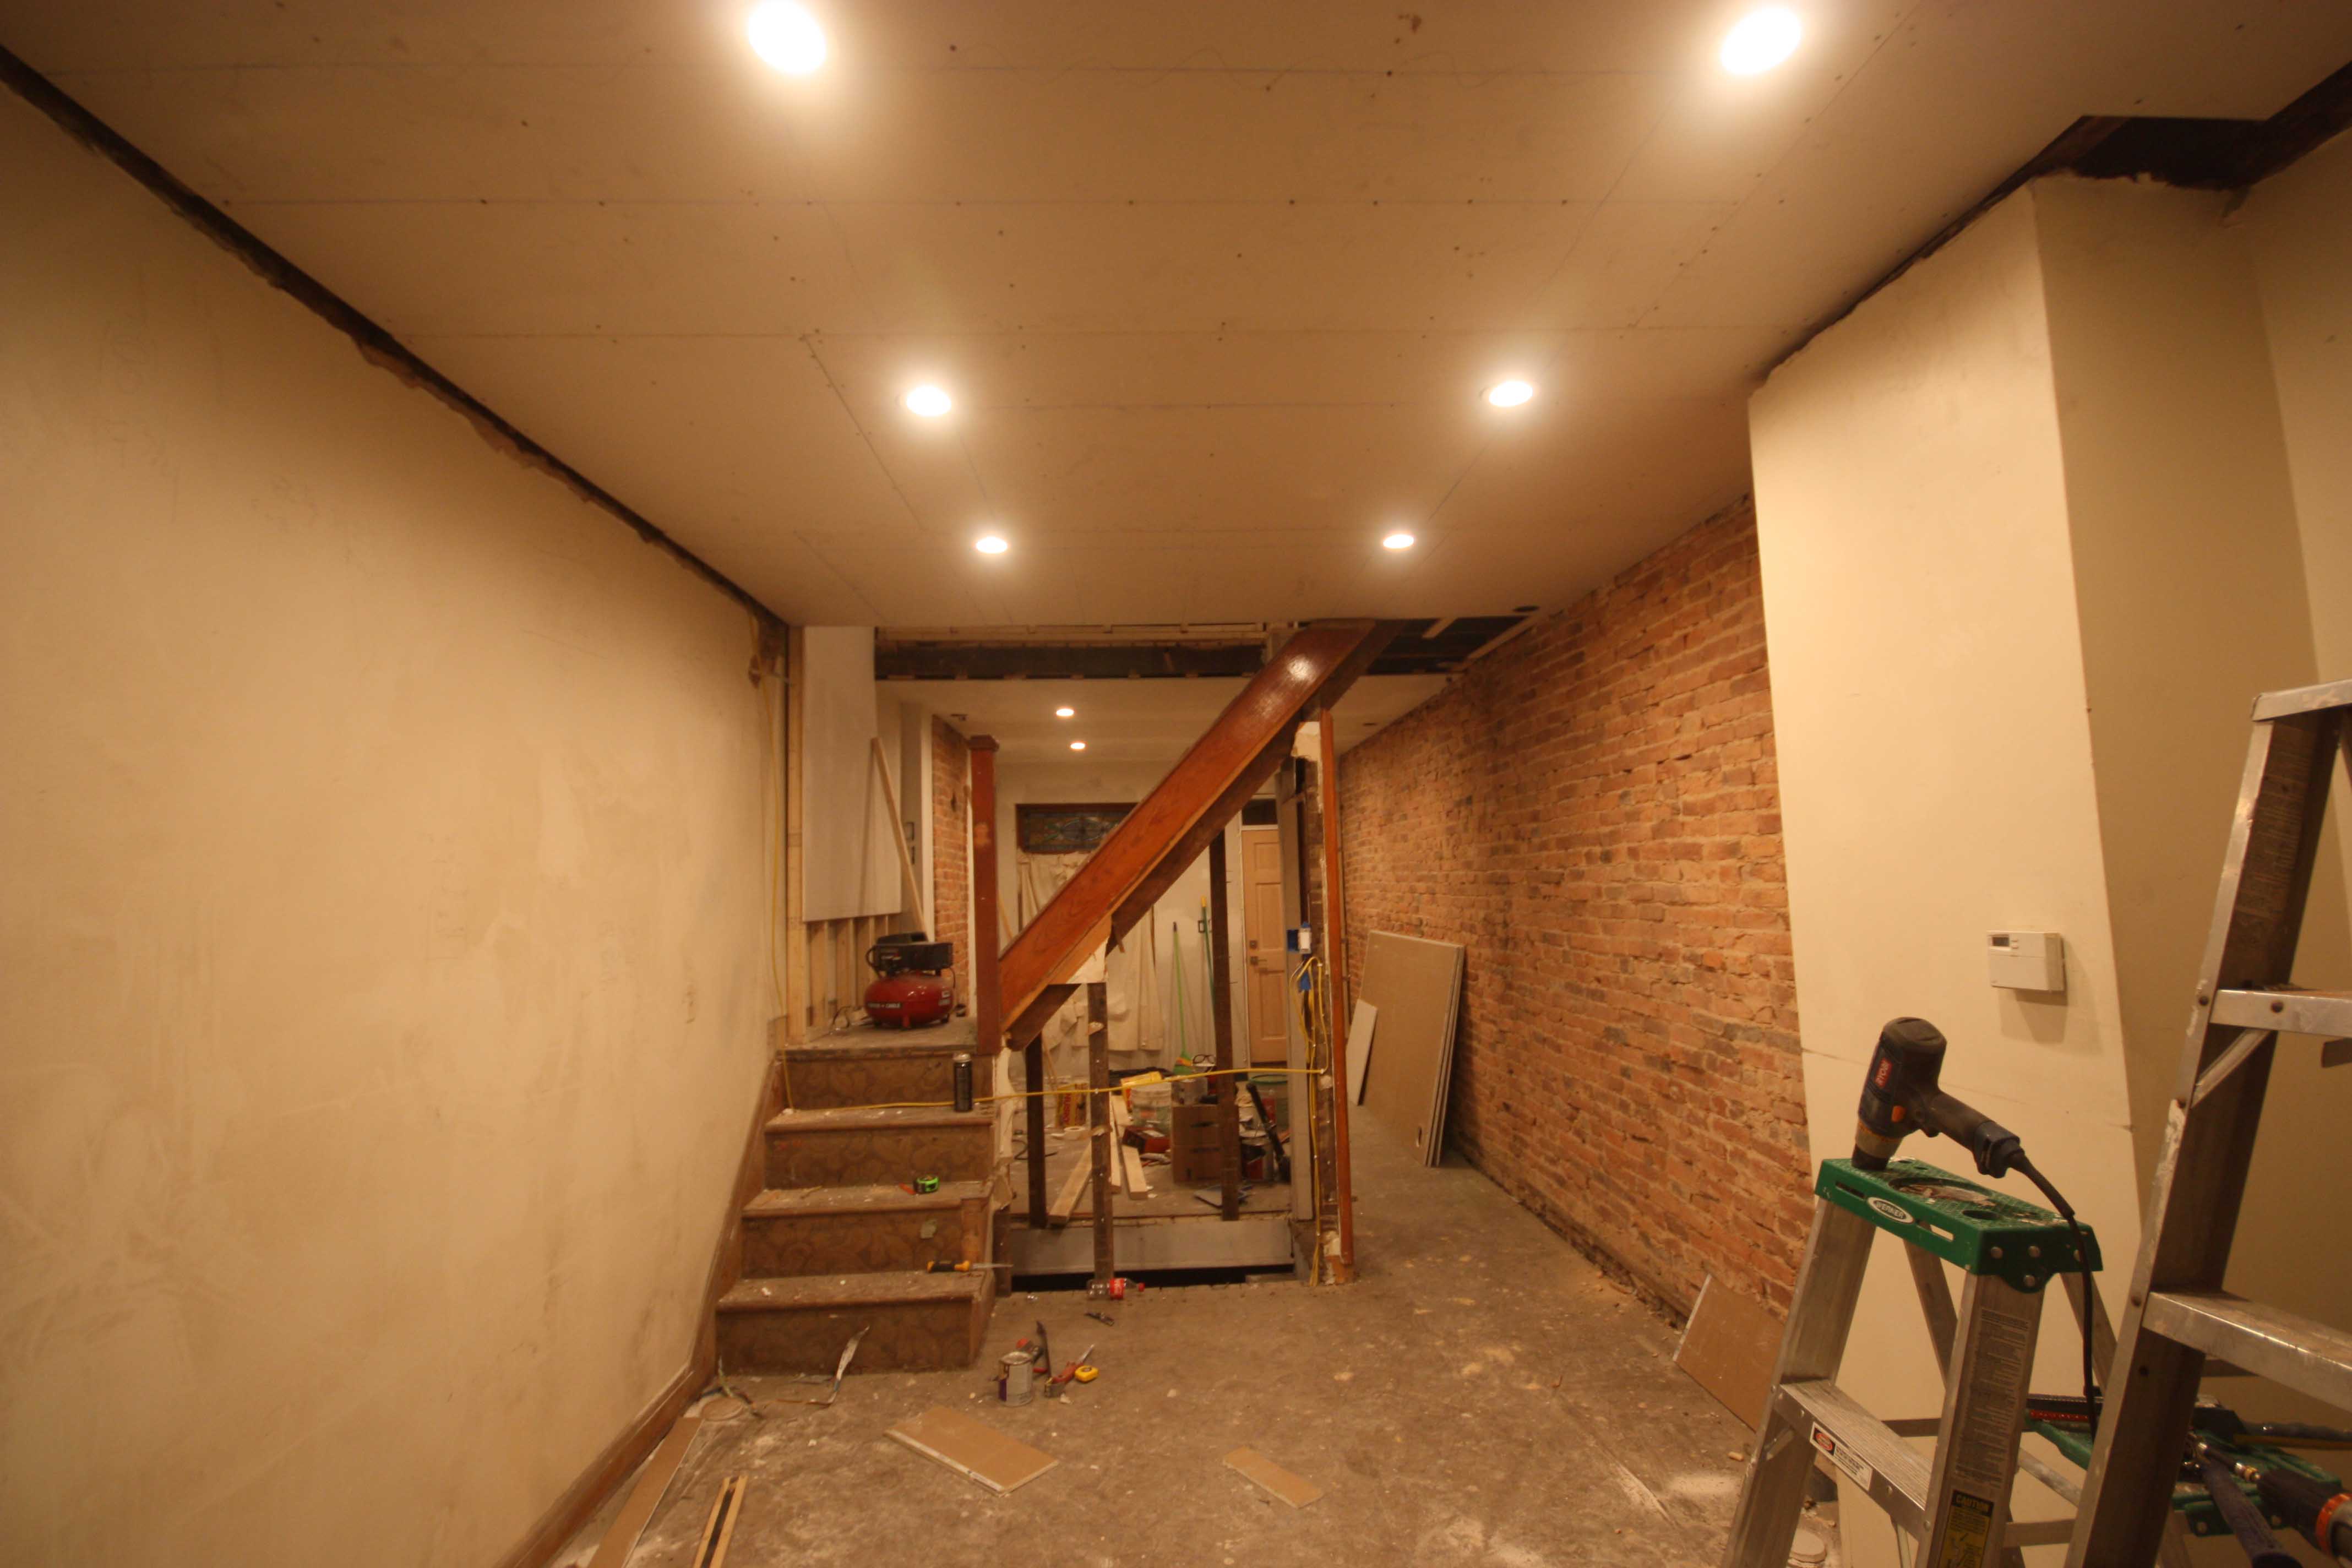
Then was time to knock down the staircase. This would bring up some interesting issues. Since I live in this house as I renovate it, I have moved all the ‘day to day’ living spaces (excluding kitchen) to the second floor. Also, the ONLY bathroom in the house is on the second floor. I realized there was going to be a time period where I was going to have no normal way to get up to the second floor. I figured a solution would present itself when I came into that problem.
Full Speed Ahead.
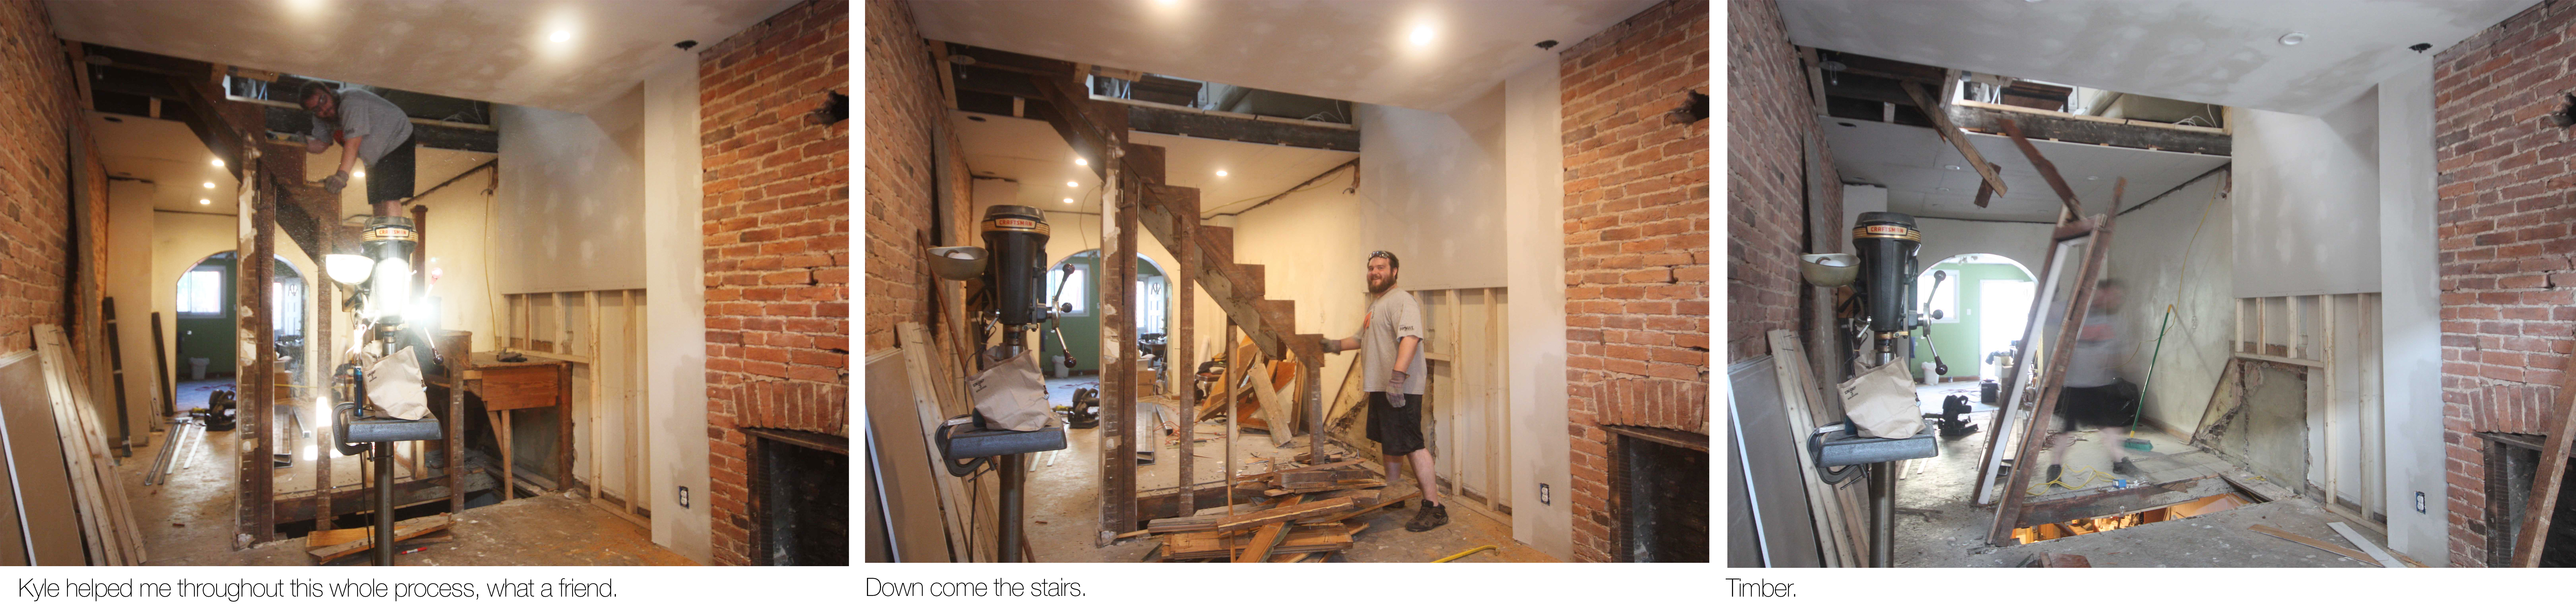
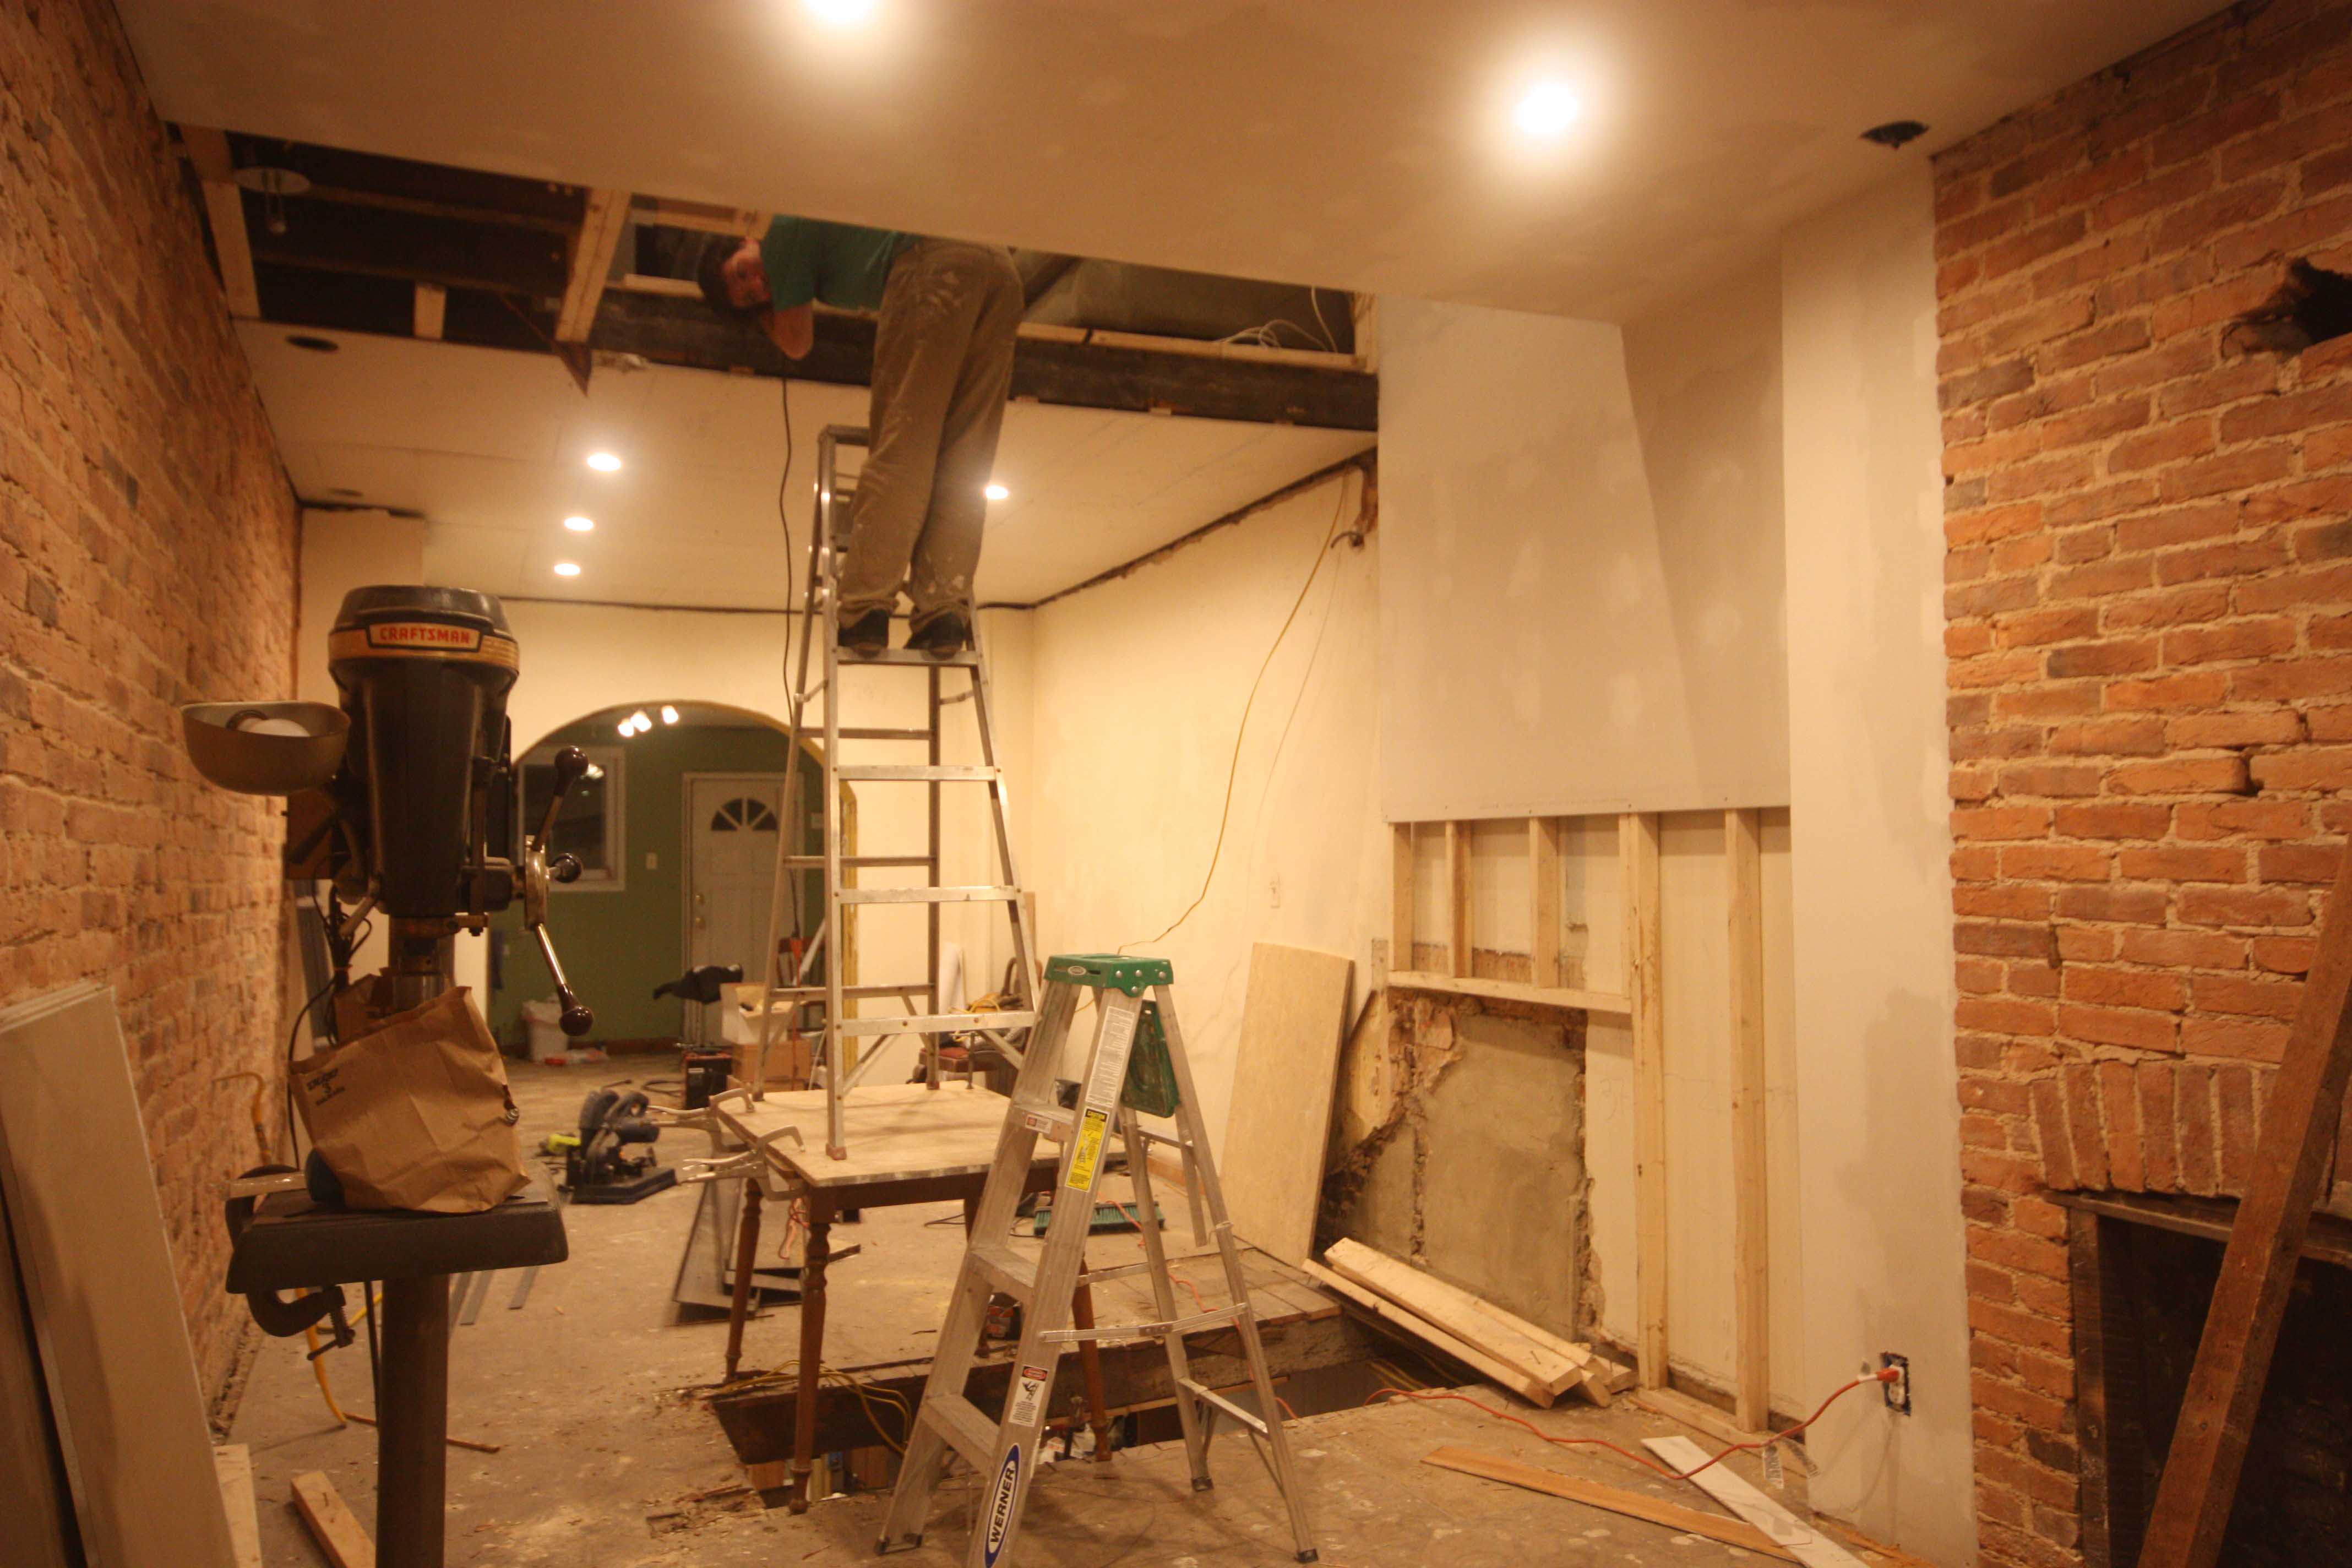
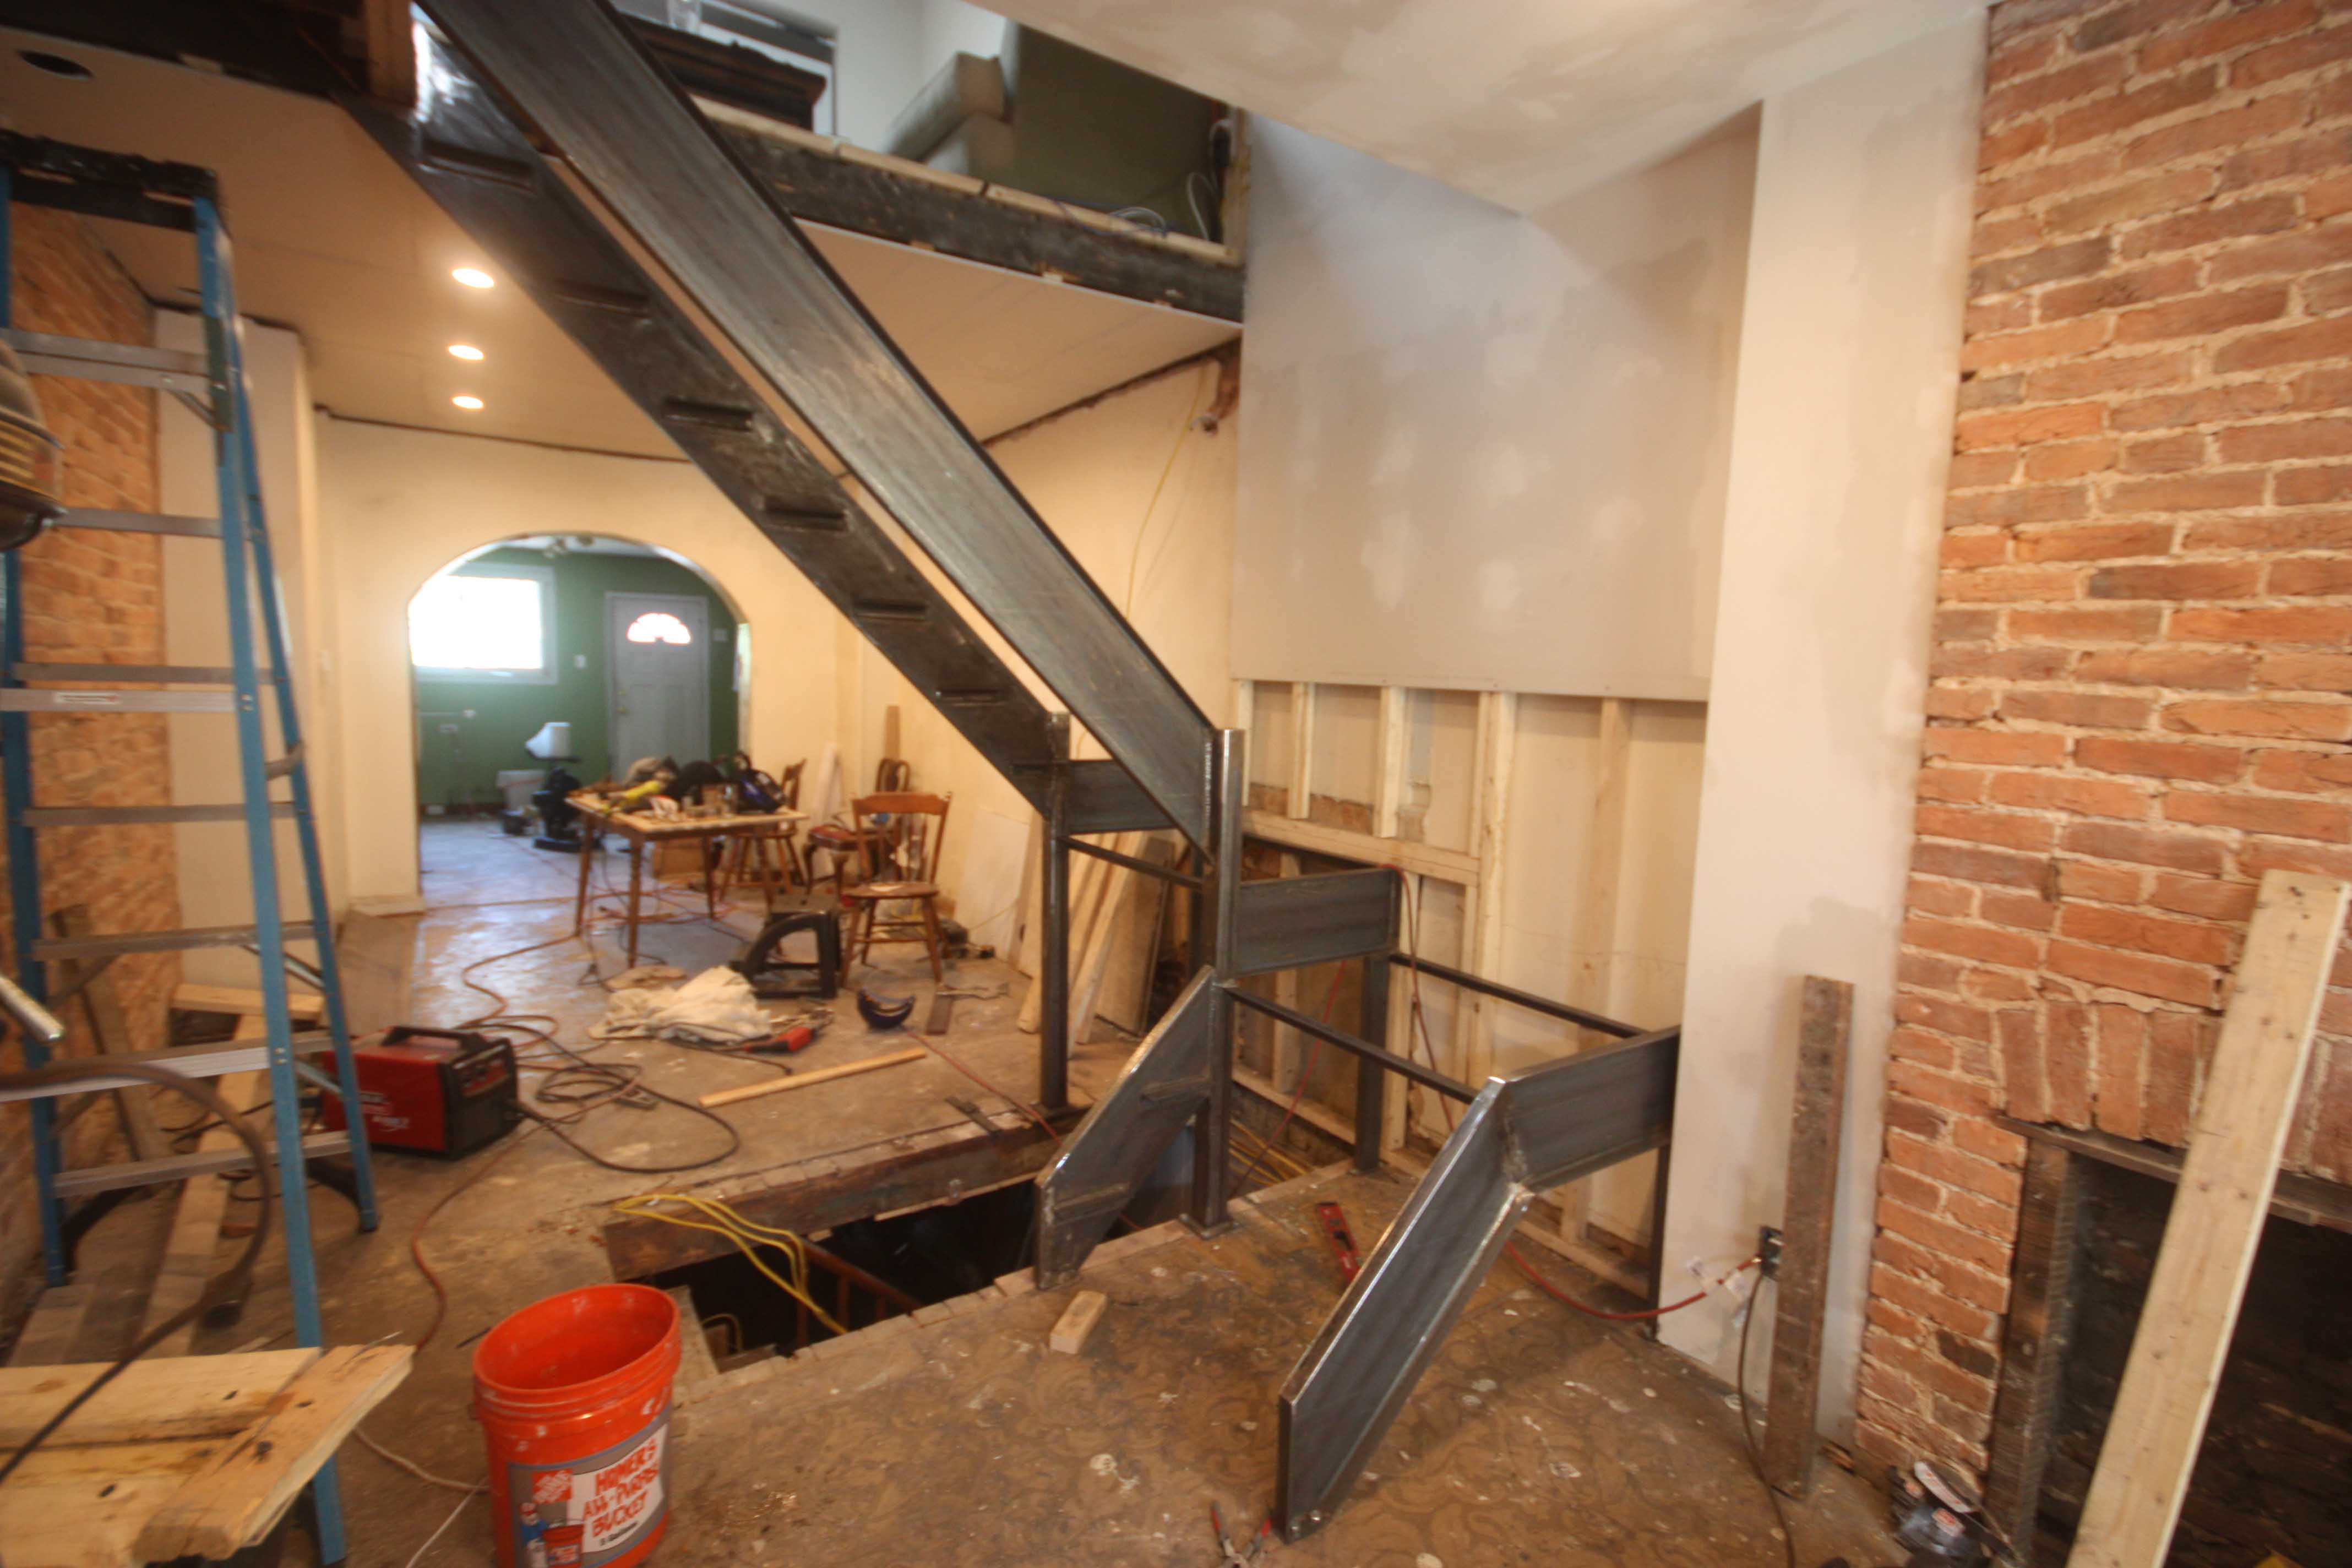
and then there was no vertical circulation.

Commence Ladder Land
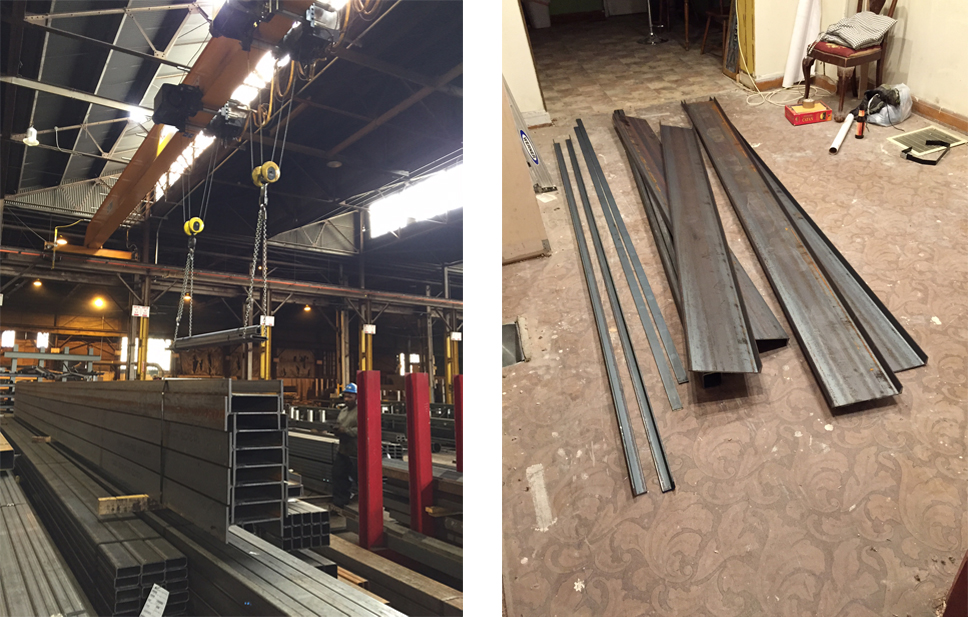
Now I have to build this thing, no turning back. Here is the steel as I bought it. I bought 40′ of 10″ jr Channel. 1.5″ thick. 20′ of flat bar 1.5″x.25, 20′ of Angle Iron .25″ thick, and 10′ of .25″ thick 3″ Hollow structural steel. I had to buy most of the steel in 20′ lengths from this big steel warehouse. Look at how wimpy it looks compared to the other stock, mine is the stuff in the chains in the air. Total cost for this round was $680. This didn’t include any railings. Pretty cheap all things considered
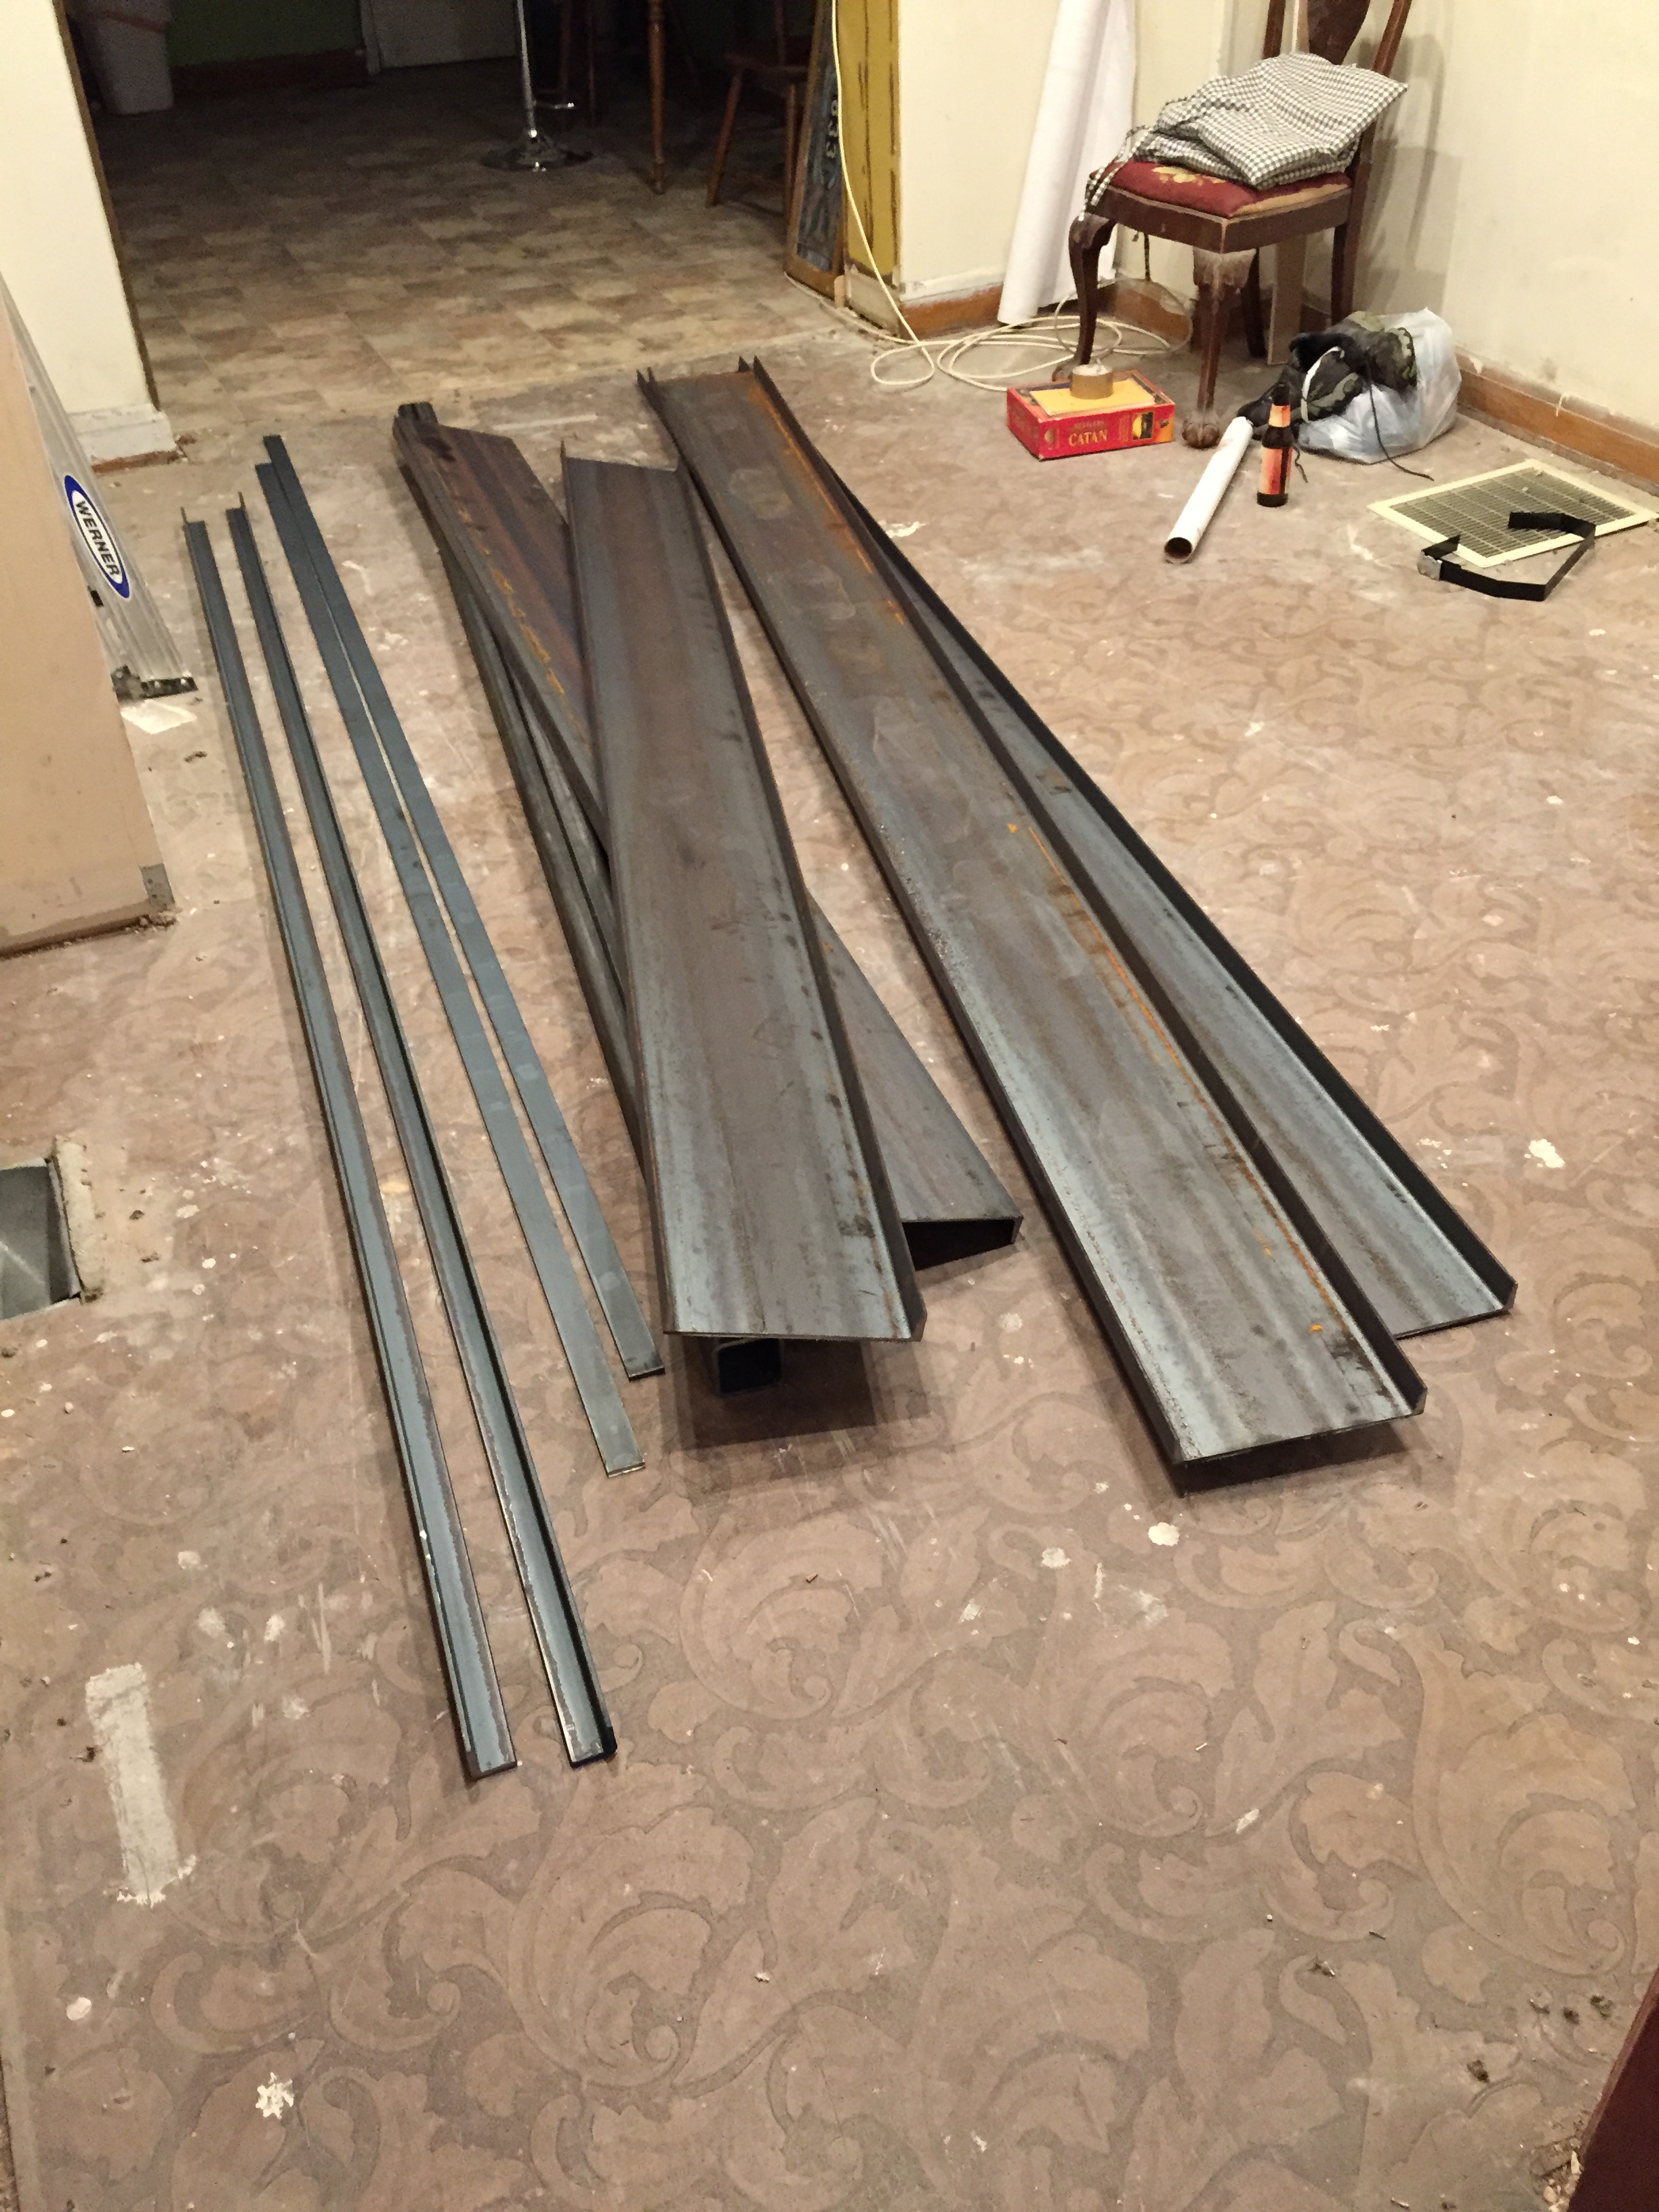
That’s my wimpy steel in the background.
I rented a truck from home depot and picked up all the steel and hauled it into my house over my shoulder. It was quite heavy to say the least. Since, for the first time, I wasn’t dealing with cheap 2×4’s, I knew my cuts had to be perfect. Since I modeled the whole thing in sketchup, I had all the correct measurements for each piece of steel. I laid out each labeled cut on each piece of steel in sketchup, then printed everything out full size on the plotters here at the office. then cut out the templates off of those.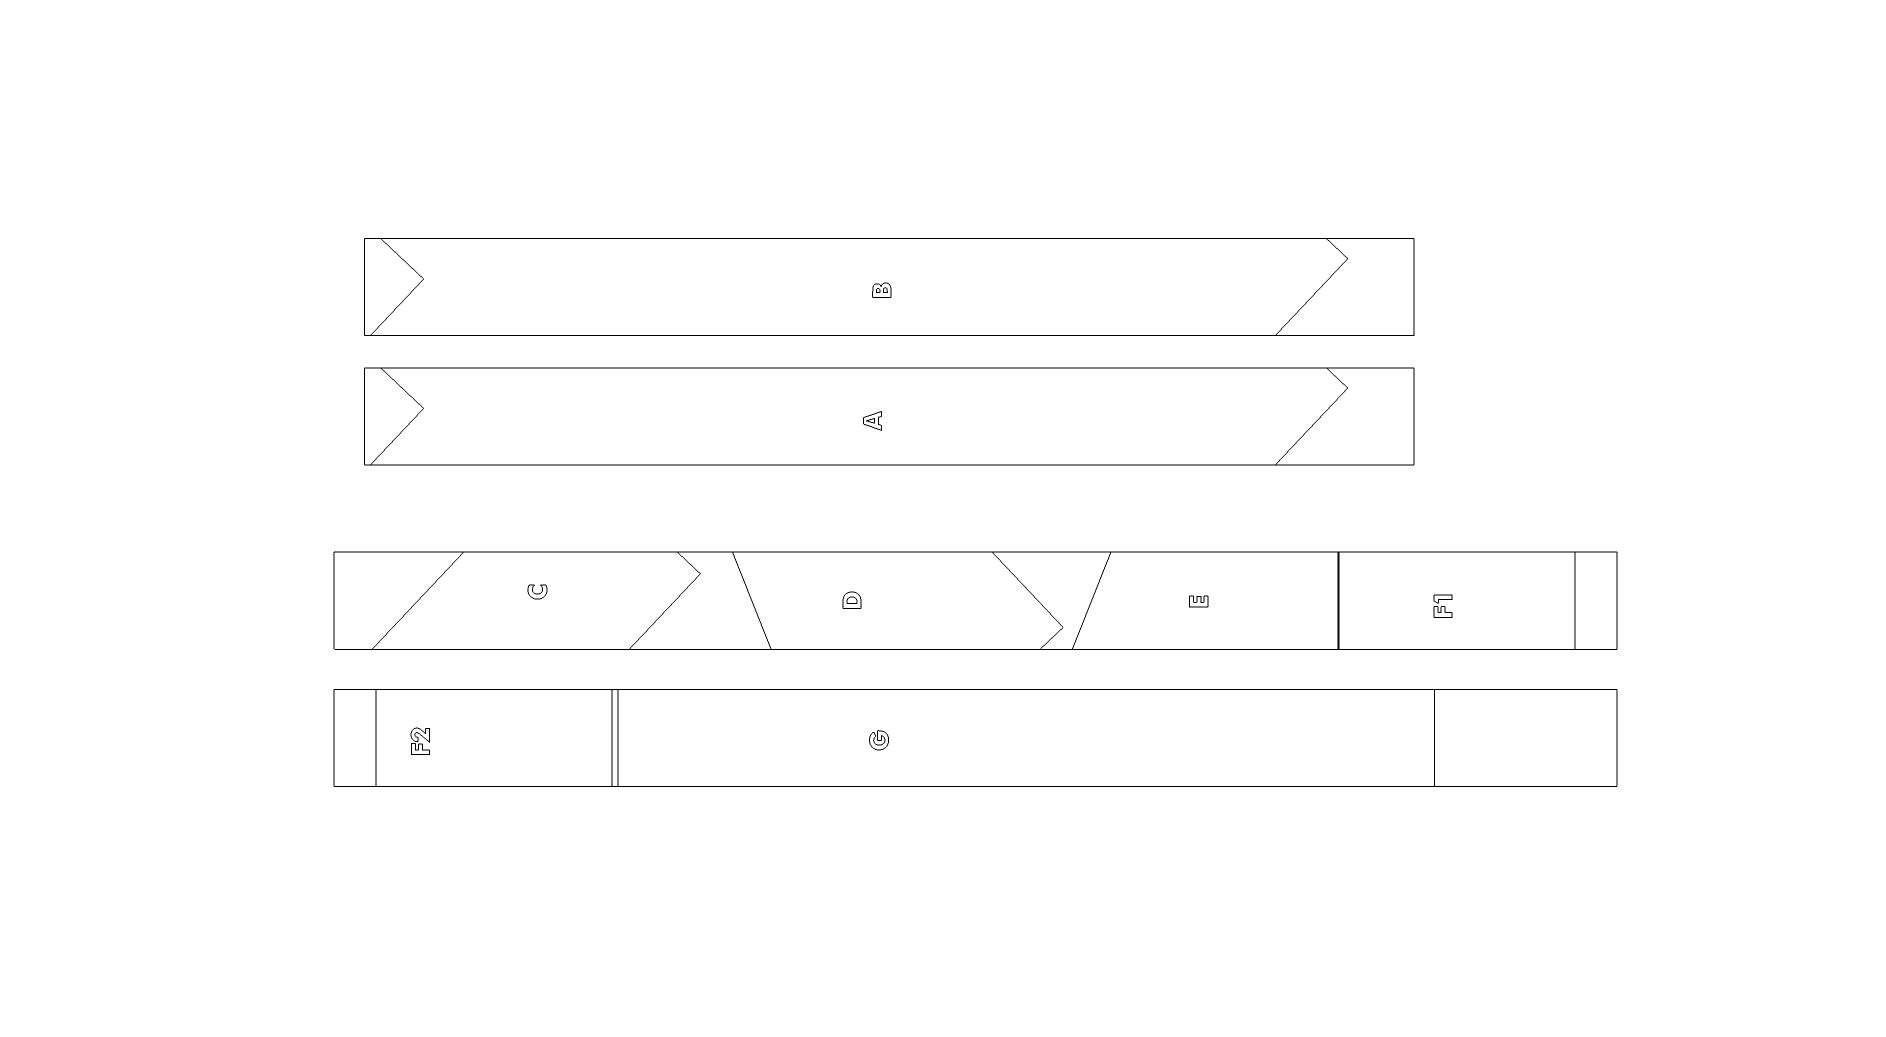 As far as all the metal working tools go, the answer is, I don’t own any. I had recently joined the Station North Tool Library here in Baltimore. The tool library is a absolutely wonderful organization. I wouldn’t have been able to make the staircase without them. Basically you pay a yearly membership, based off your income, and can check out up to 8 tools per week, for free. Additionally, you have access to use their awesome wood shop too. So, I checked out a metal chop saw, angle grinder, Flux-core mig welder, welding gear, bench grinder, and some various clamps and things.
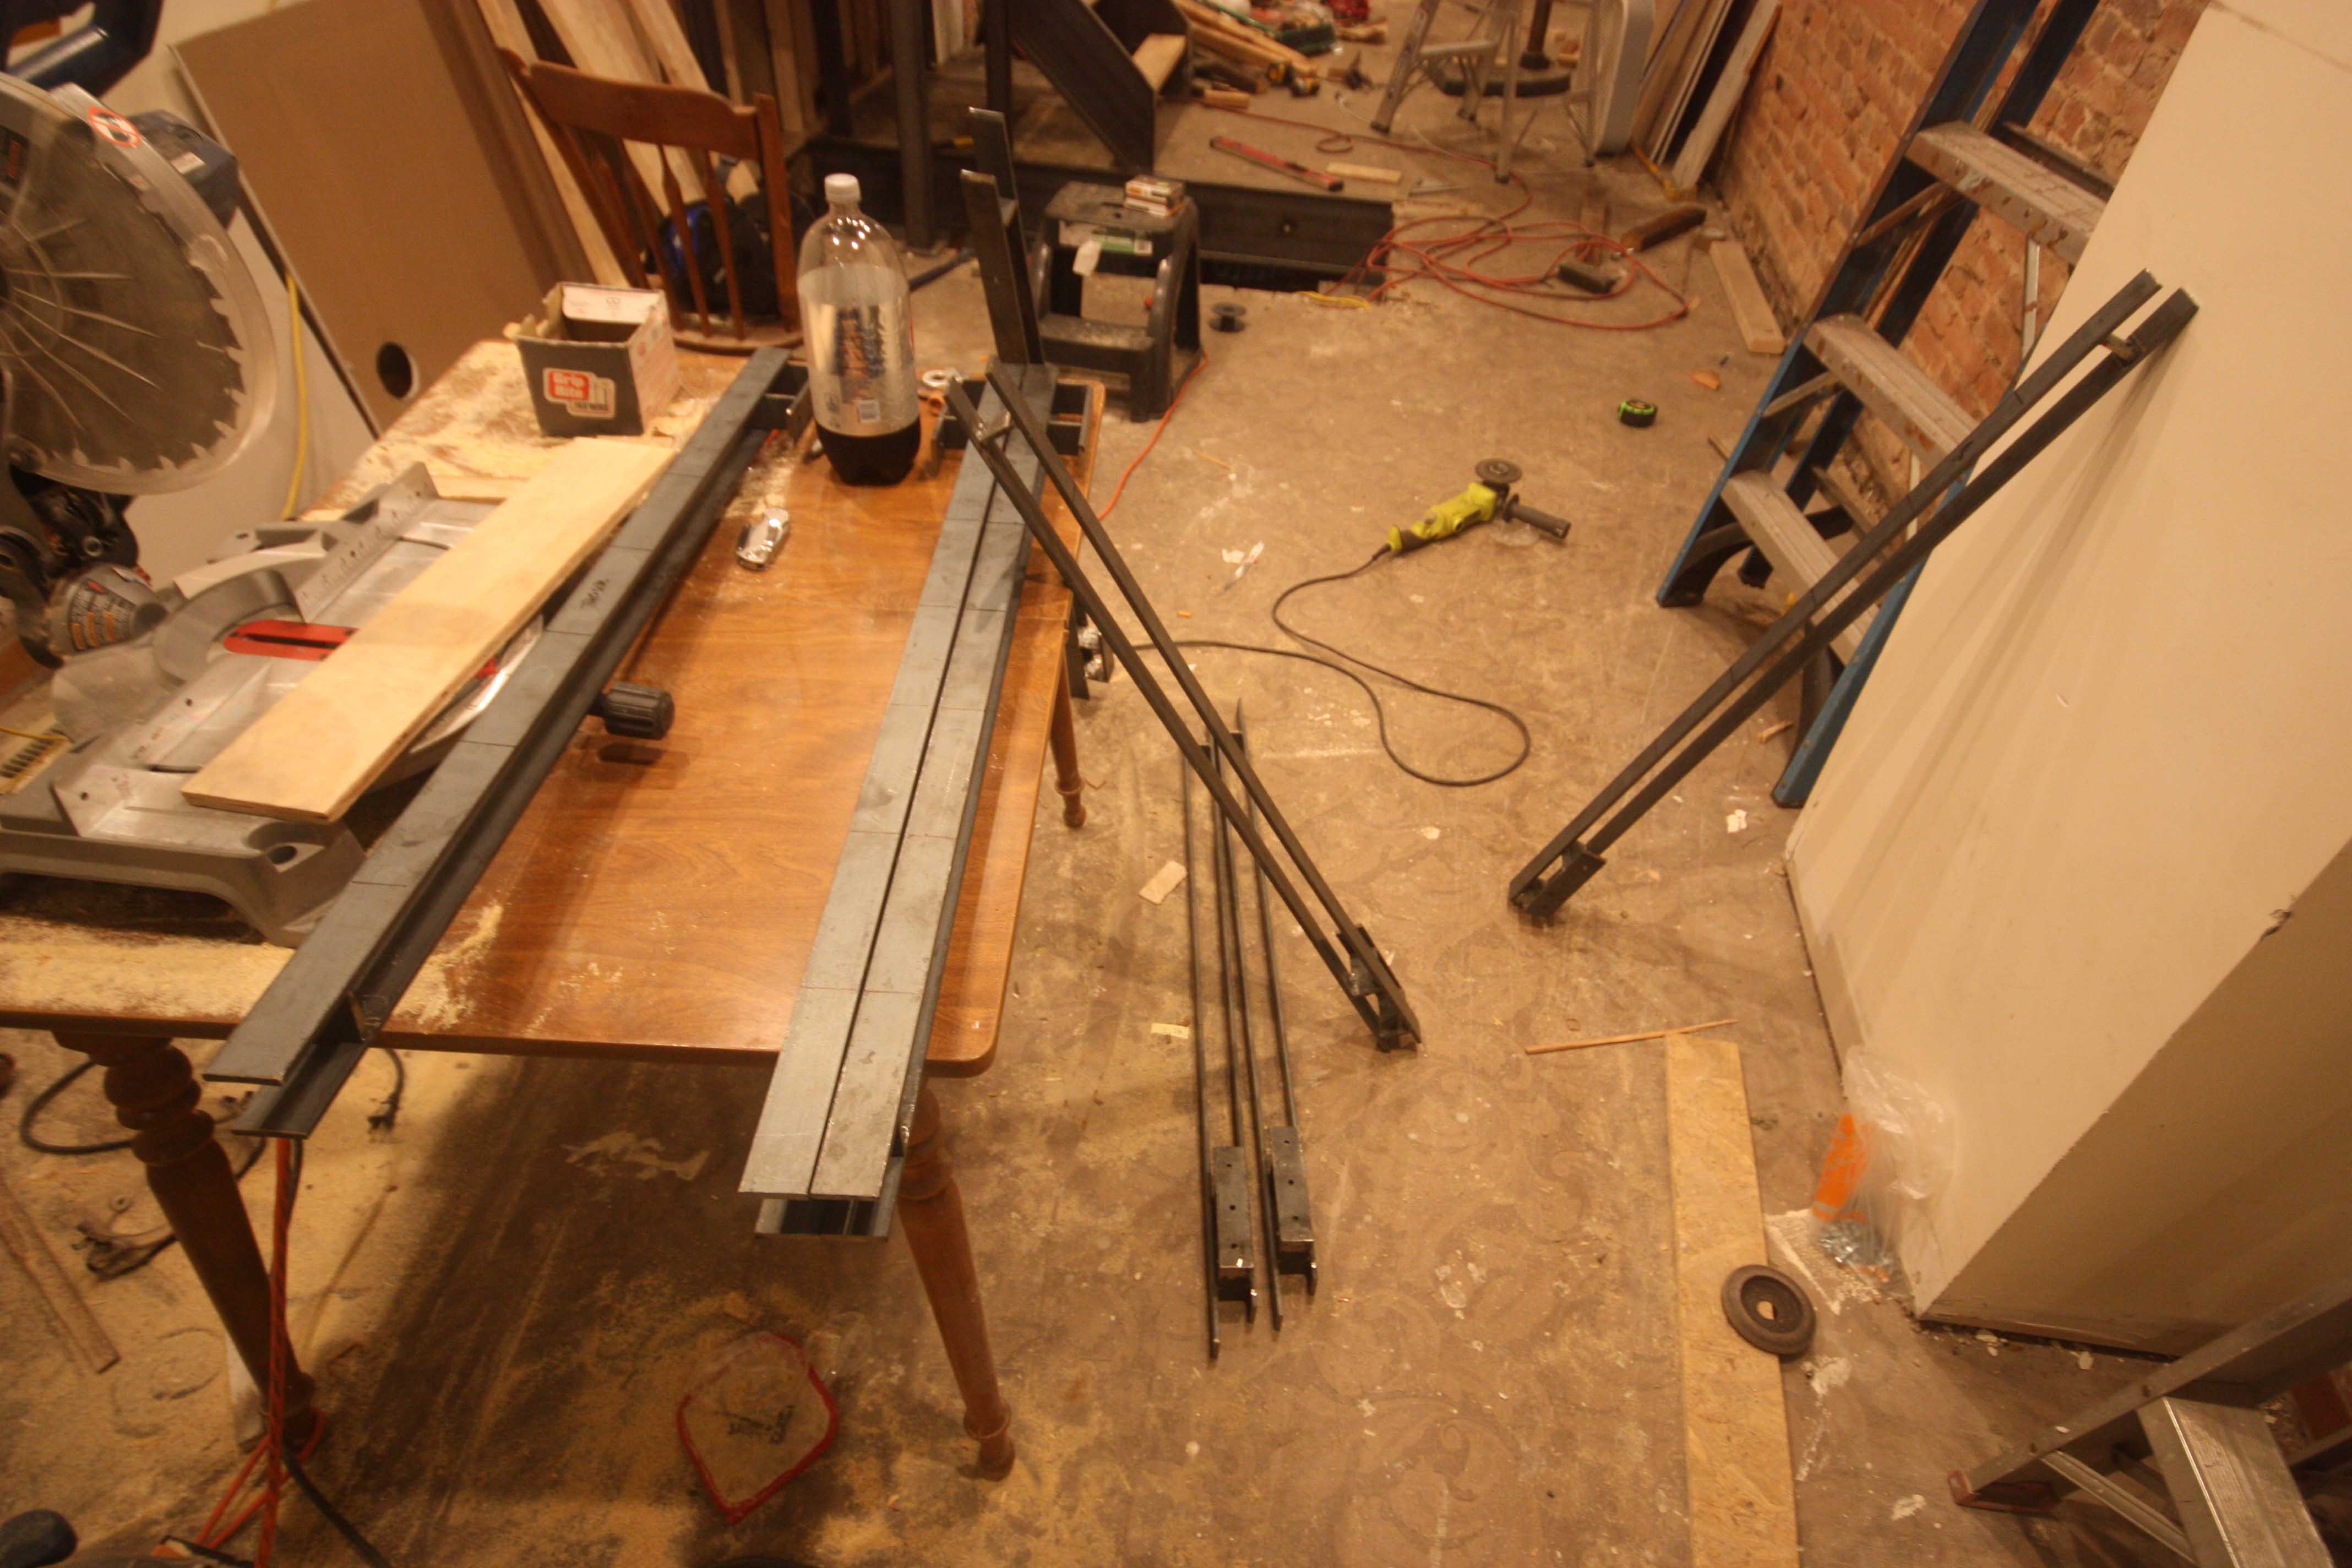
Then I went to work on making the cuts,
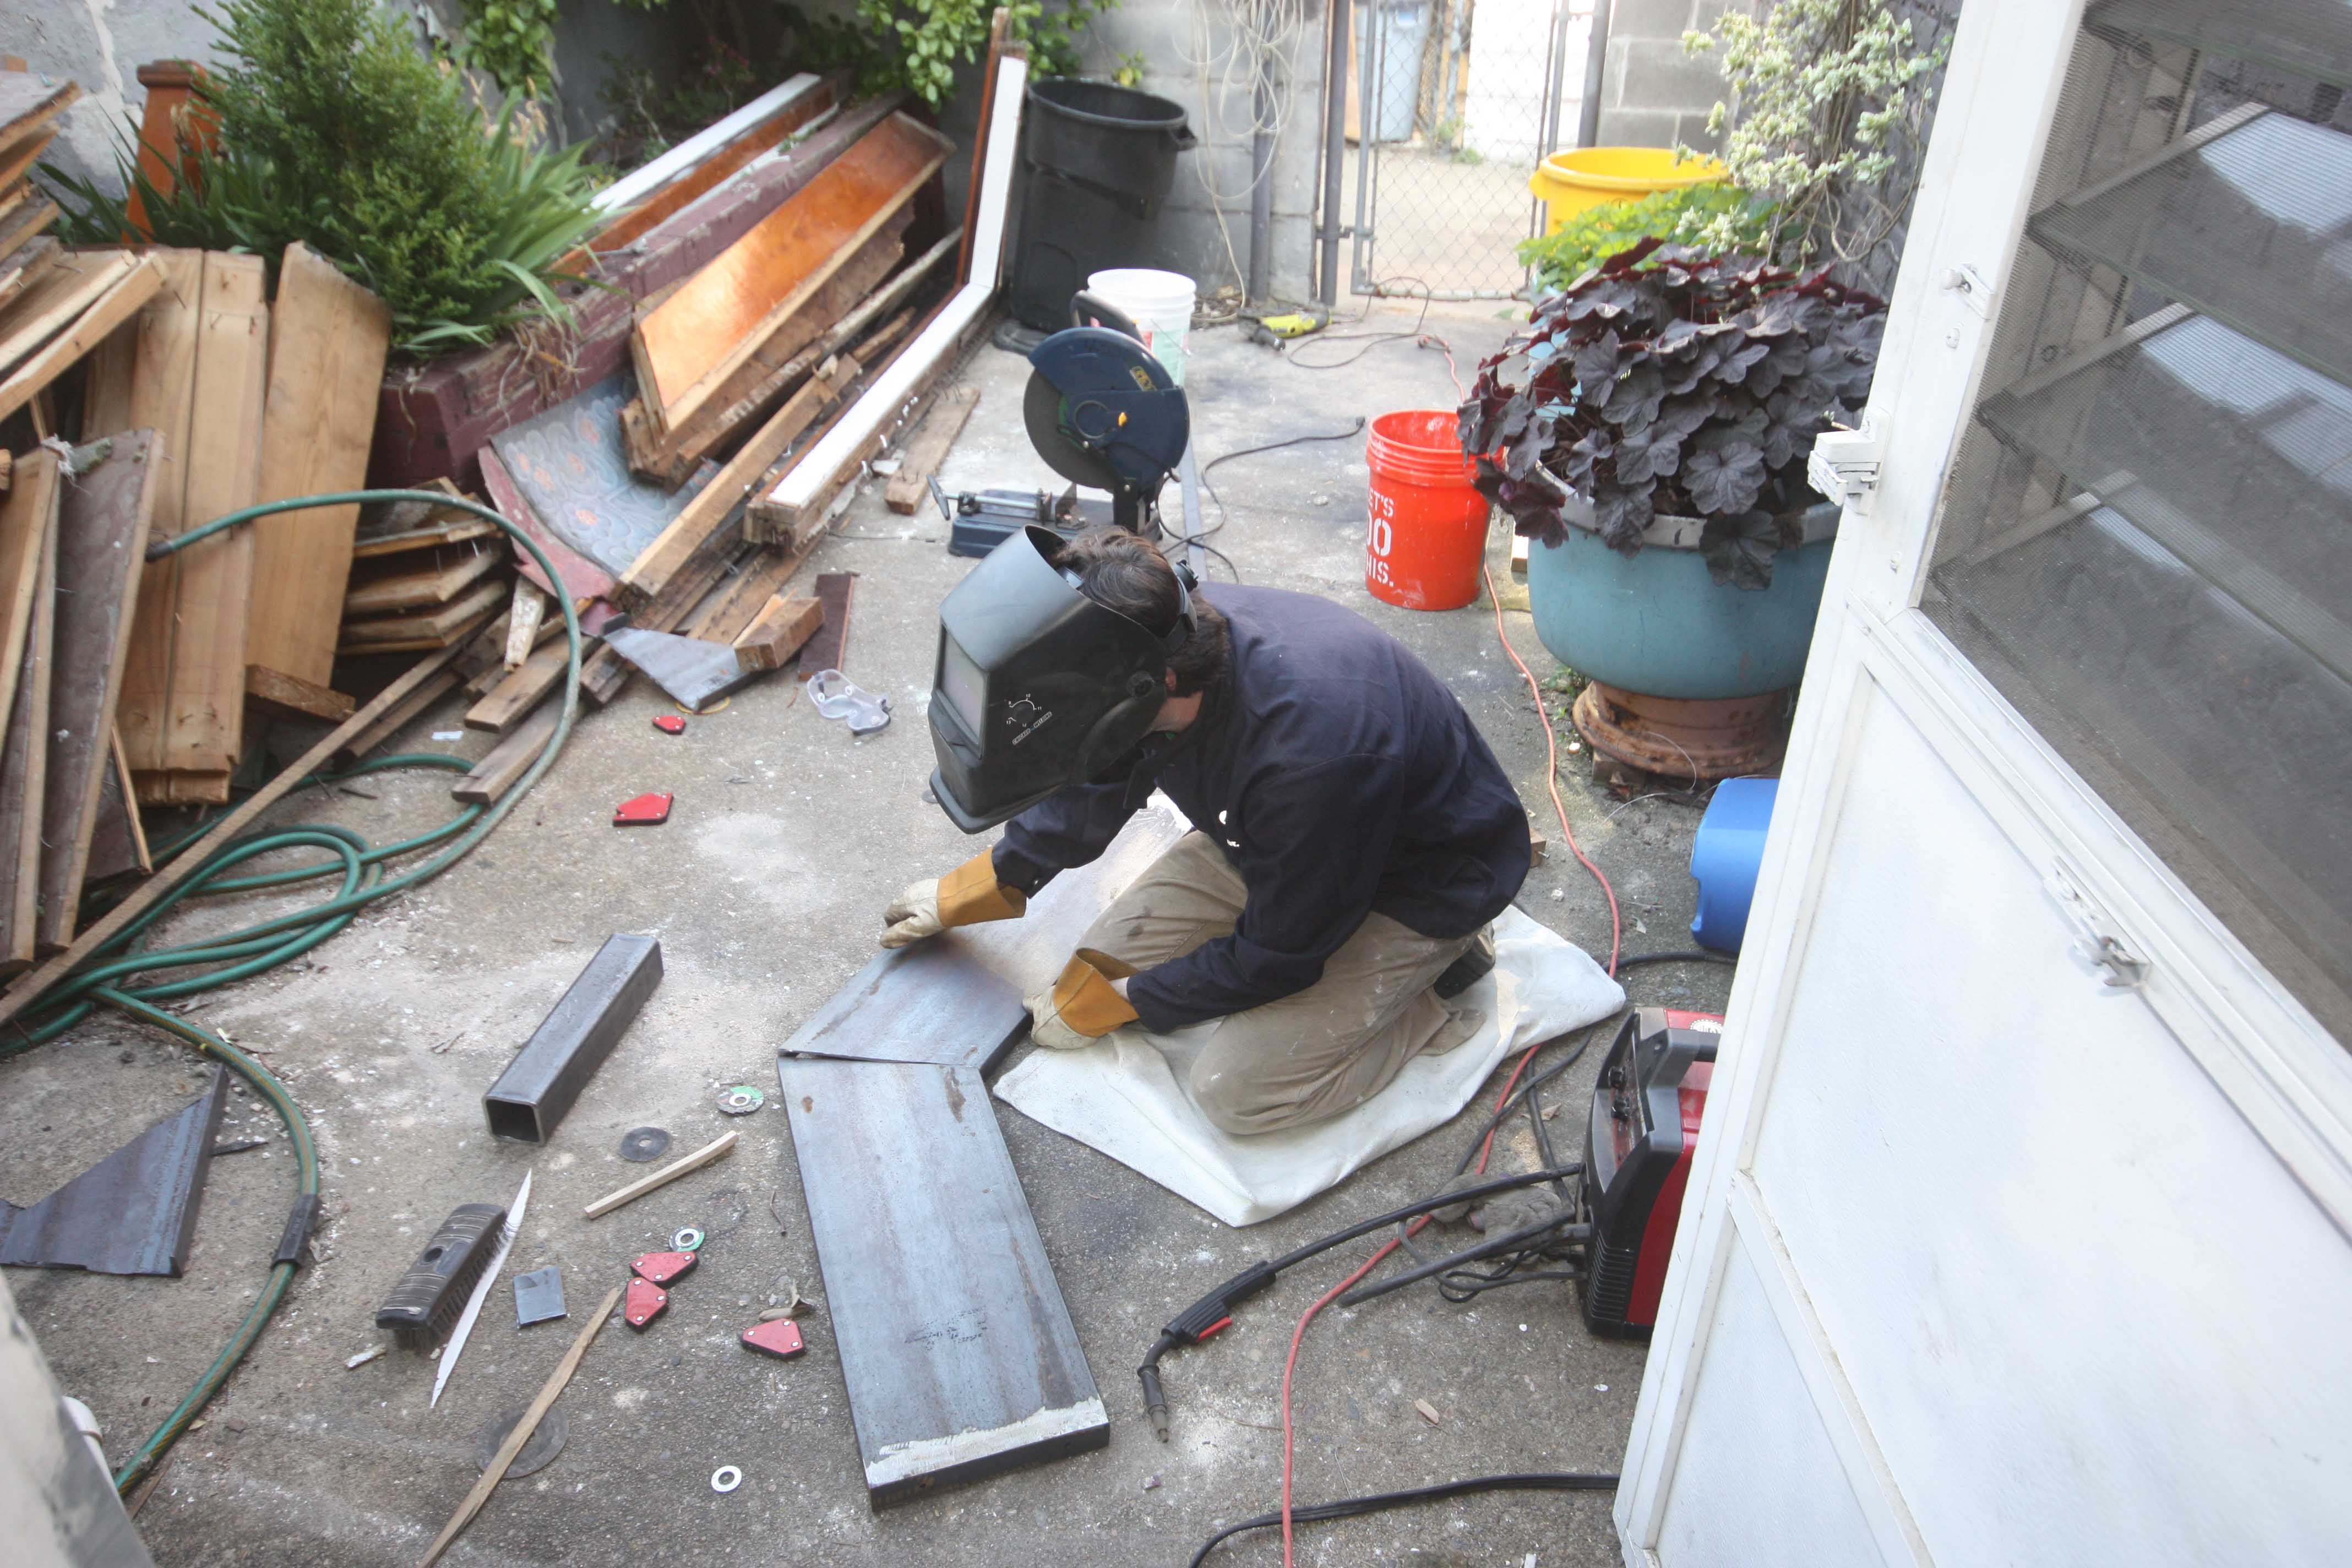
you can see the chop saw in the background. It was terrible to cut the steel with it. I went through a bunch of blades. Some of the cuts took about a half hour. It took so long.
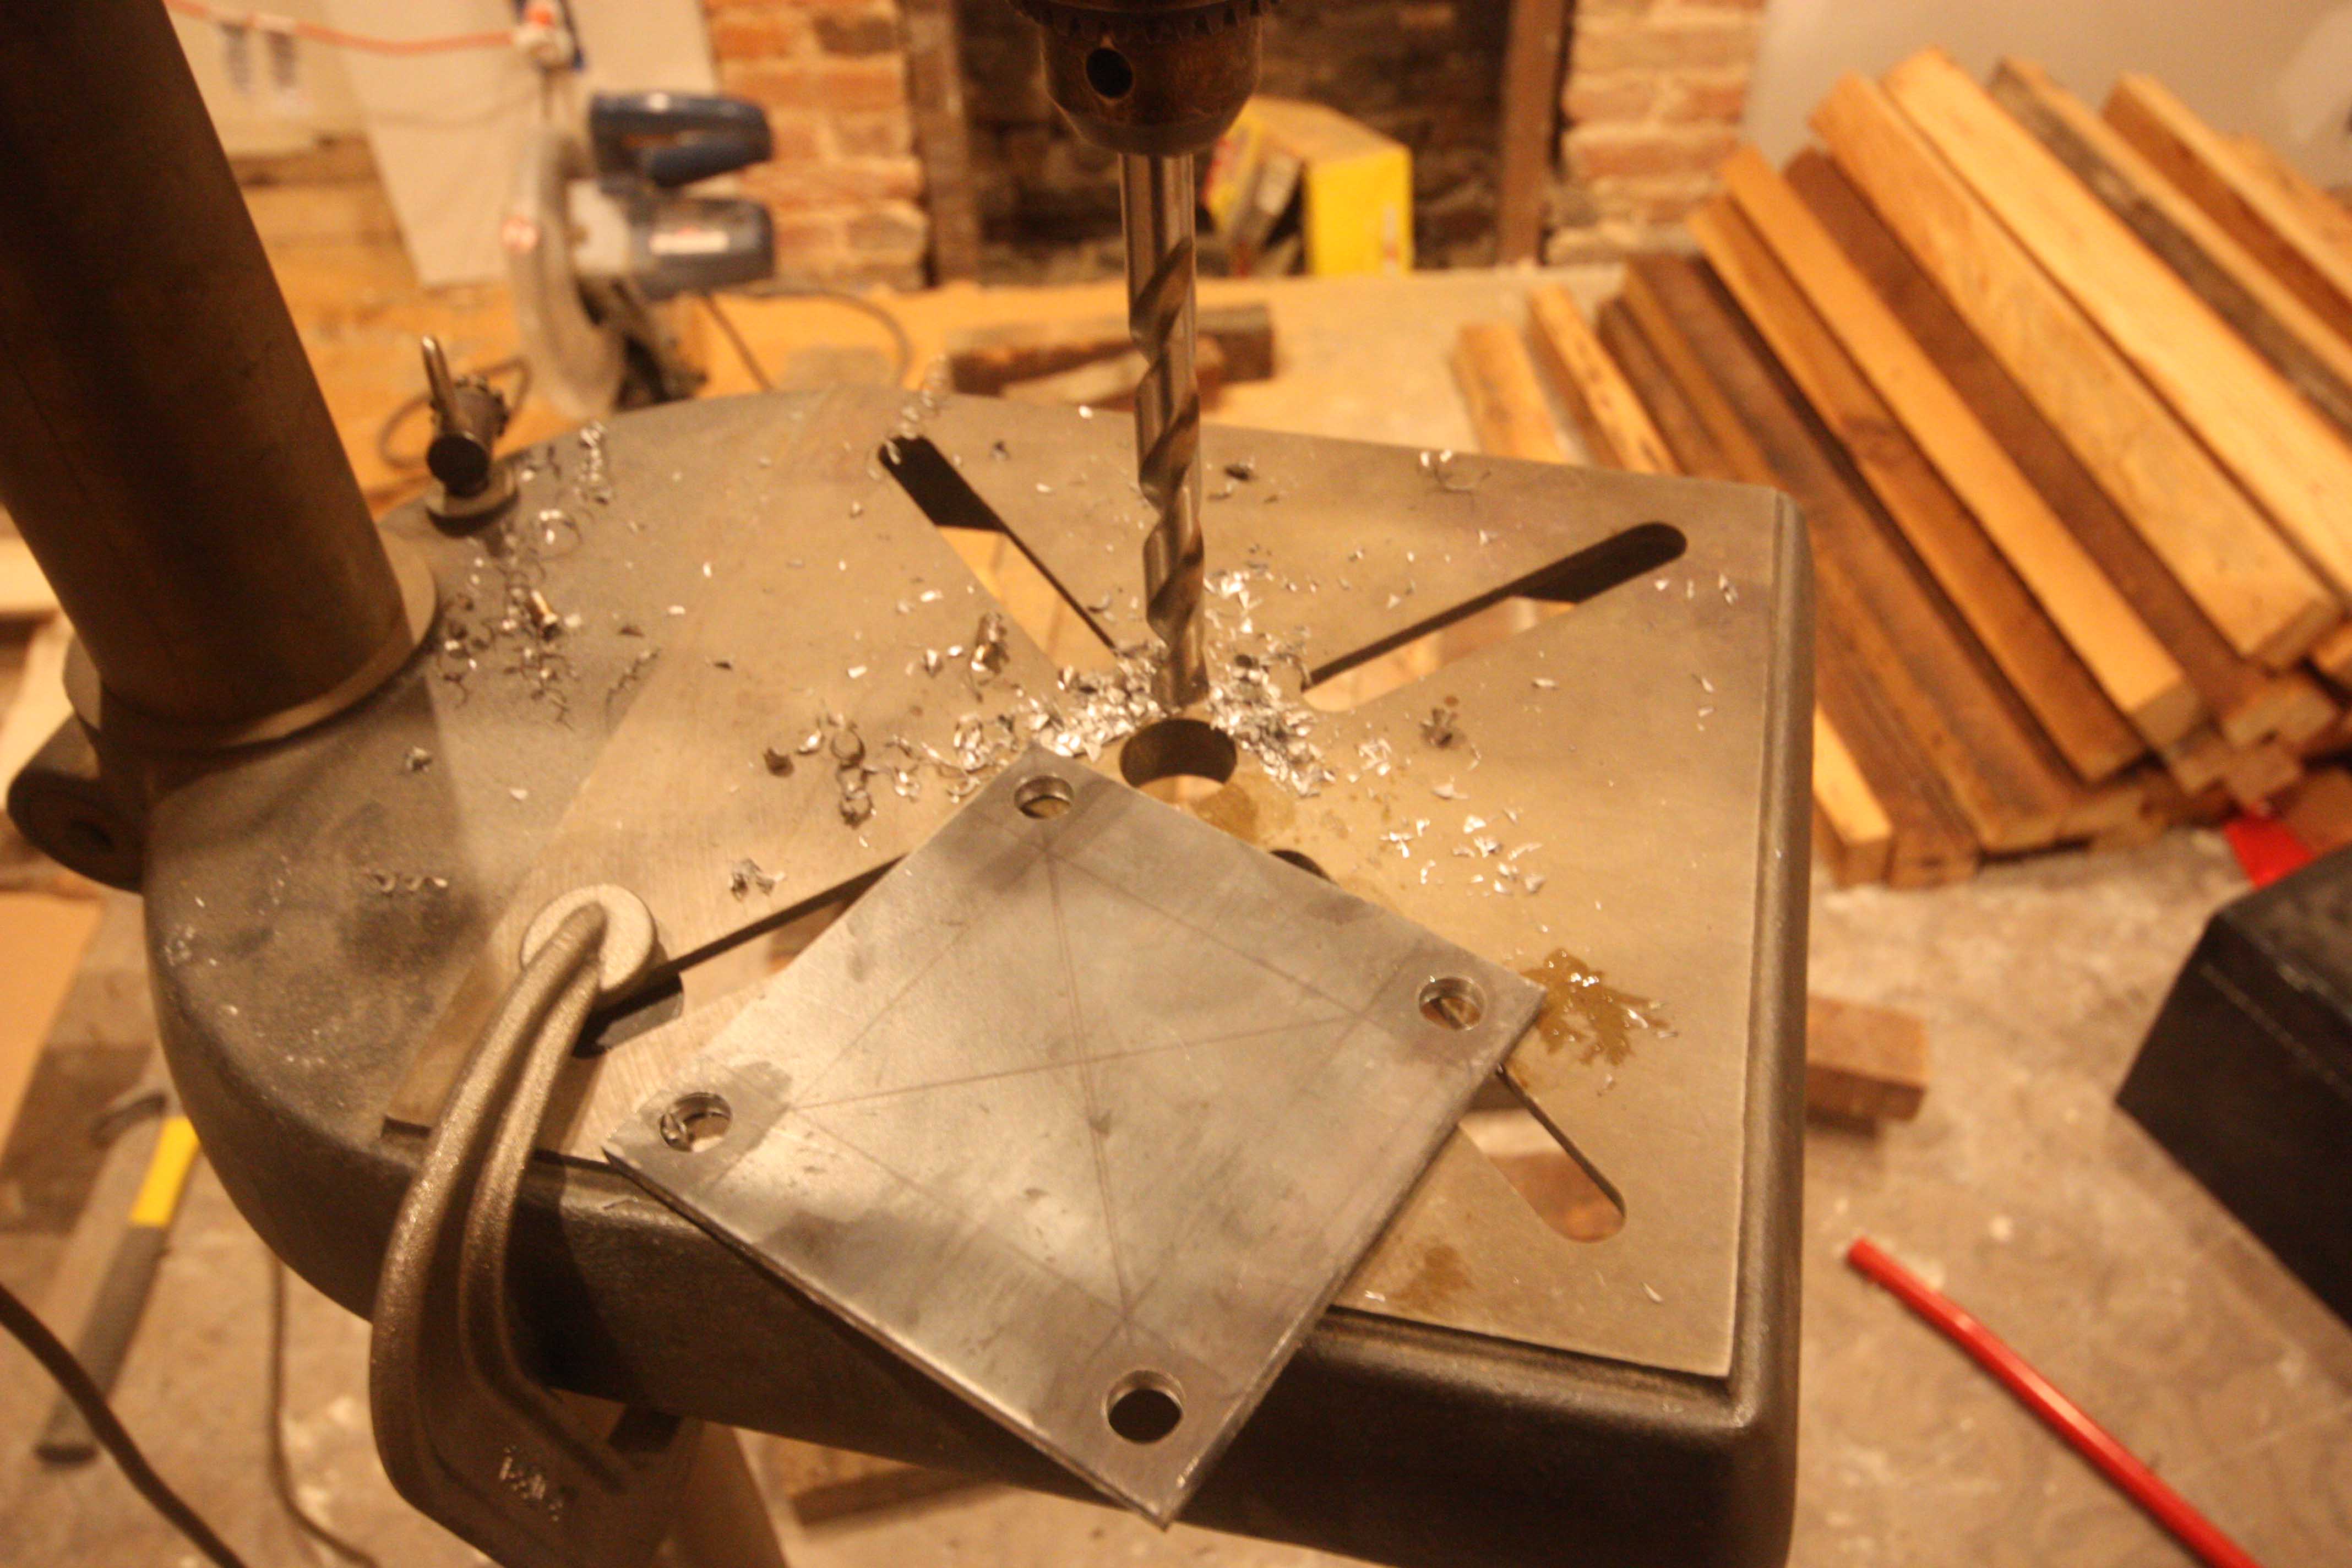
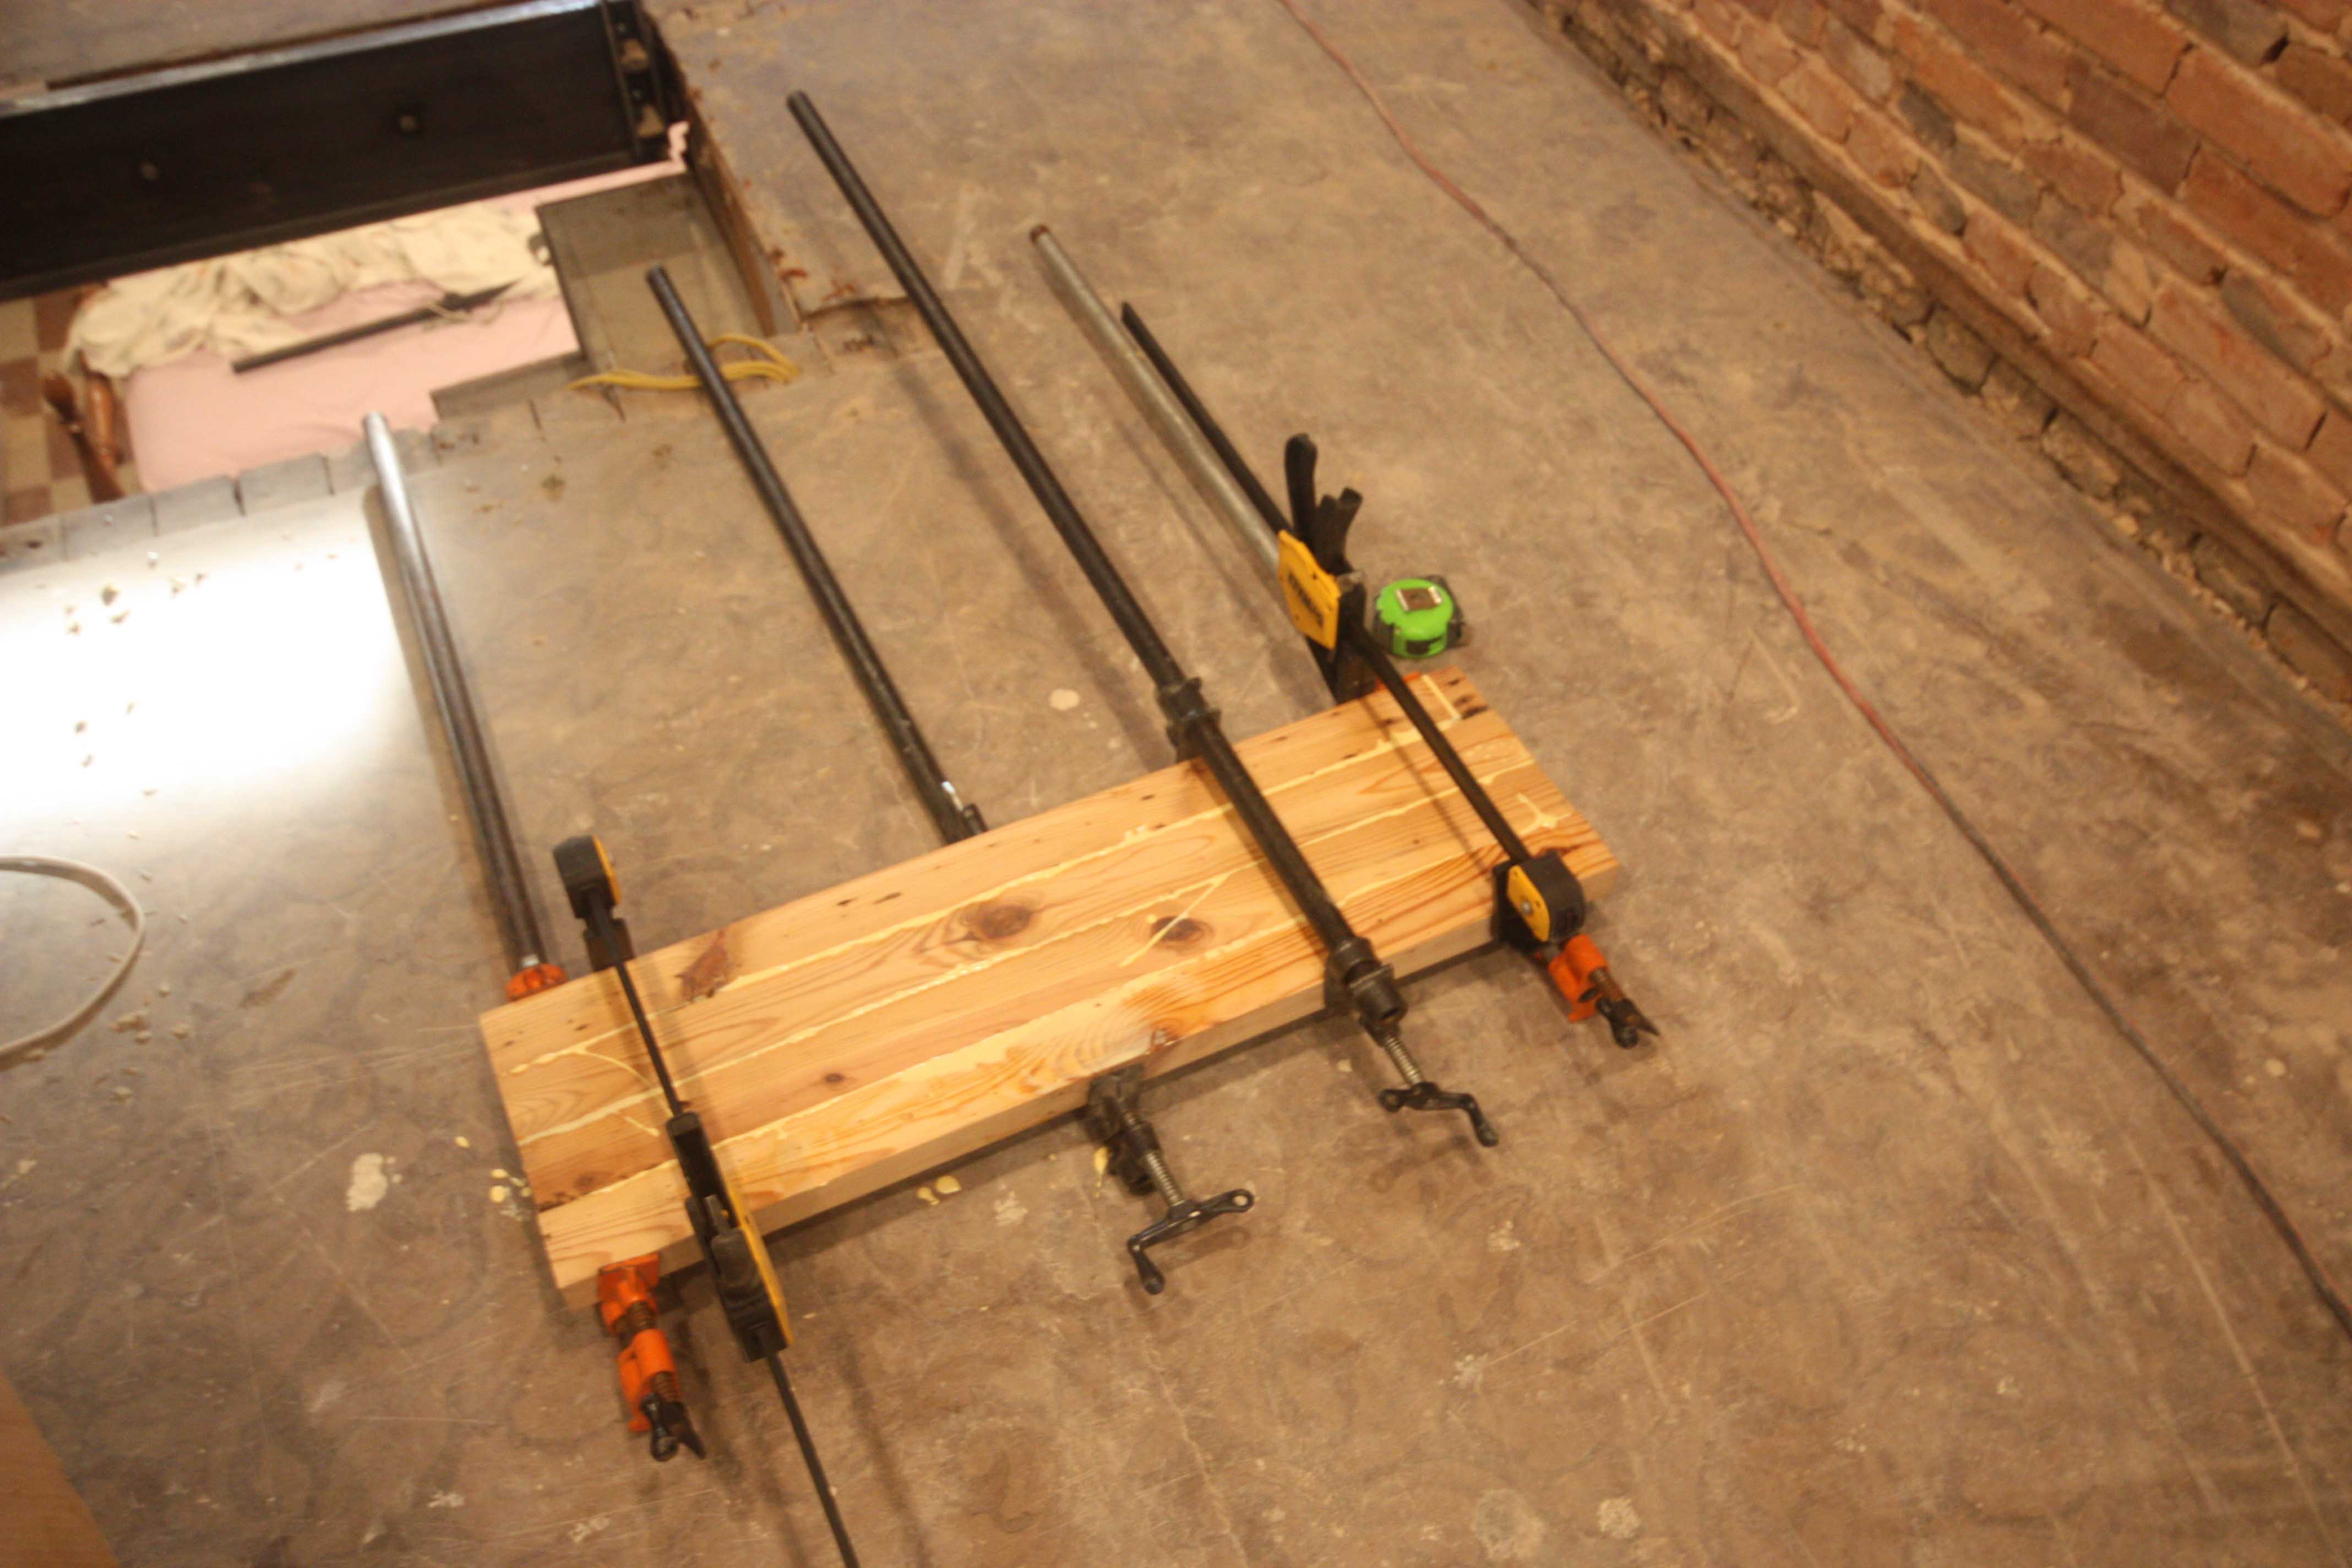
Luckily I was able to borrow a full sized drill press which proved to be invaluable for this job. Above is an image of fabricating the bottom plate that the 3″ column will attach to, and screw into the bottom floor joist. In the background you’ll see a bunch of lumber.
Side story: I had been wondering what to do for the actual wooden treads. I priced out all the lumber, and it was going to be about 1000$ for 6/4 (1.5″) red oak. While doing demo on this house I had been saving all the old 1880’s wood from the house. If it was original I piled it up in the basement. The stock was really good too. It was all basically 2″ x 2.75″ heart pine that was almost 150 years old. I just figured I’d make a table or something out of it. But then I realized they would be perfect treads for the staircase. I would have to mill all of them down though and glue them all together. That’s them in the background. Details to follow…
So welding…
 I had no idea how to weld. Lets start with that statement. I was able to find another great organization here in Baltimore called the Foundry. I signed up for their welding 101 class. It was 2 .5 hours long and they taught you the basic types of welds in a 1 to 6 hands on class. it was really great. We made this. Its only 3 inches tall. and the welds are kind of nasty. but I figured that was enough learning and I should jump into the real thing.
Masks down, lets do this.

Also all the steel posts had to be capped welded and ground down.

Once most of the raw pieces were cut, I bolted them down and started welding them into place.

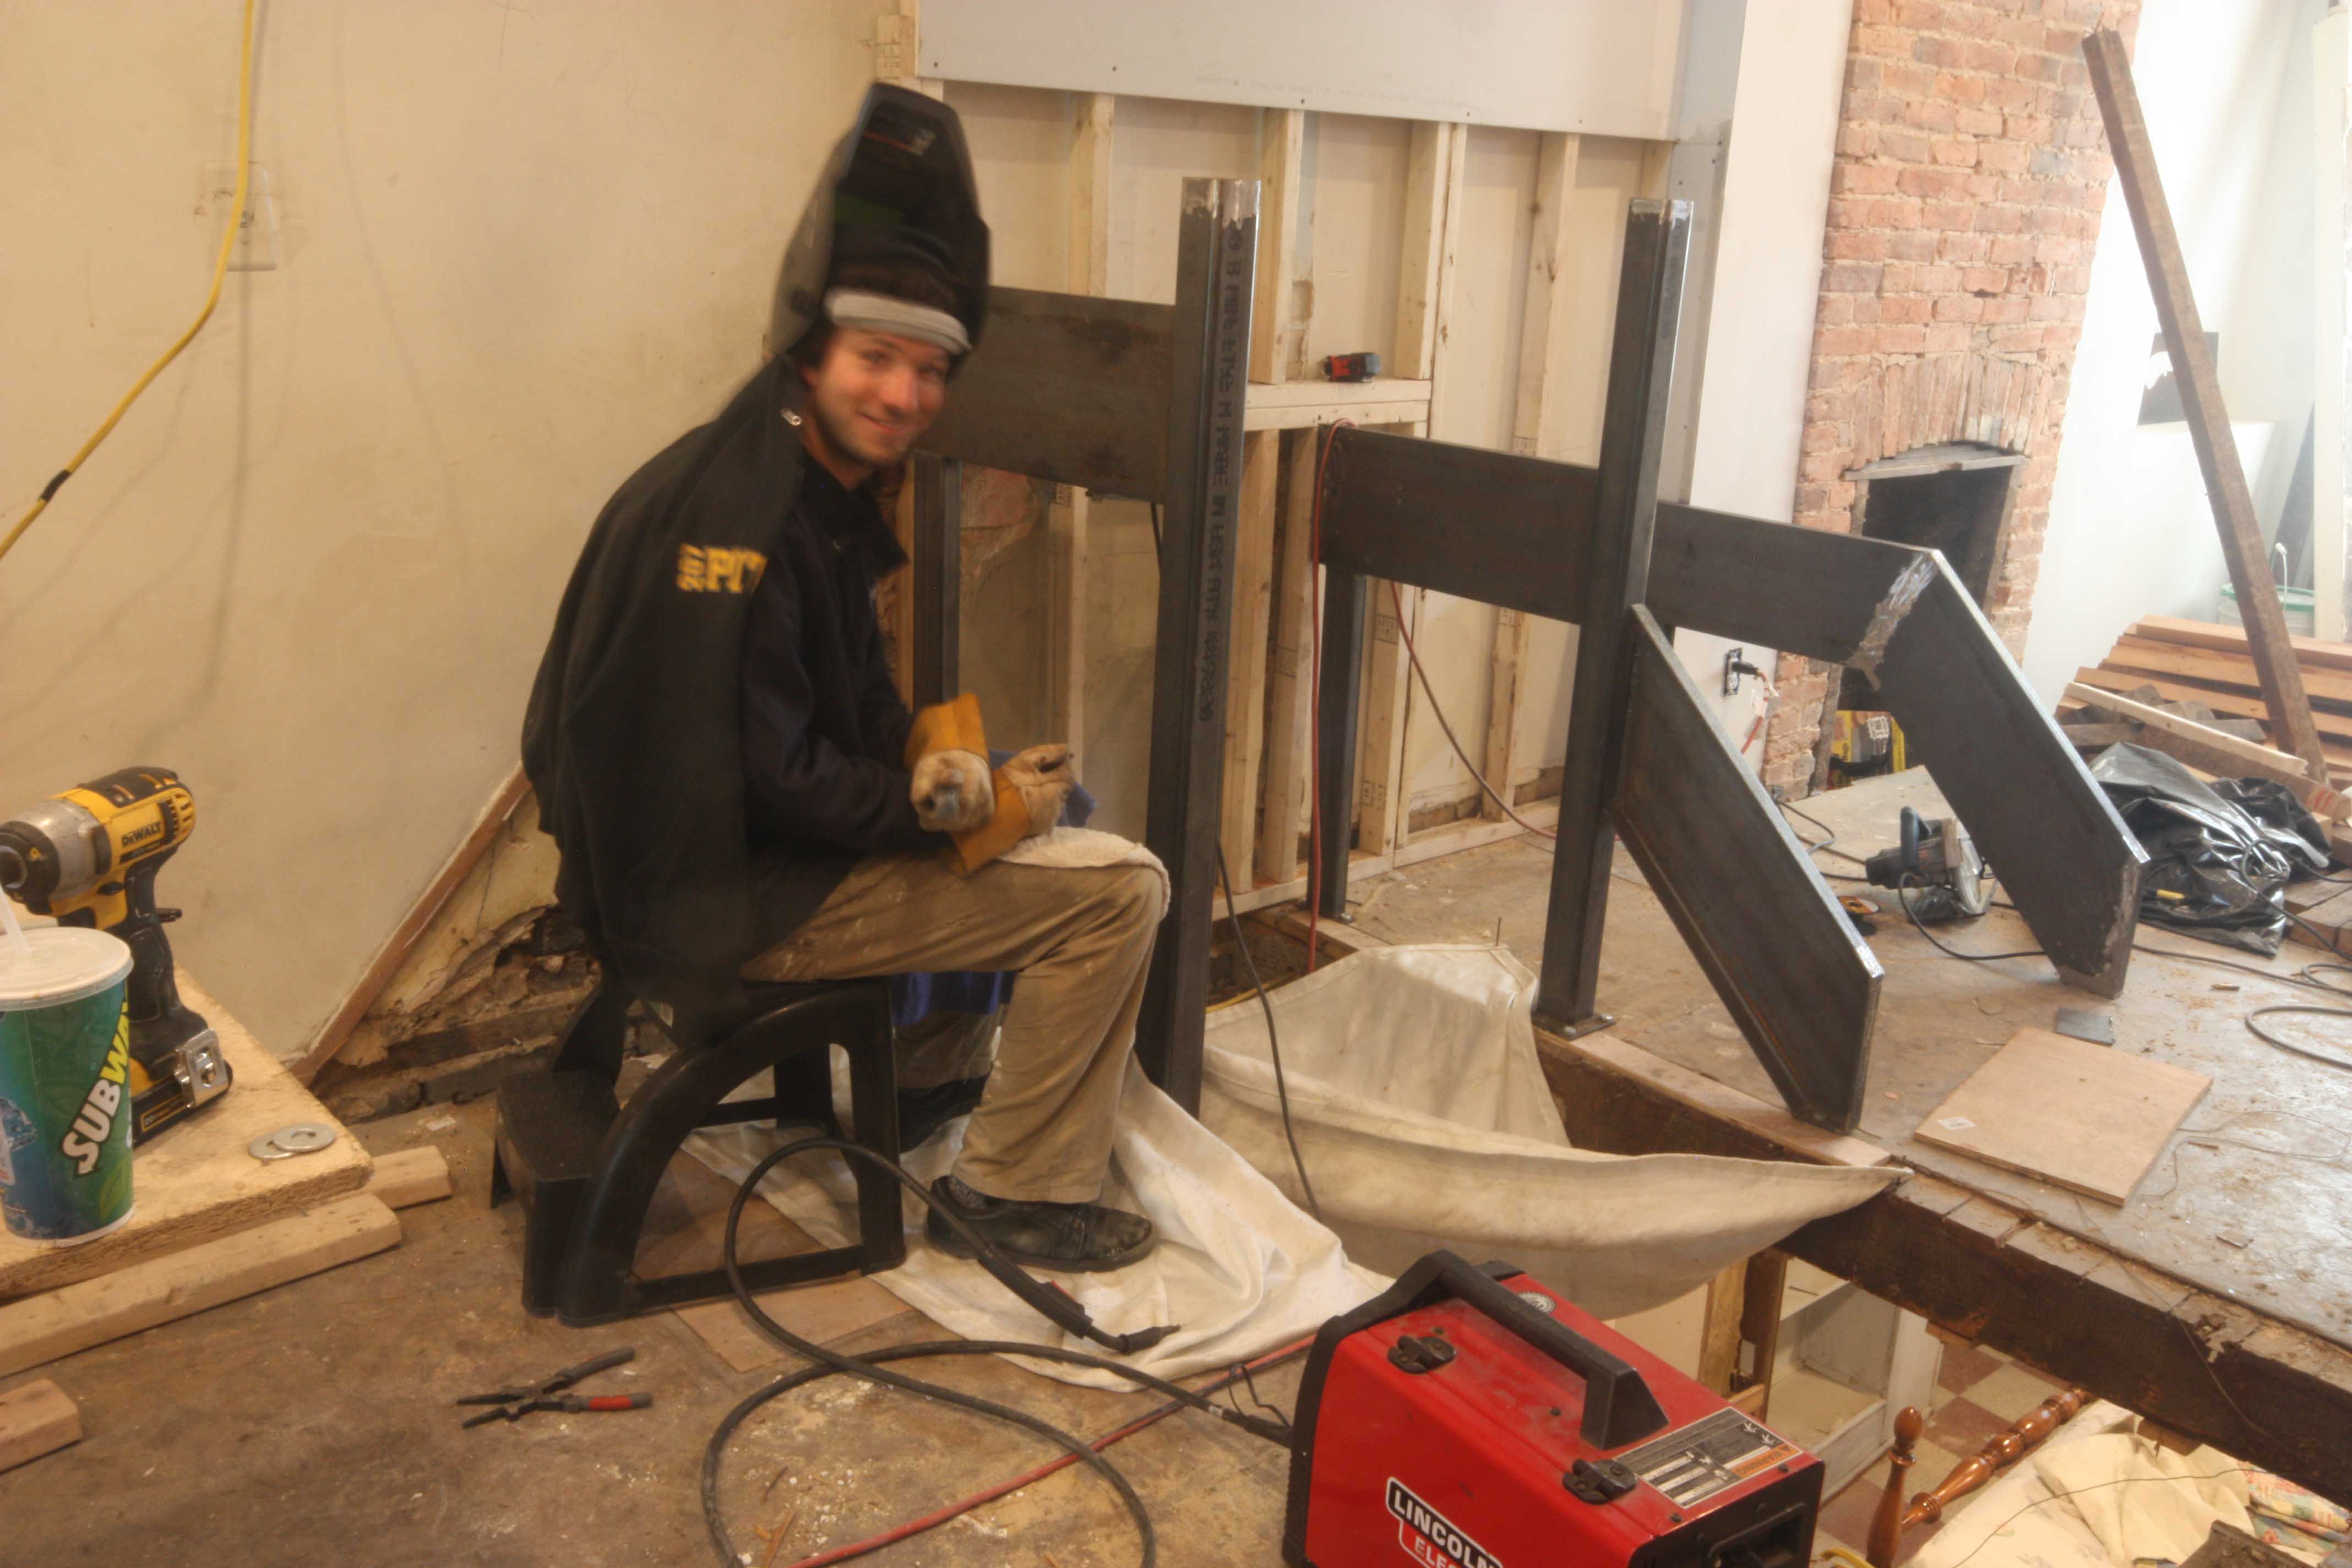
Now the big stringers.
After the basic framework was complete, I had to fabricate and weld on the angle irons that the treads will ultimately connect to.

Then I could install my placeholder treads.
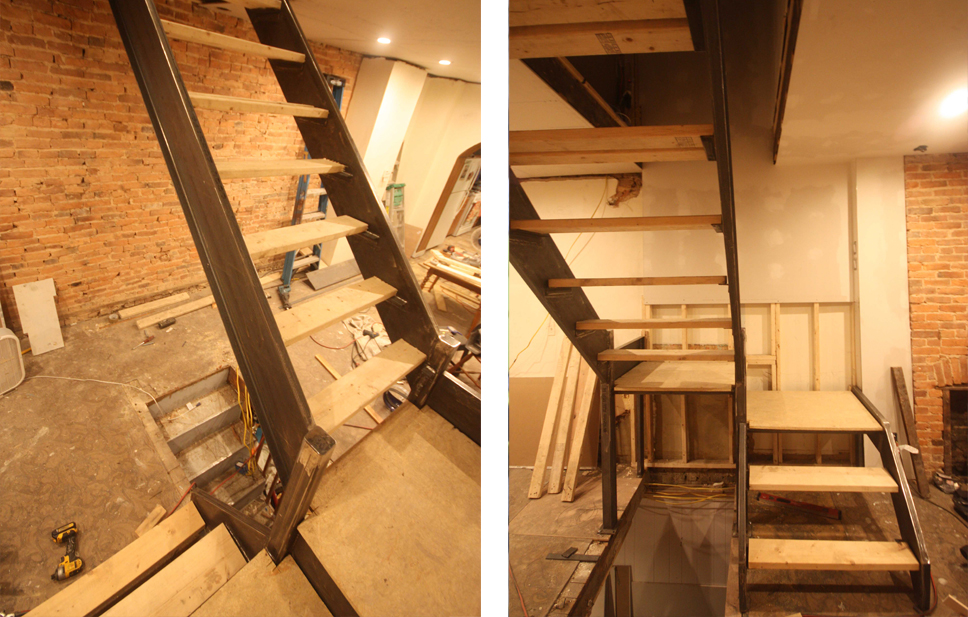
Yep, 2x4s and 2×6’s. But after I had these babies in I could actually walk up the stairs and use the bathroom, Finally no more ladder land.
So now I needed to fabricate the treads, landings, and railings.
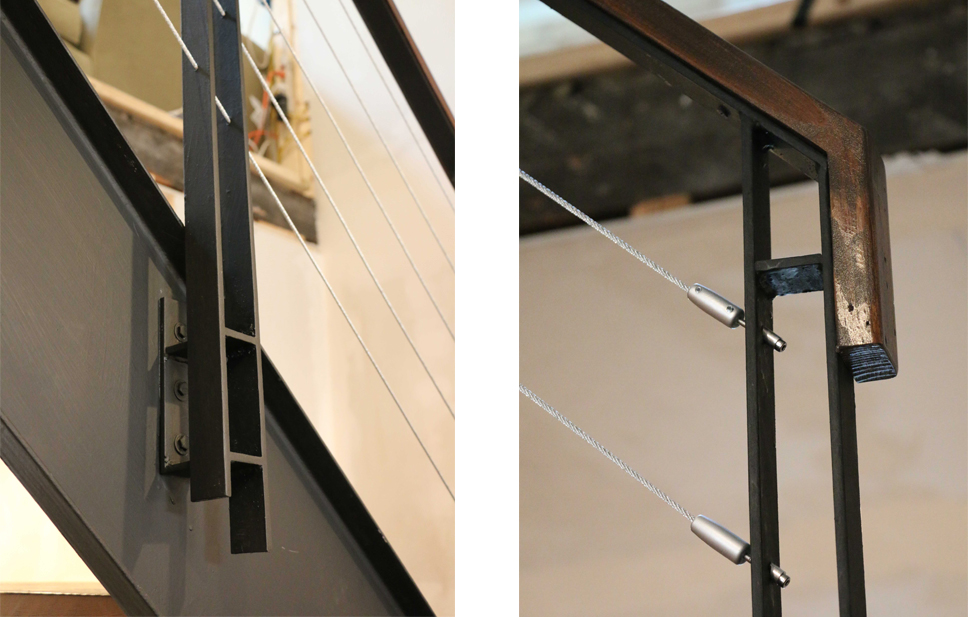
I came up with 3 options for the railings
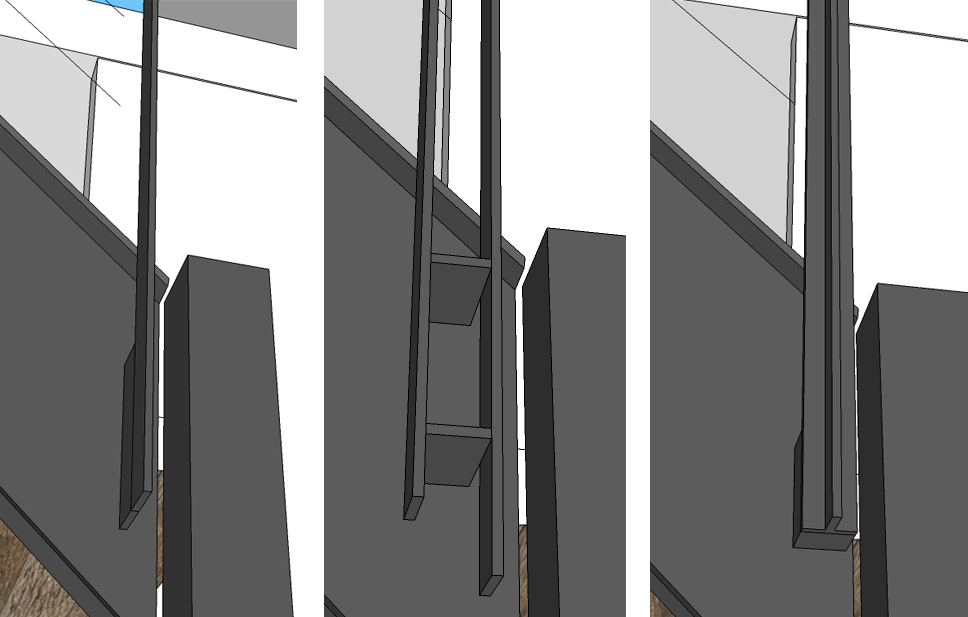
I ended up going with number 2
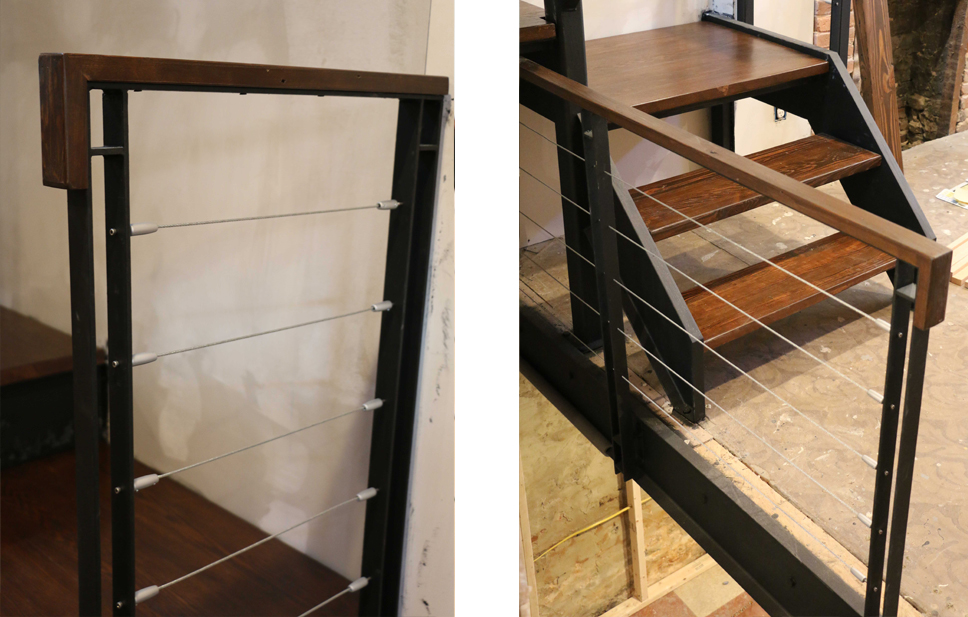
Here is the fabrication of the railings. Having a drill press was totally necessary to get the holes in the exact same spot for the cable railings. The railings are made of 1.5″ flat bar. Additionally I am going to bolt them to the stairs, instead of welding them. This way if I needed to move something huge up the stairs, I could remove them.

Then on to fabricating the treads.
Using the existing wood I demo’ed from the house I milled them out and glued 4 to a tread.


Staining + 3 coats poly
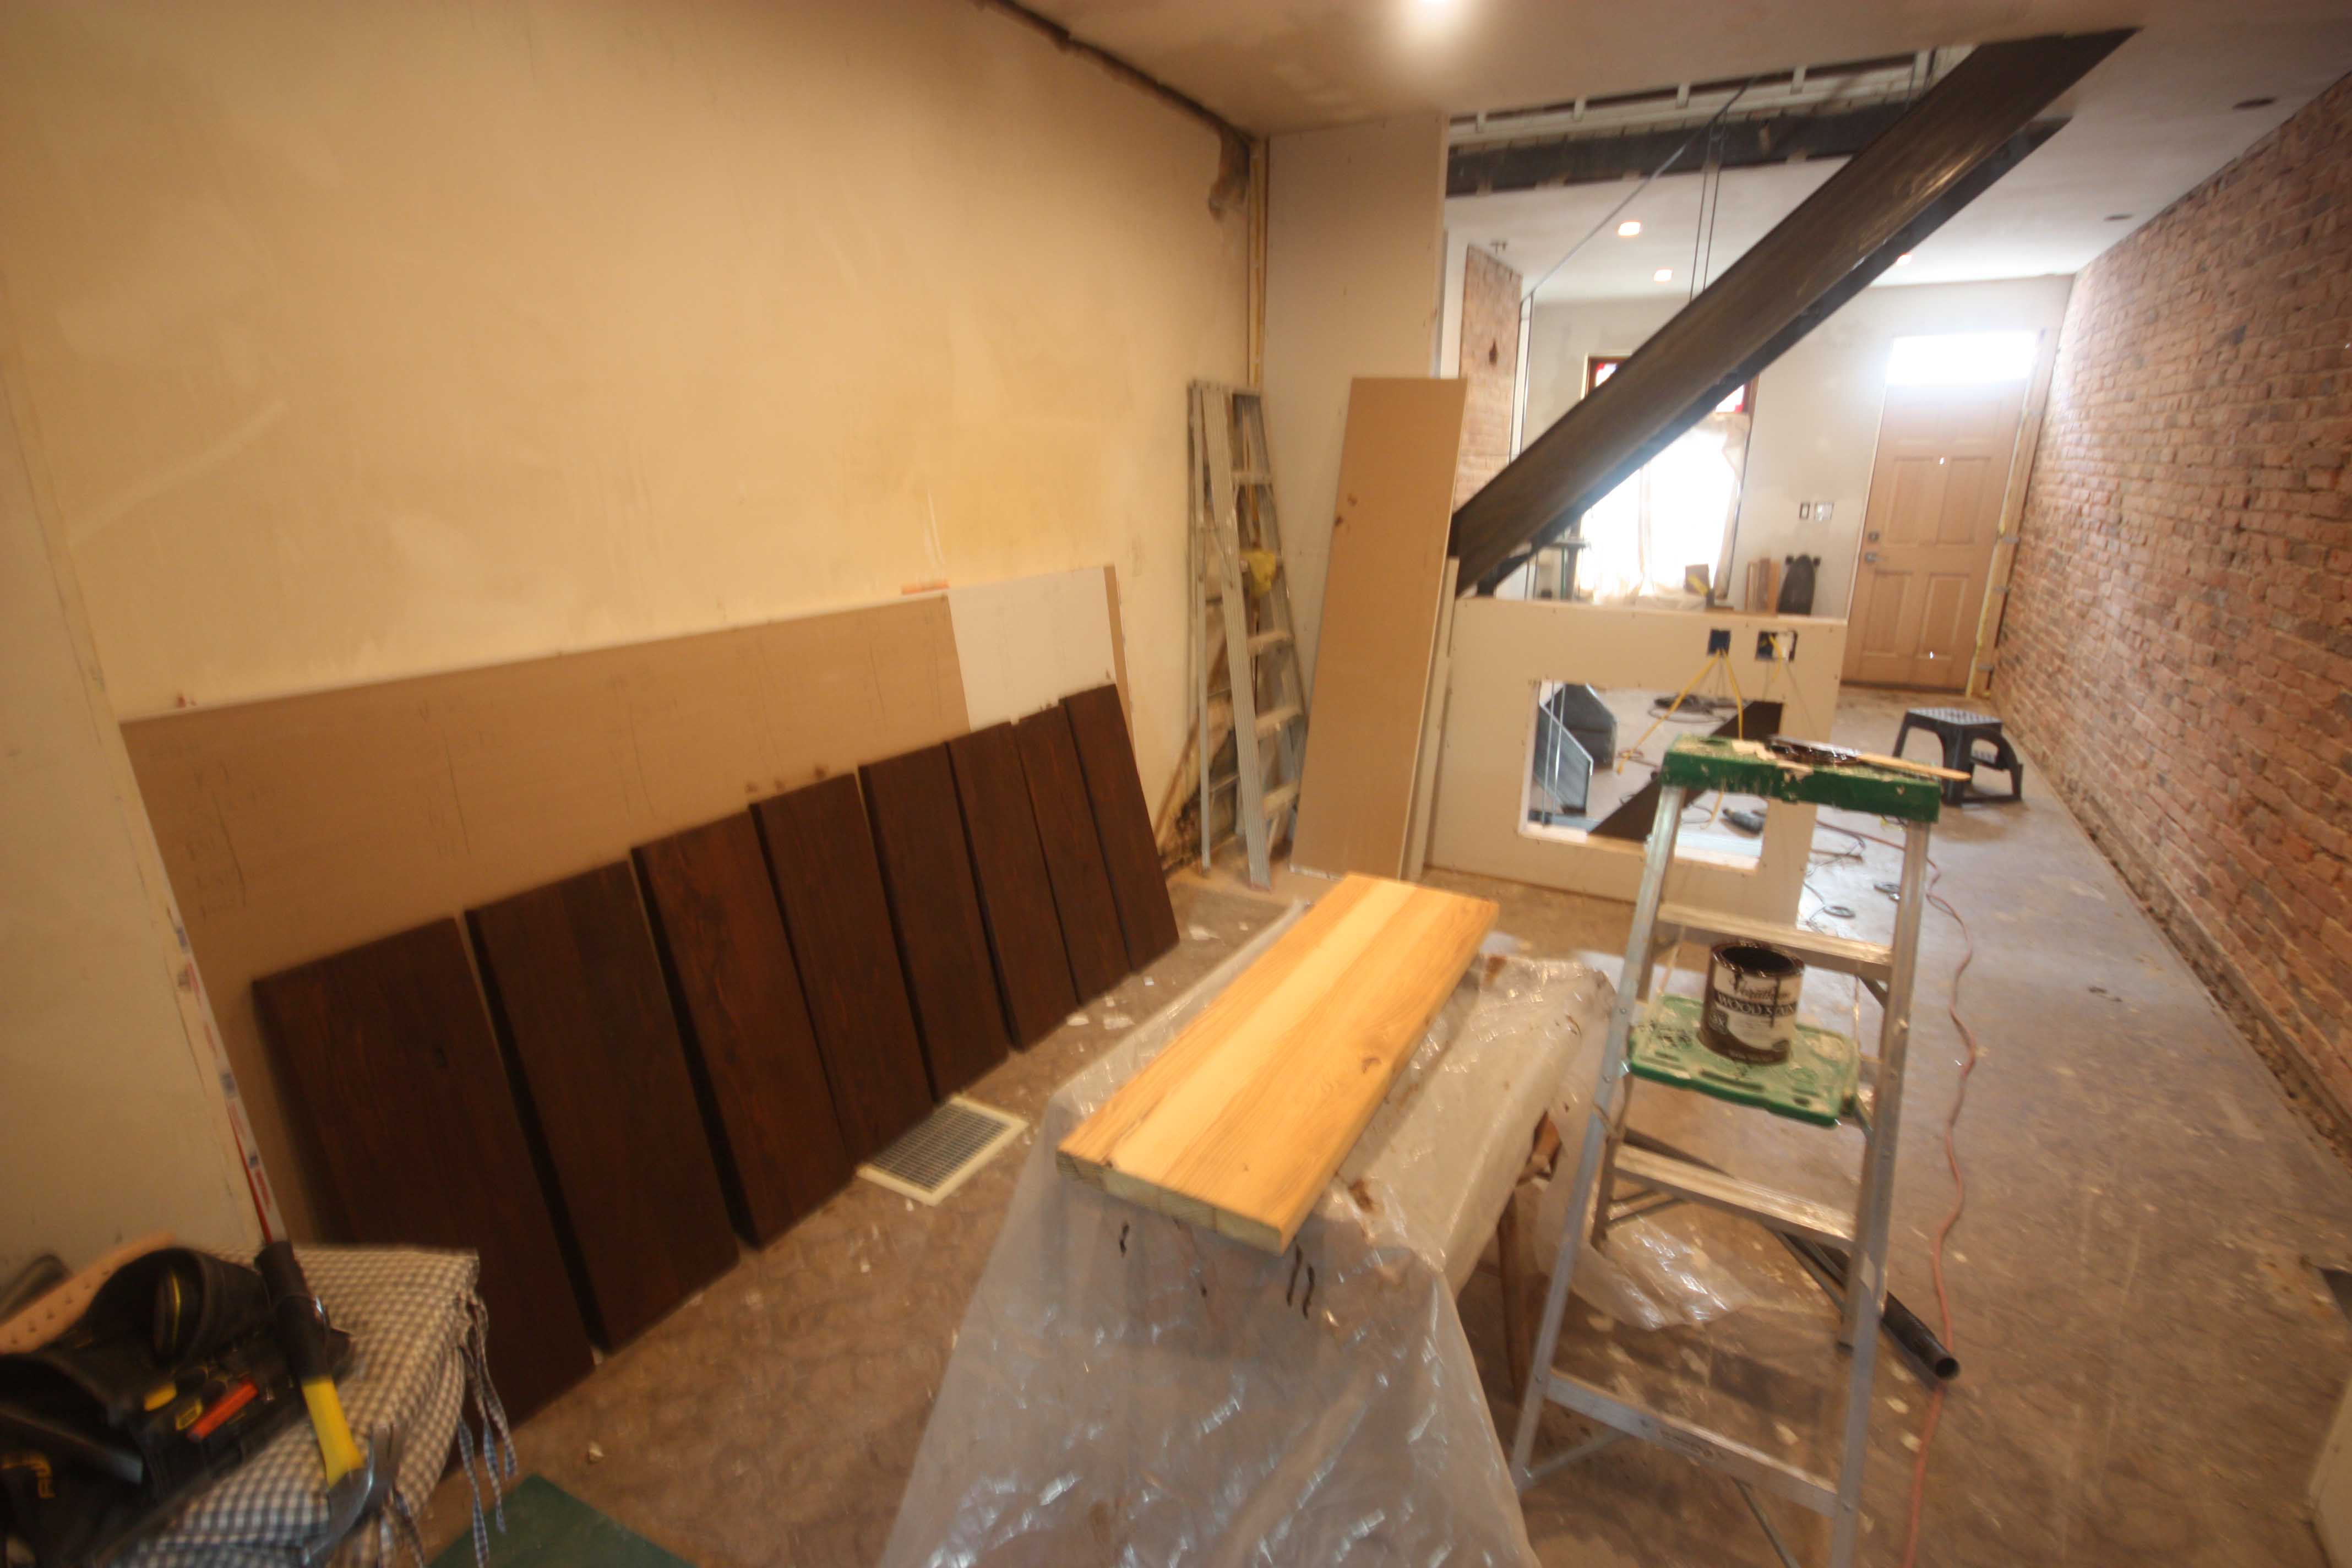
Here are the landings being sanded down

Here are the wooden handrails that will be bolted to the 1.5″ flat bar.

Details Please,
okay, you’re probably tired of reading this
Here are the final pictures


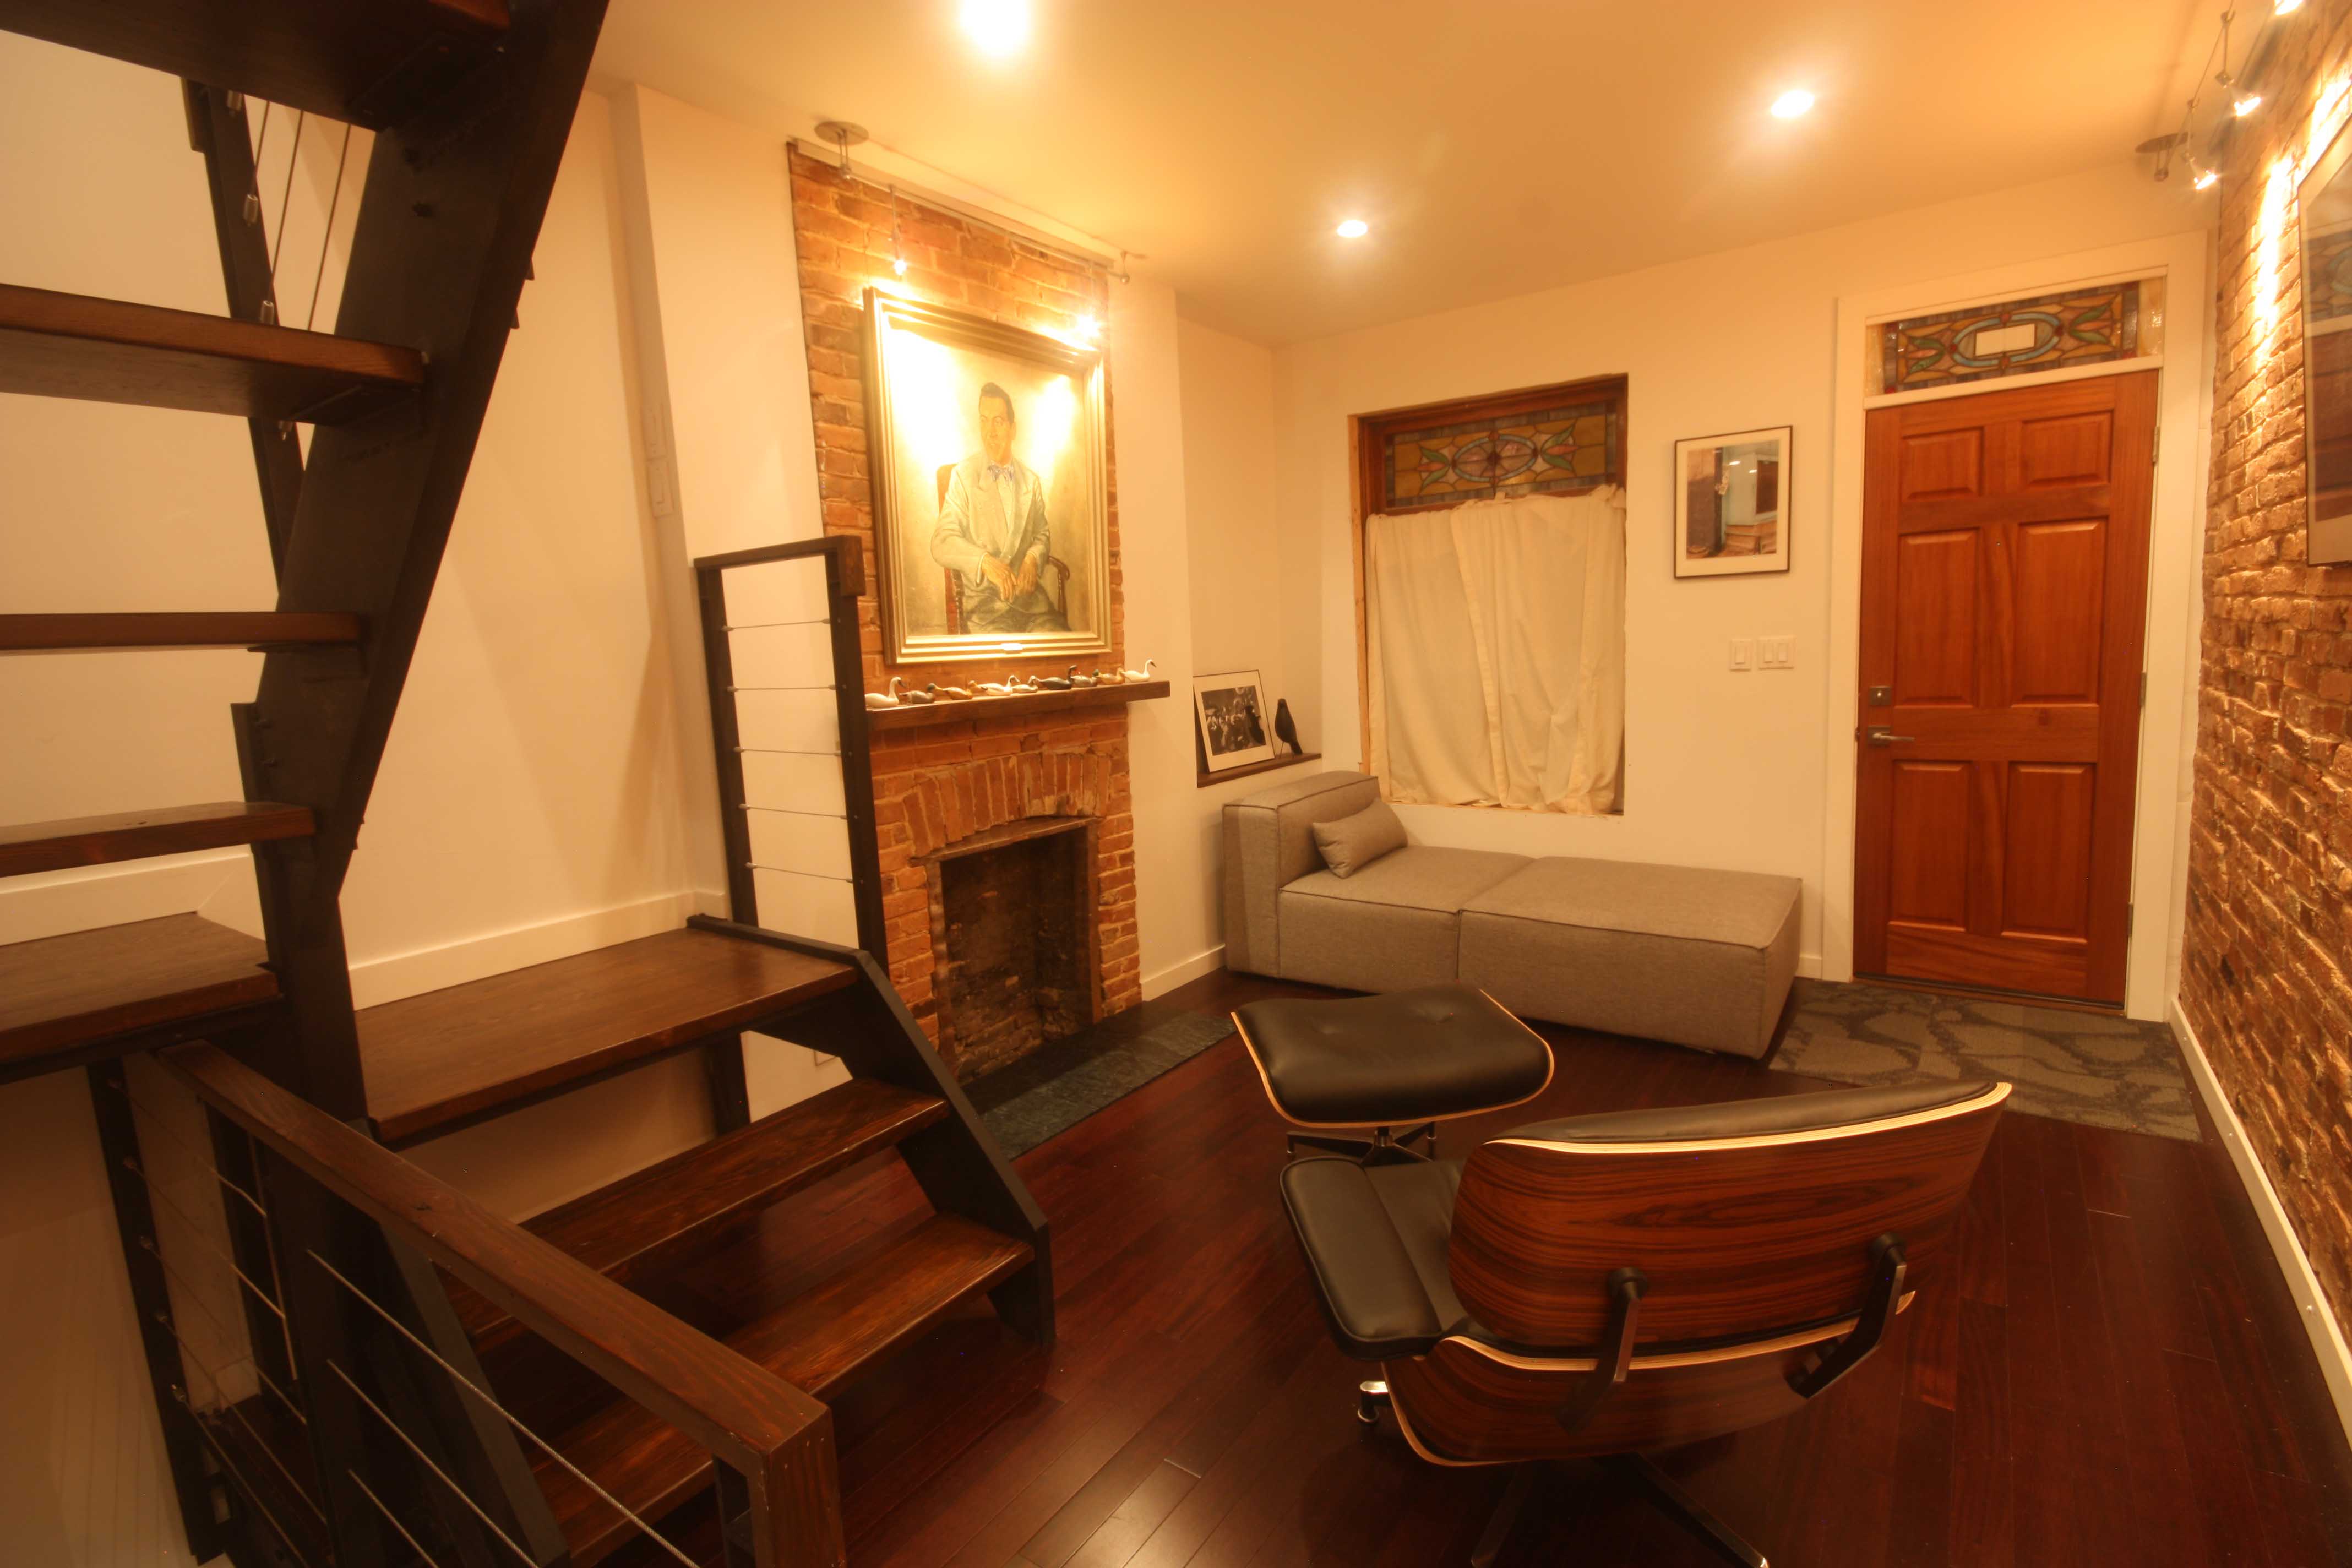
A lot of hard work, pretty much all of 2015 was spent on these rooms and staircase. But I am really satisfied with the outcome.
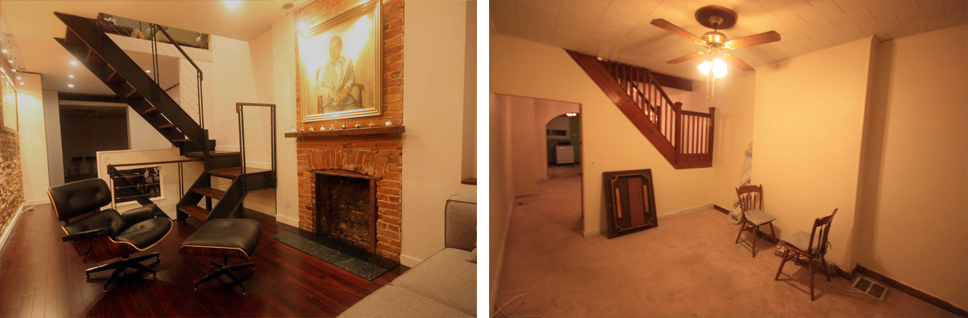
Seriously impressive! I can’t believe you did all this yourself while living in the house! I think it turned out way better than if you would have hired someone. You have all the nice details exactly as you want them, you got to make decisions like reclaiming the lumber for the treads, and you can unbolt the handrail for moving big stuff, I think it is perfect. The details are great and the end product (the whole room) Looks amazing. I can’t imagine how much value this added to your house. The whole house feels open, and modern. It is crazy to think those are the same space. I would love to see a couple more pictures of the handrail going downstairs that you embedded into the wall. Great project!
Hey Pat that staircase looks outstanding! I’m in the process of doing something similar with my rowhome in Baltimore also. Would you be willing to share your blueprints/ plans by any chance?
Sorry for the slow reply, we don’t monitor comments on this site.
Anyways, if you haven’t already finished your project I could give you my advice on a staircase. my email is pfava1@gmail.com