Phase I
I figured I’d write a post on my bedroom renovation. The bedroom was actually the first space I renovated as soon as I bought my house. I knew this project was a good first project because once I was done, I’d be able to shut the door, and have at least one nice room in my house. Additionally, it was a nice first project because I could keep the construction contained to one room and not have to deal with any scope creep.
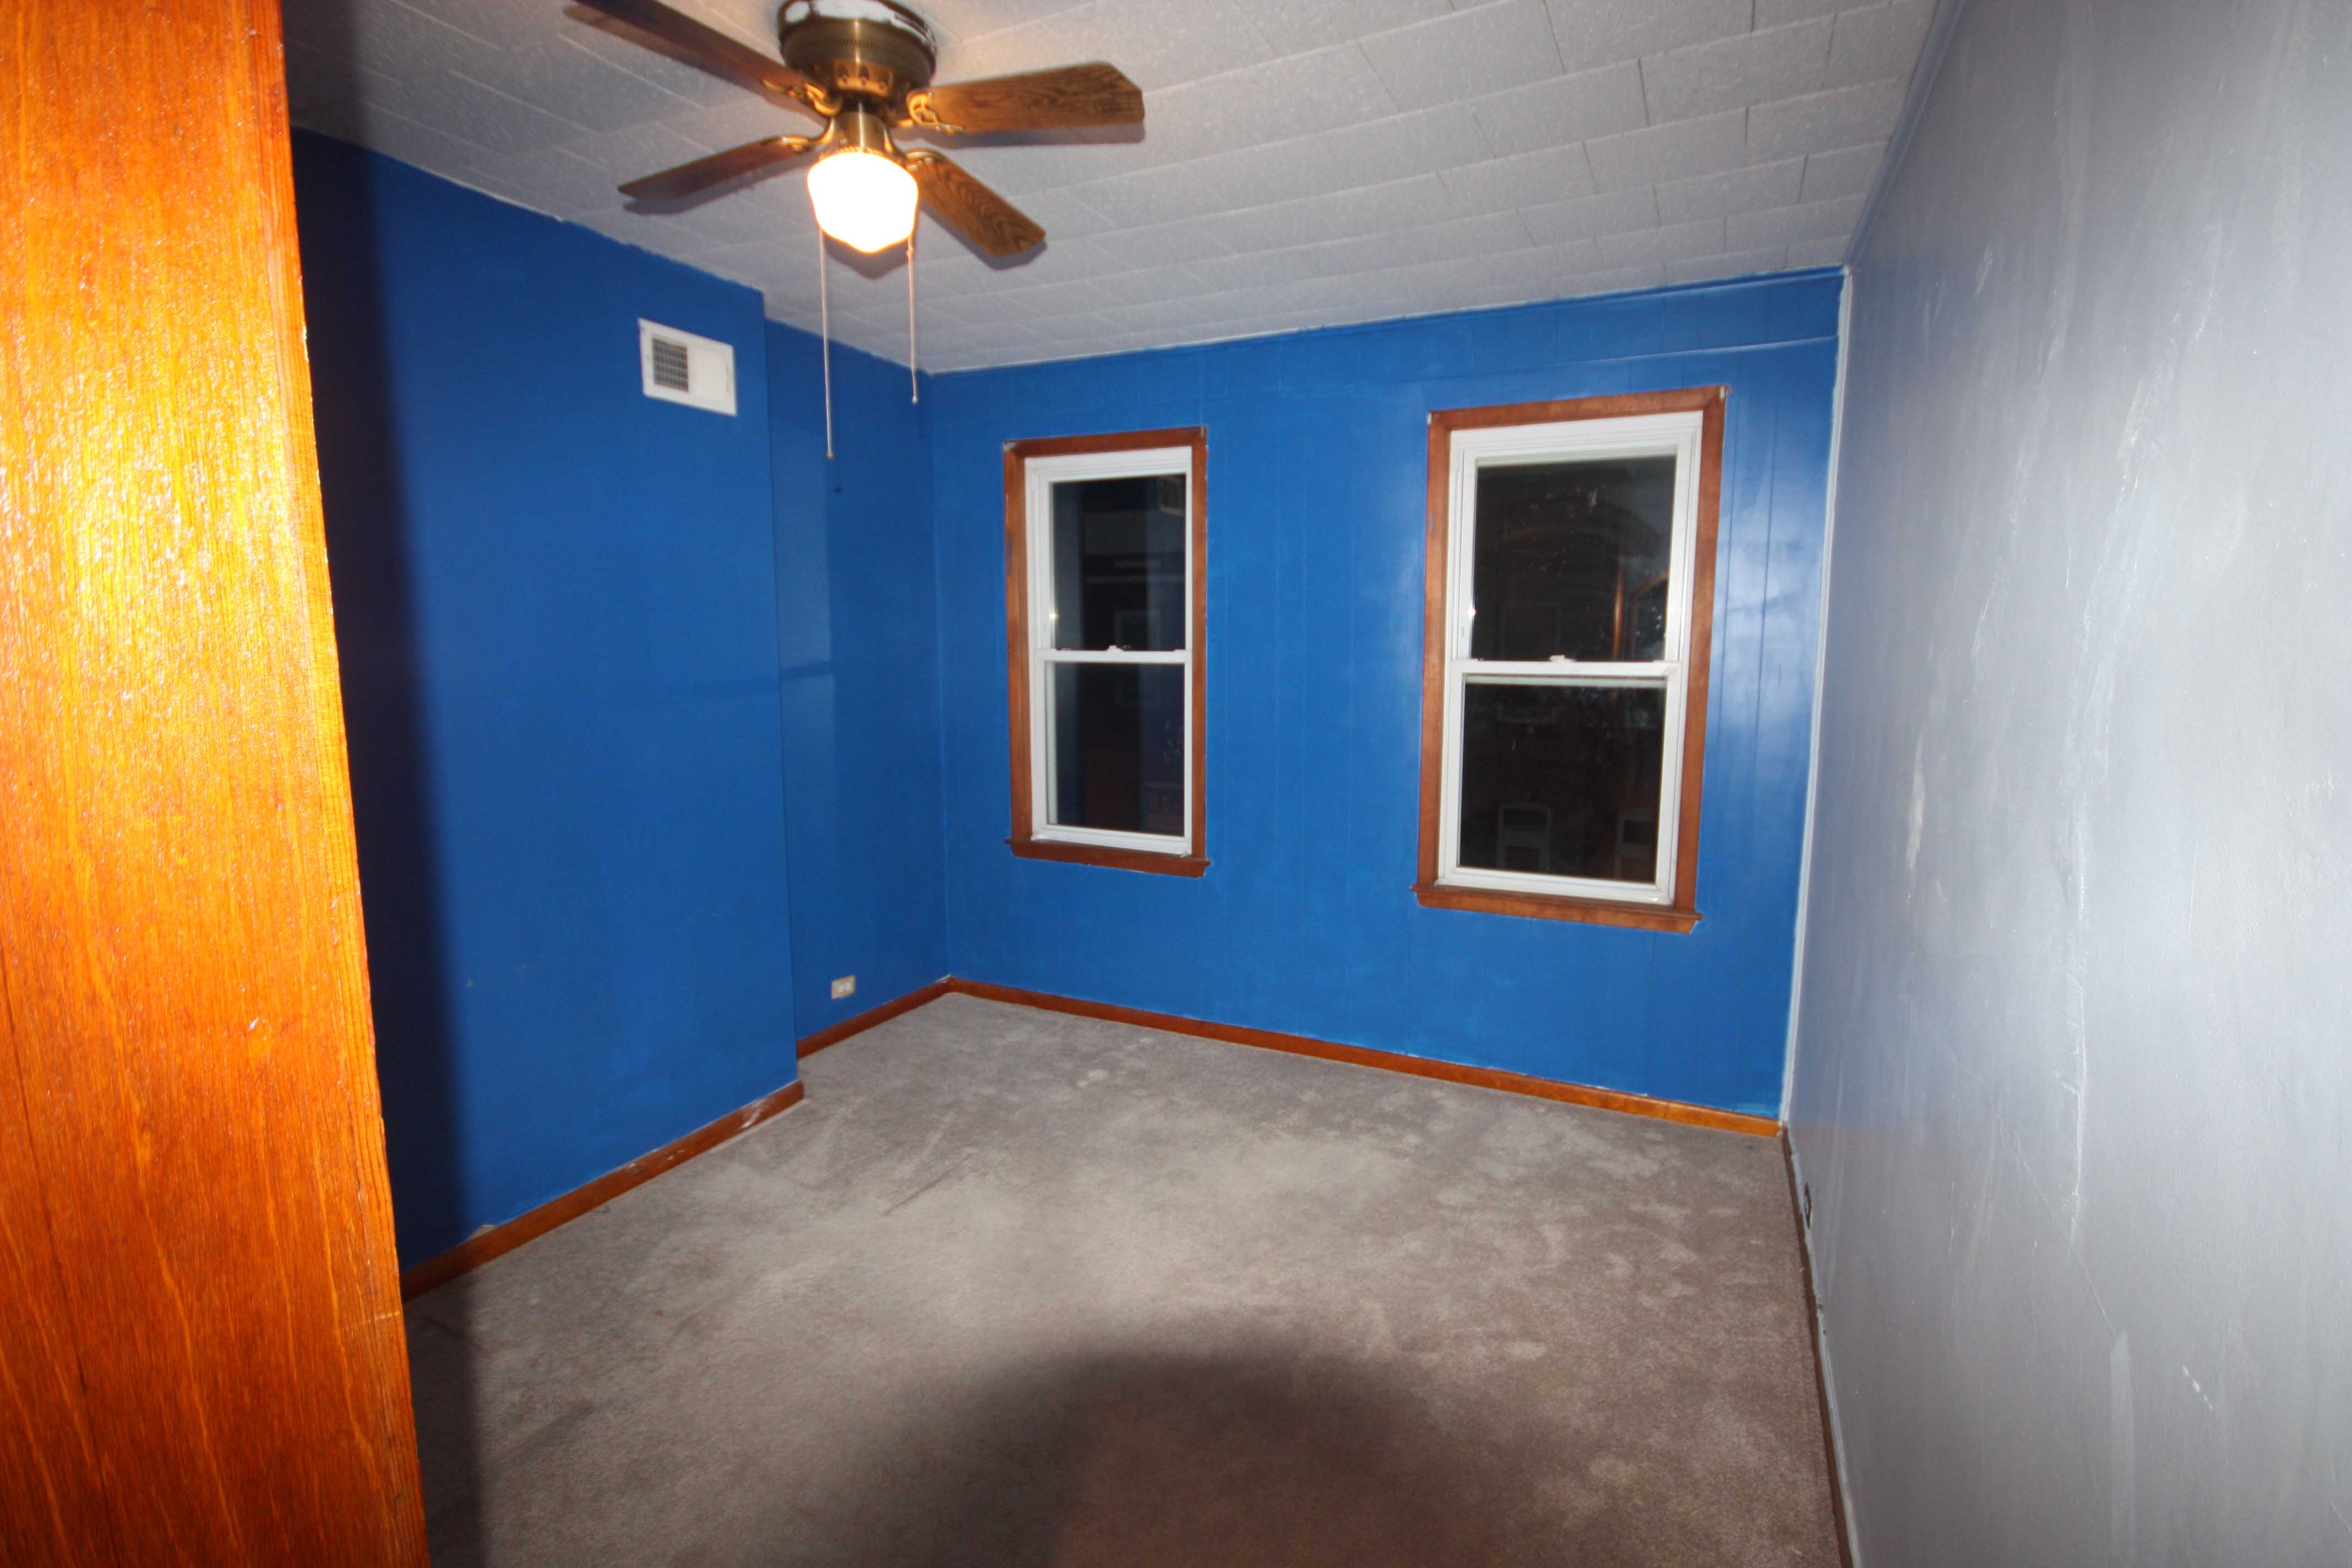
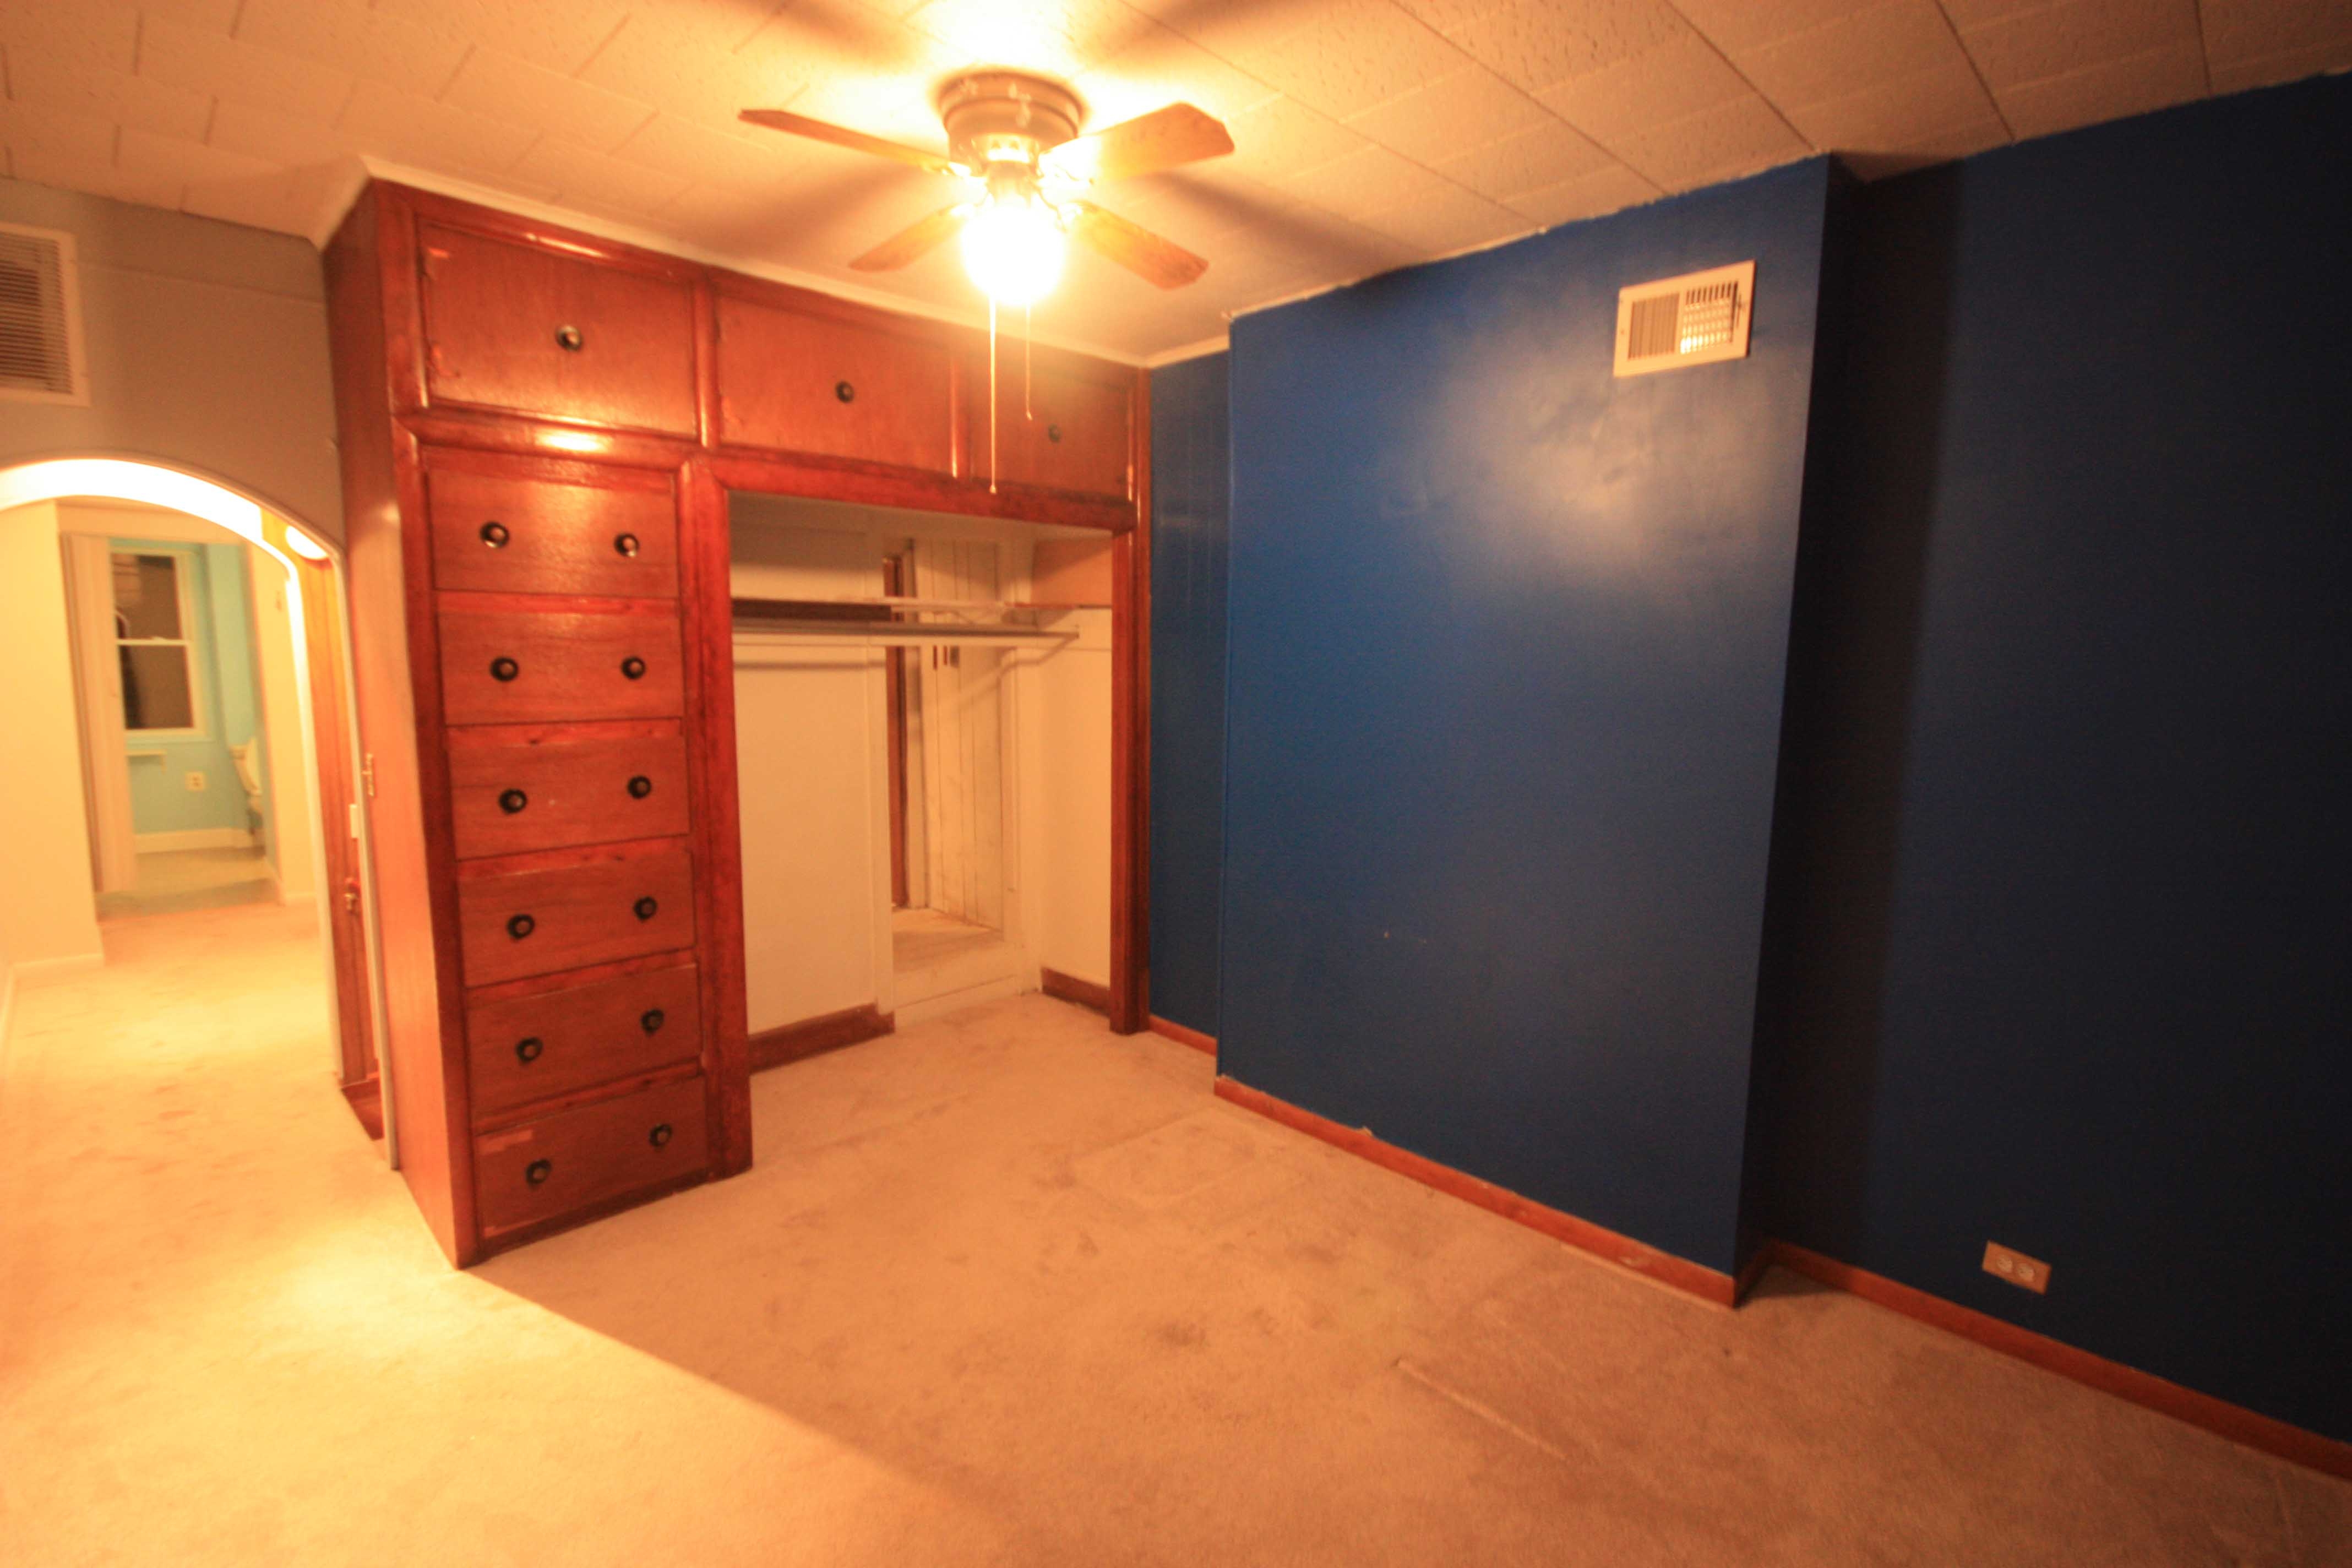
Here is the original room, a wonderful blue color painted over the wood paneling. Built in closet? No bedroom door. and flat ceilings. Tiled ceiling.
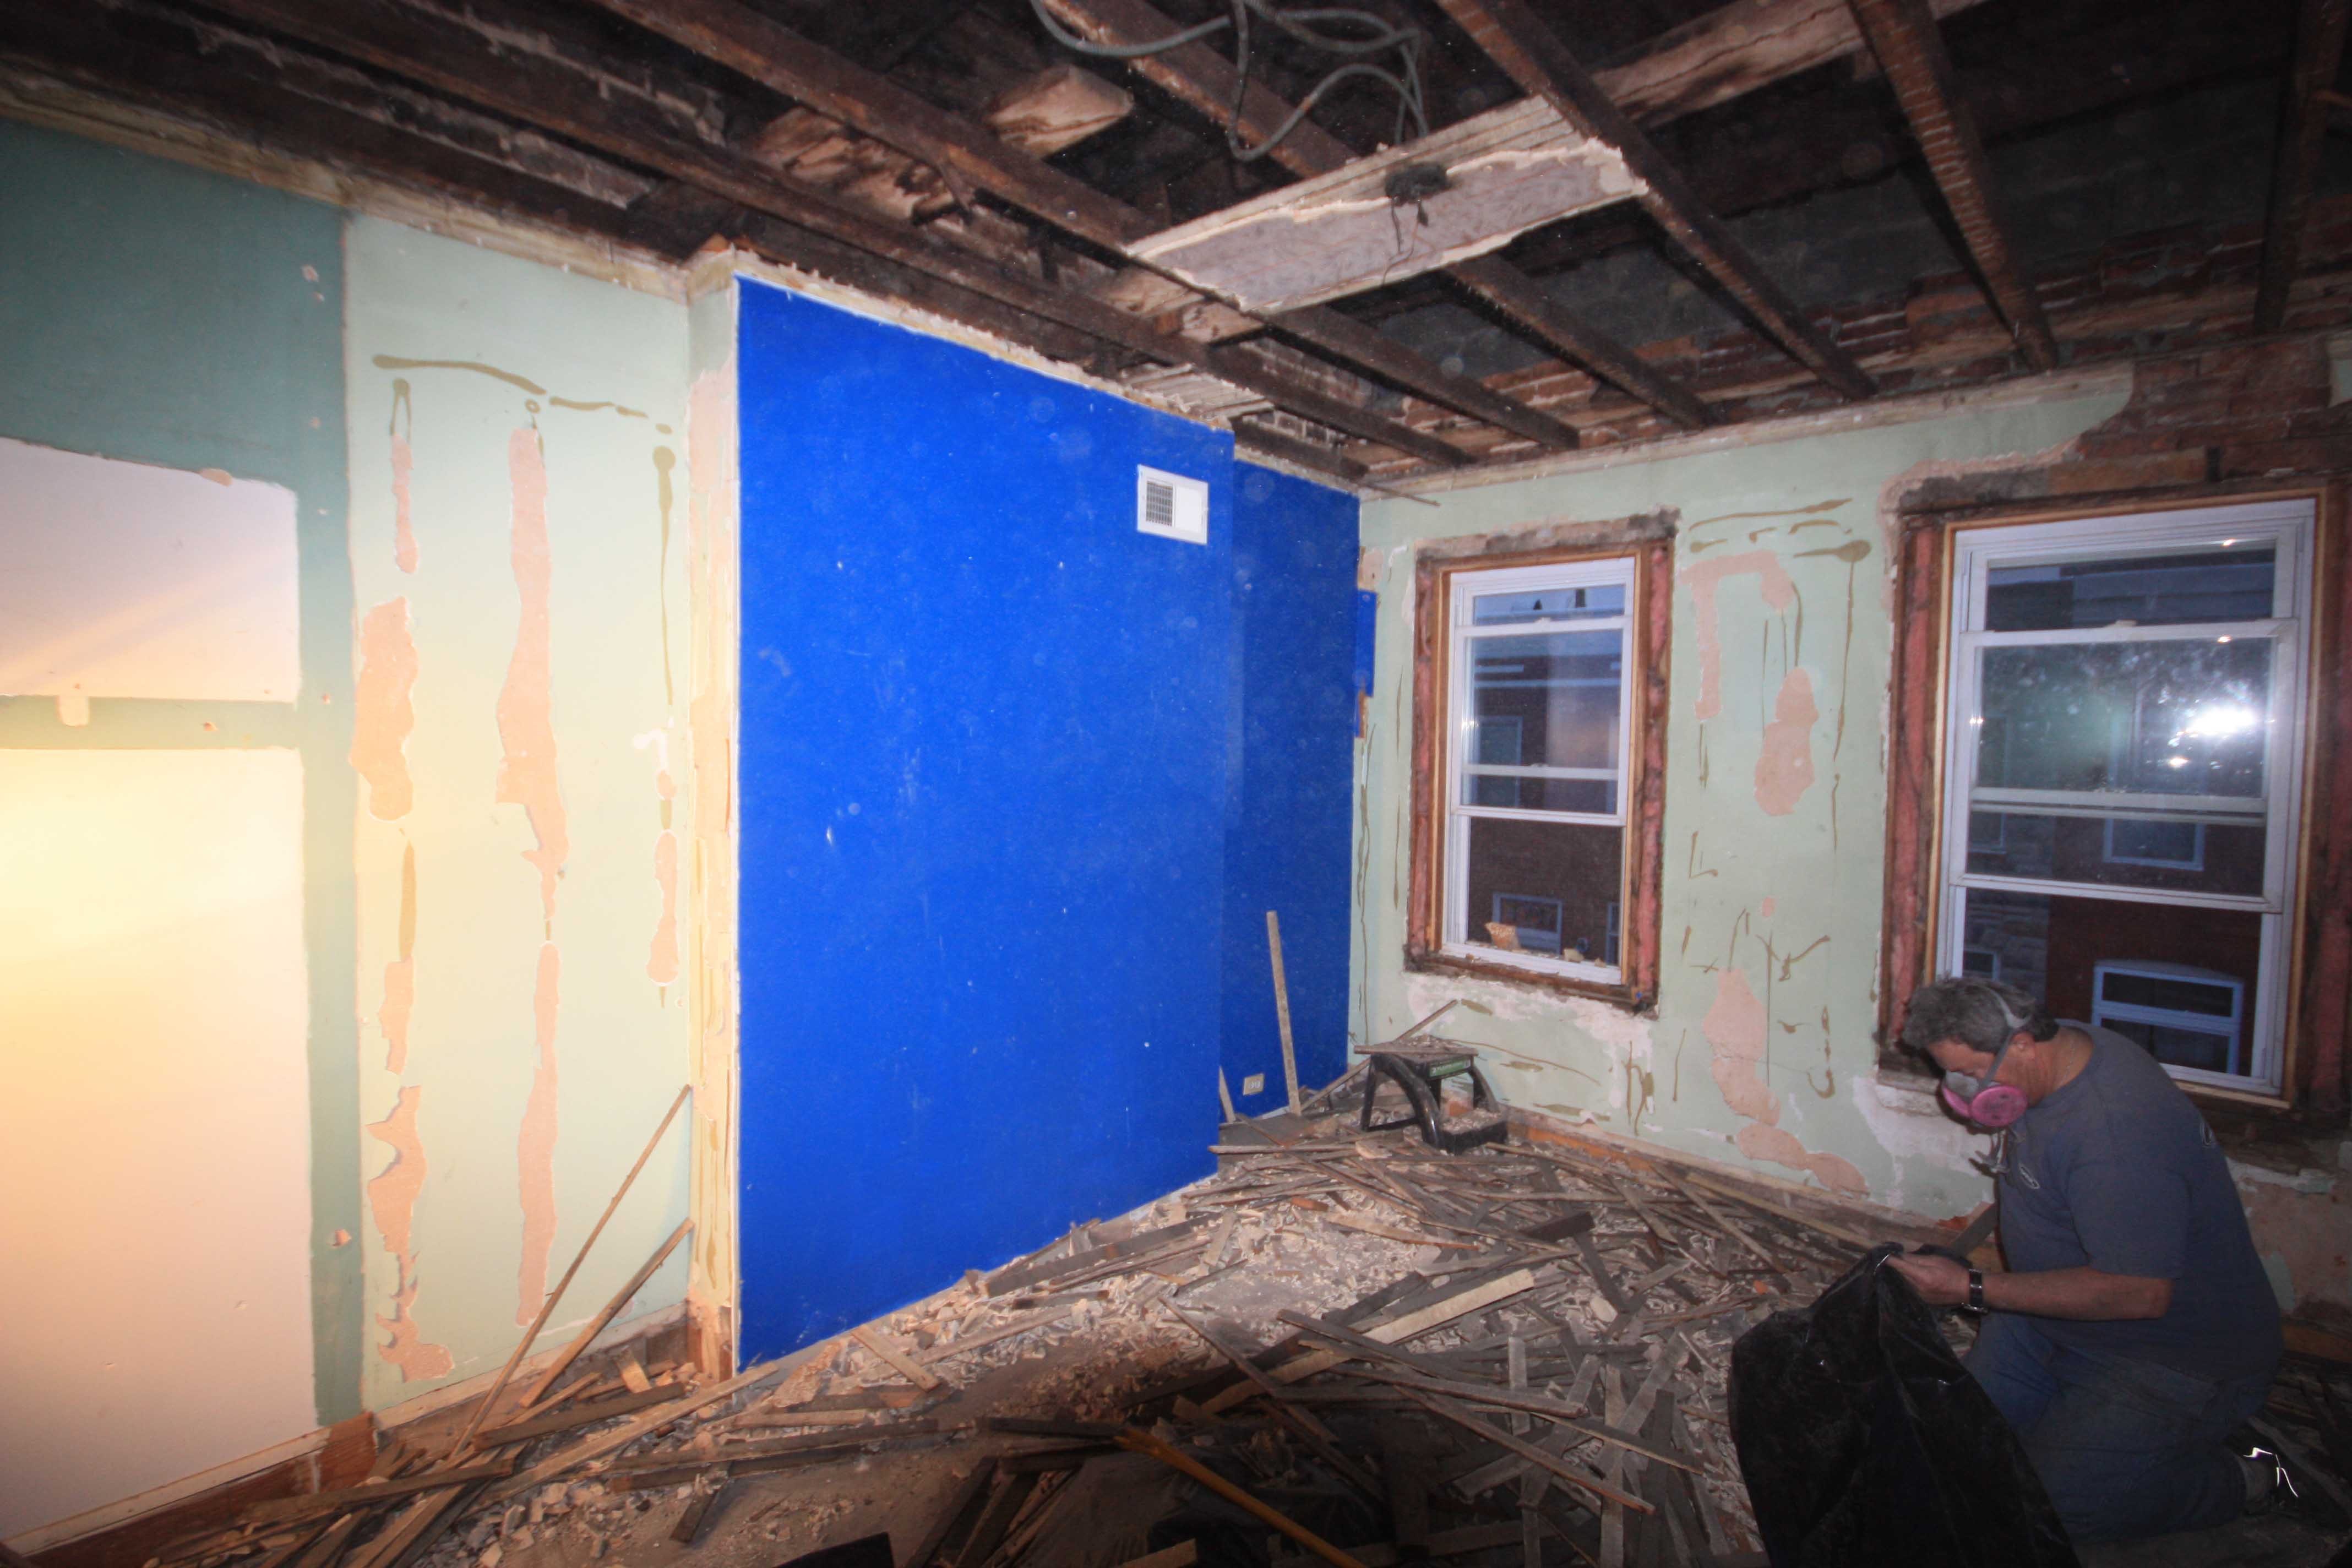
This is my dad and I tearing out the ceiling. All Lathe and Board with plaster. A huge mess. Also, there was a false ceiling in. I decided to take this out and make the new ceiling sloped.
(Hint, most of the staircase’s treads came from these joists in the ceiling above.)
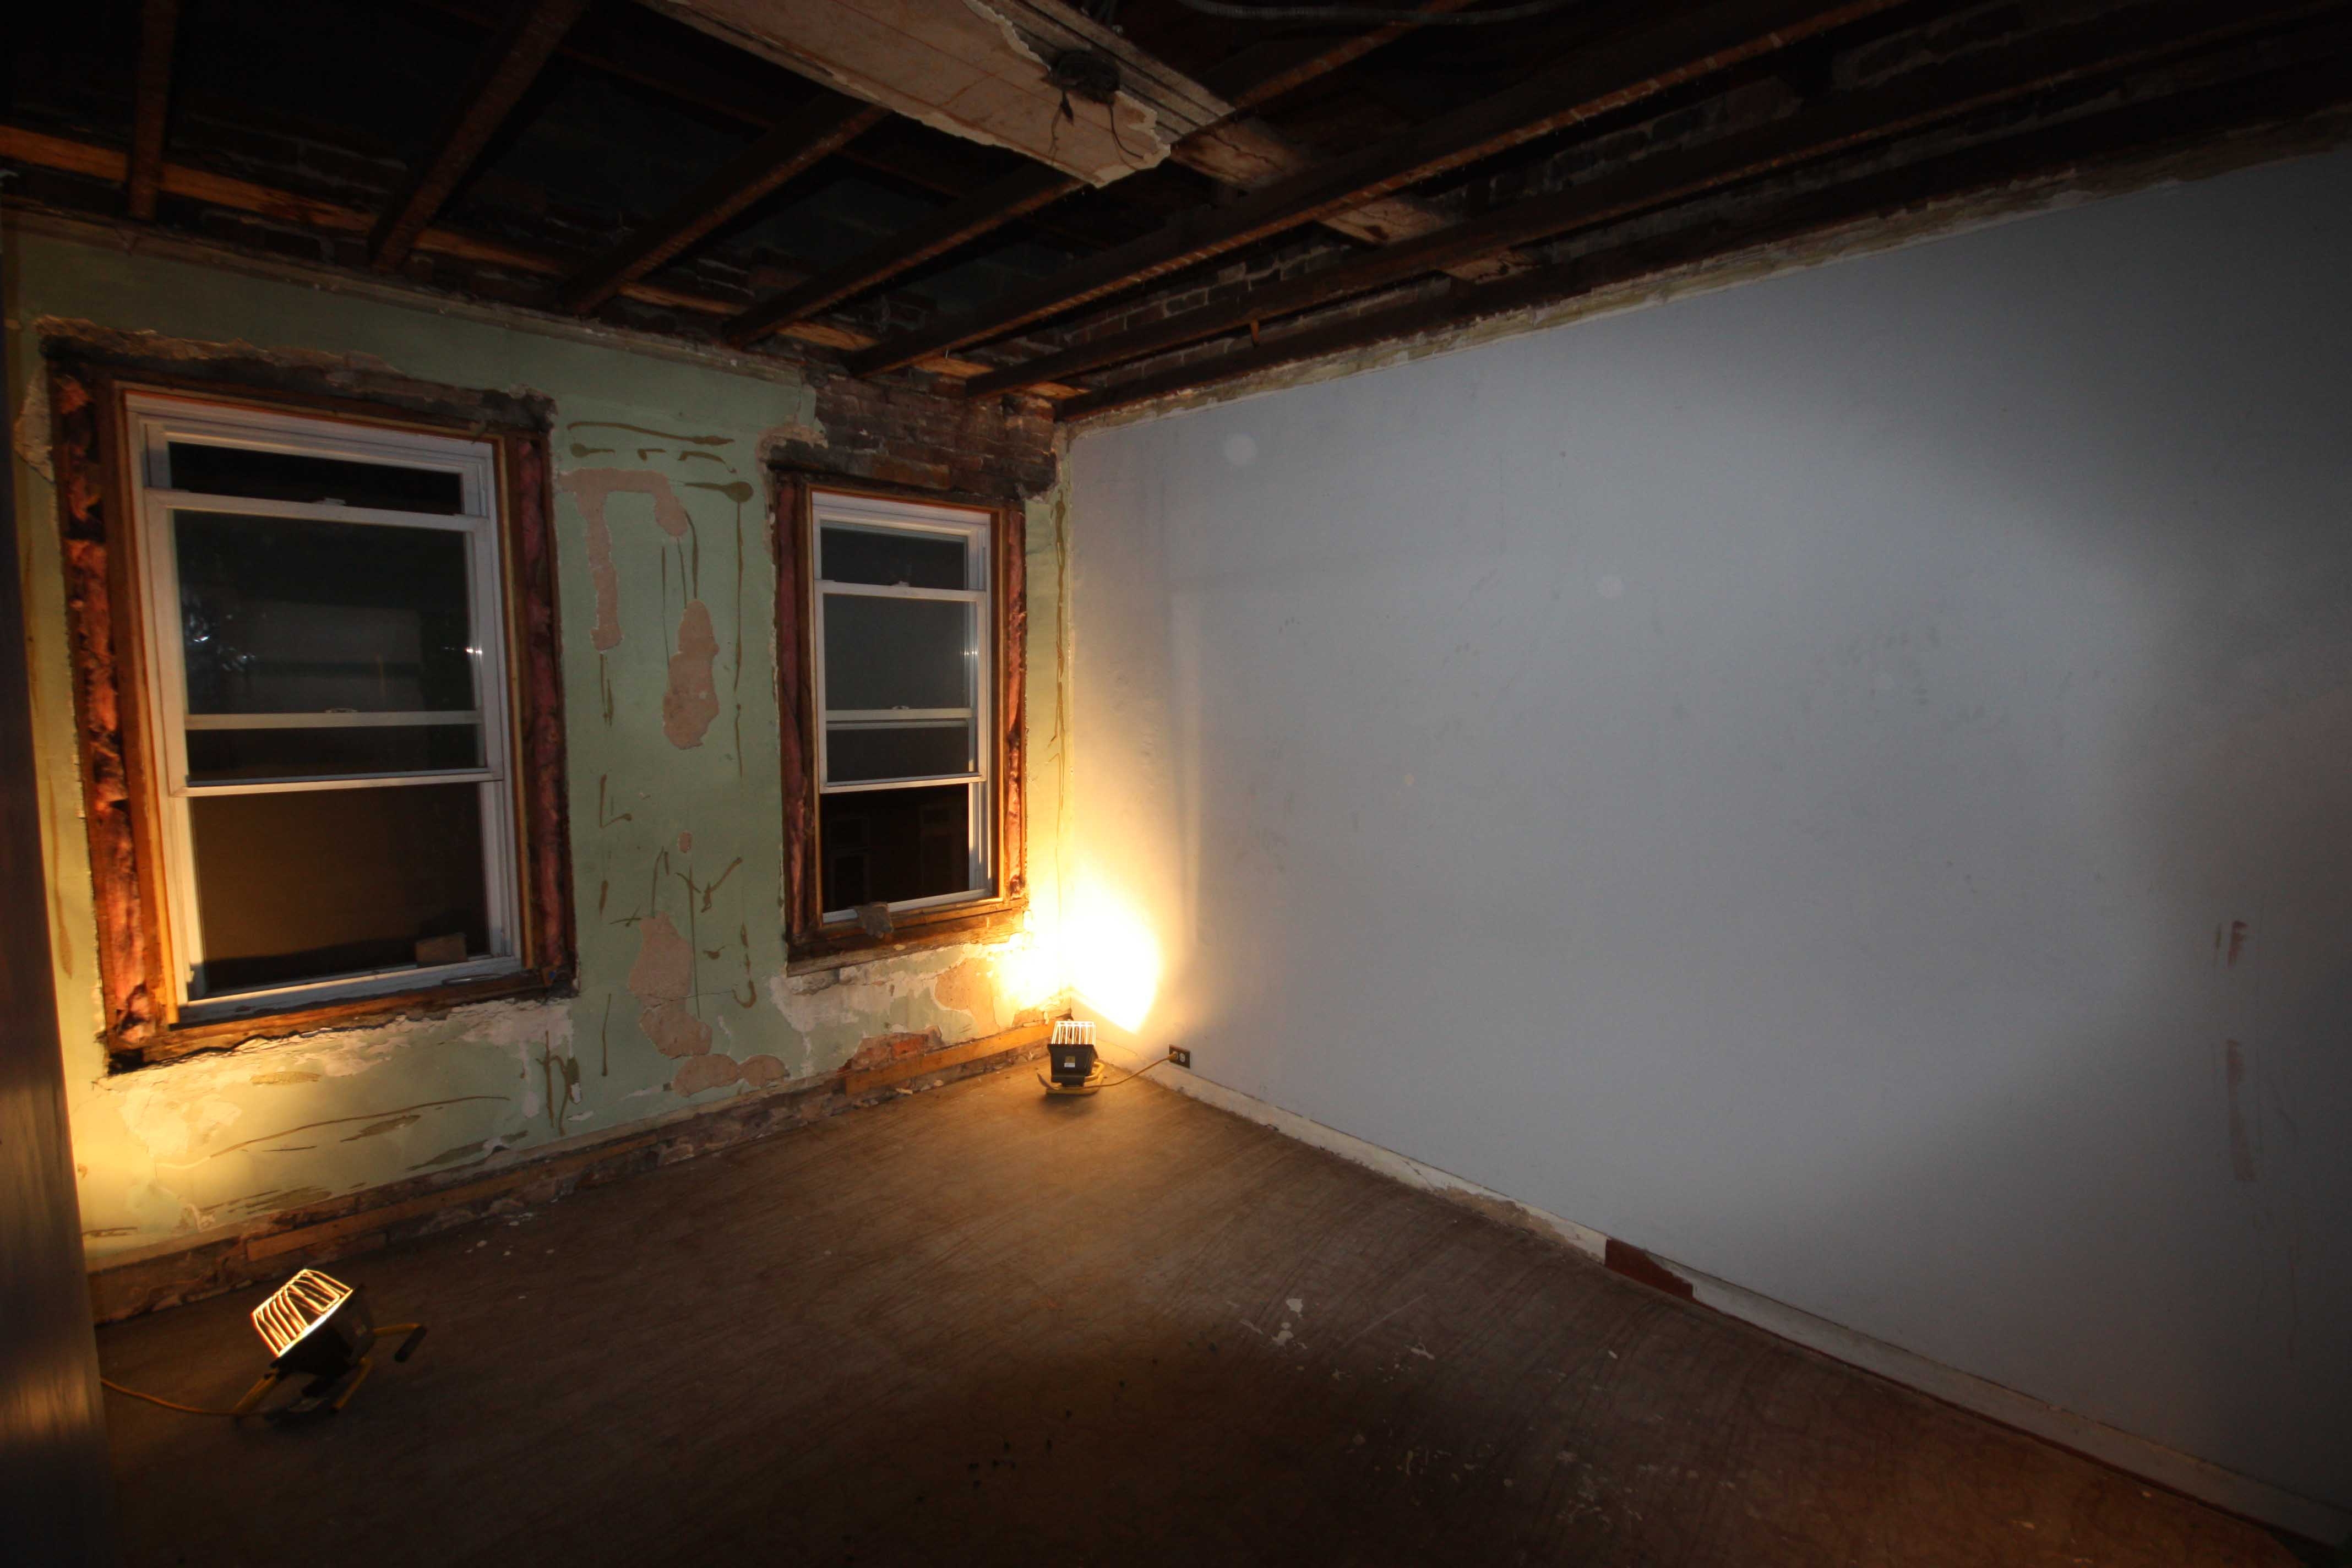
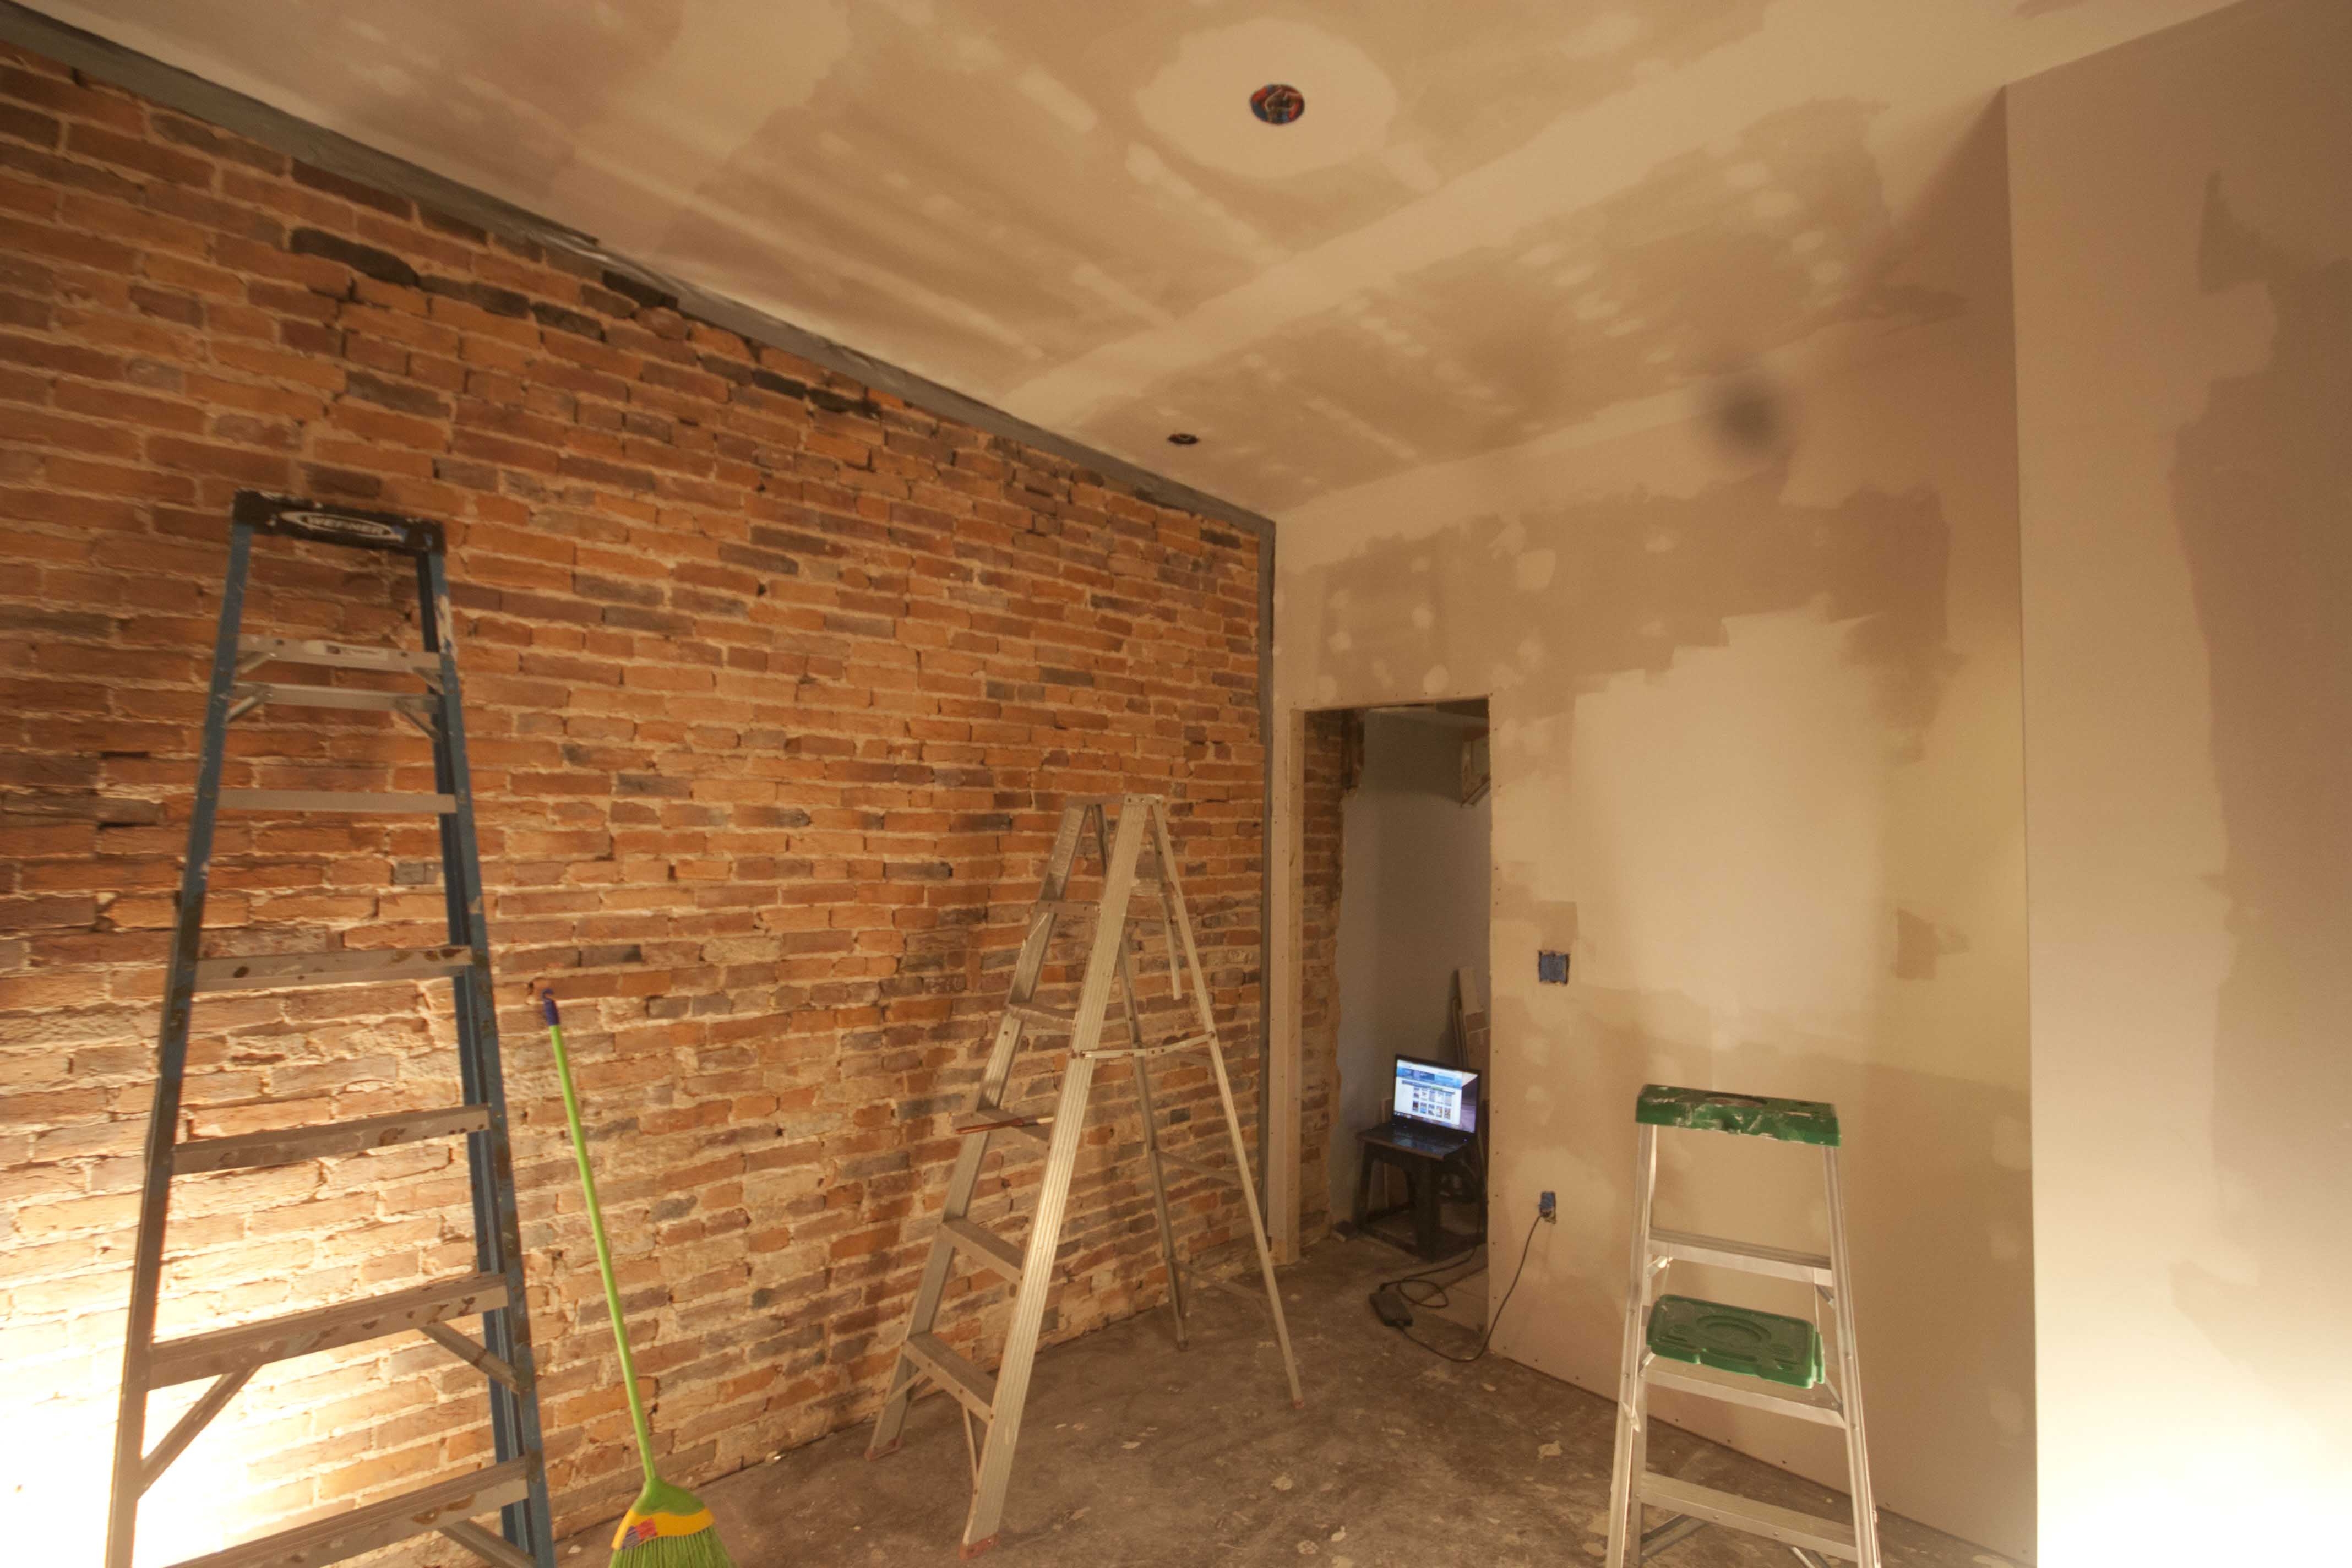
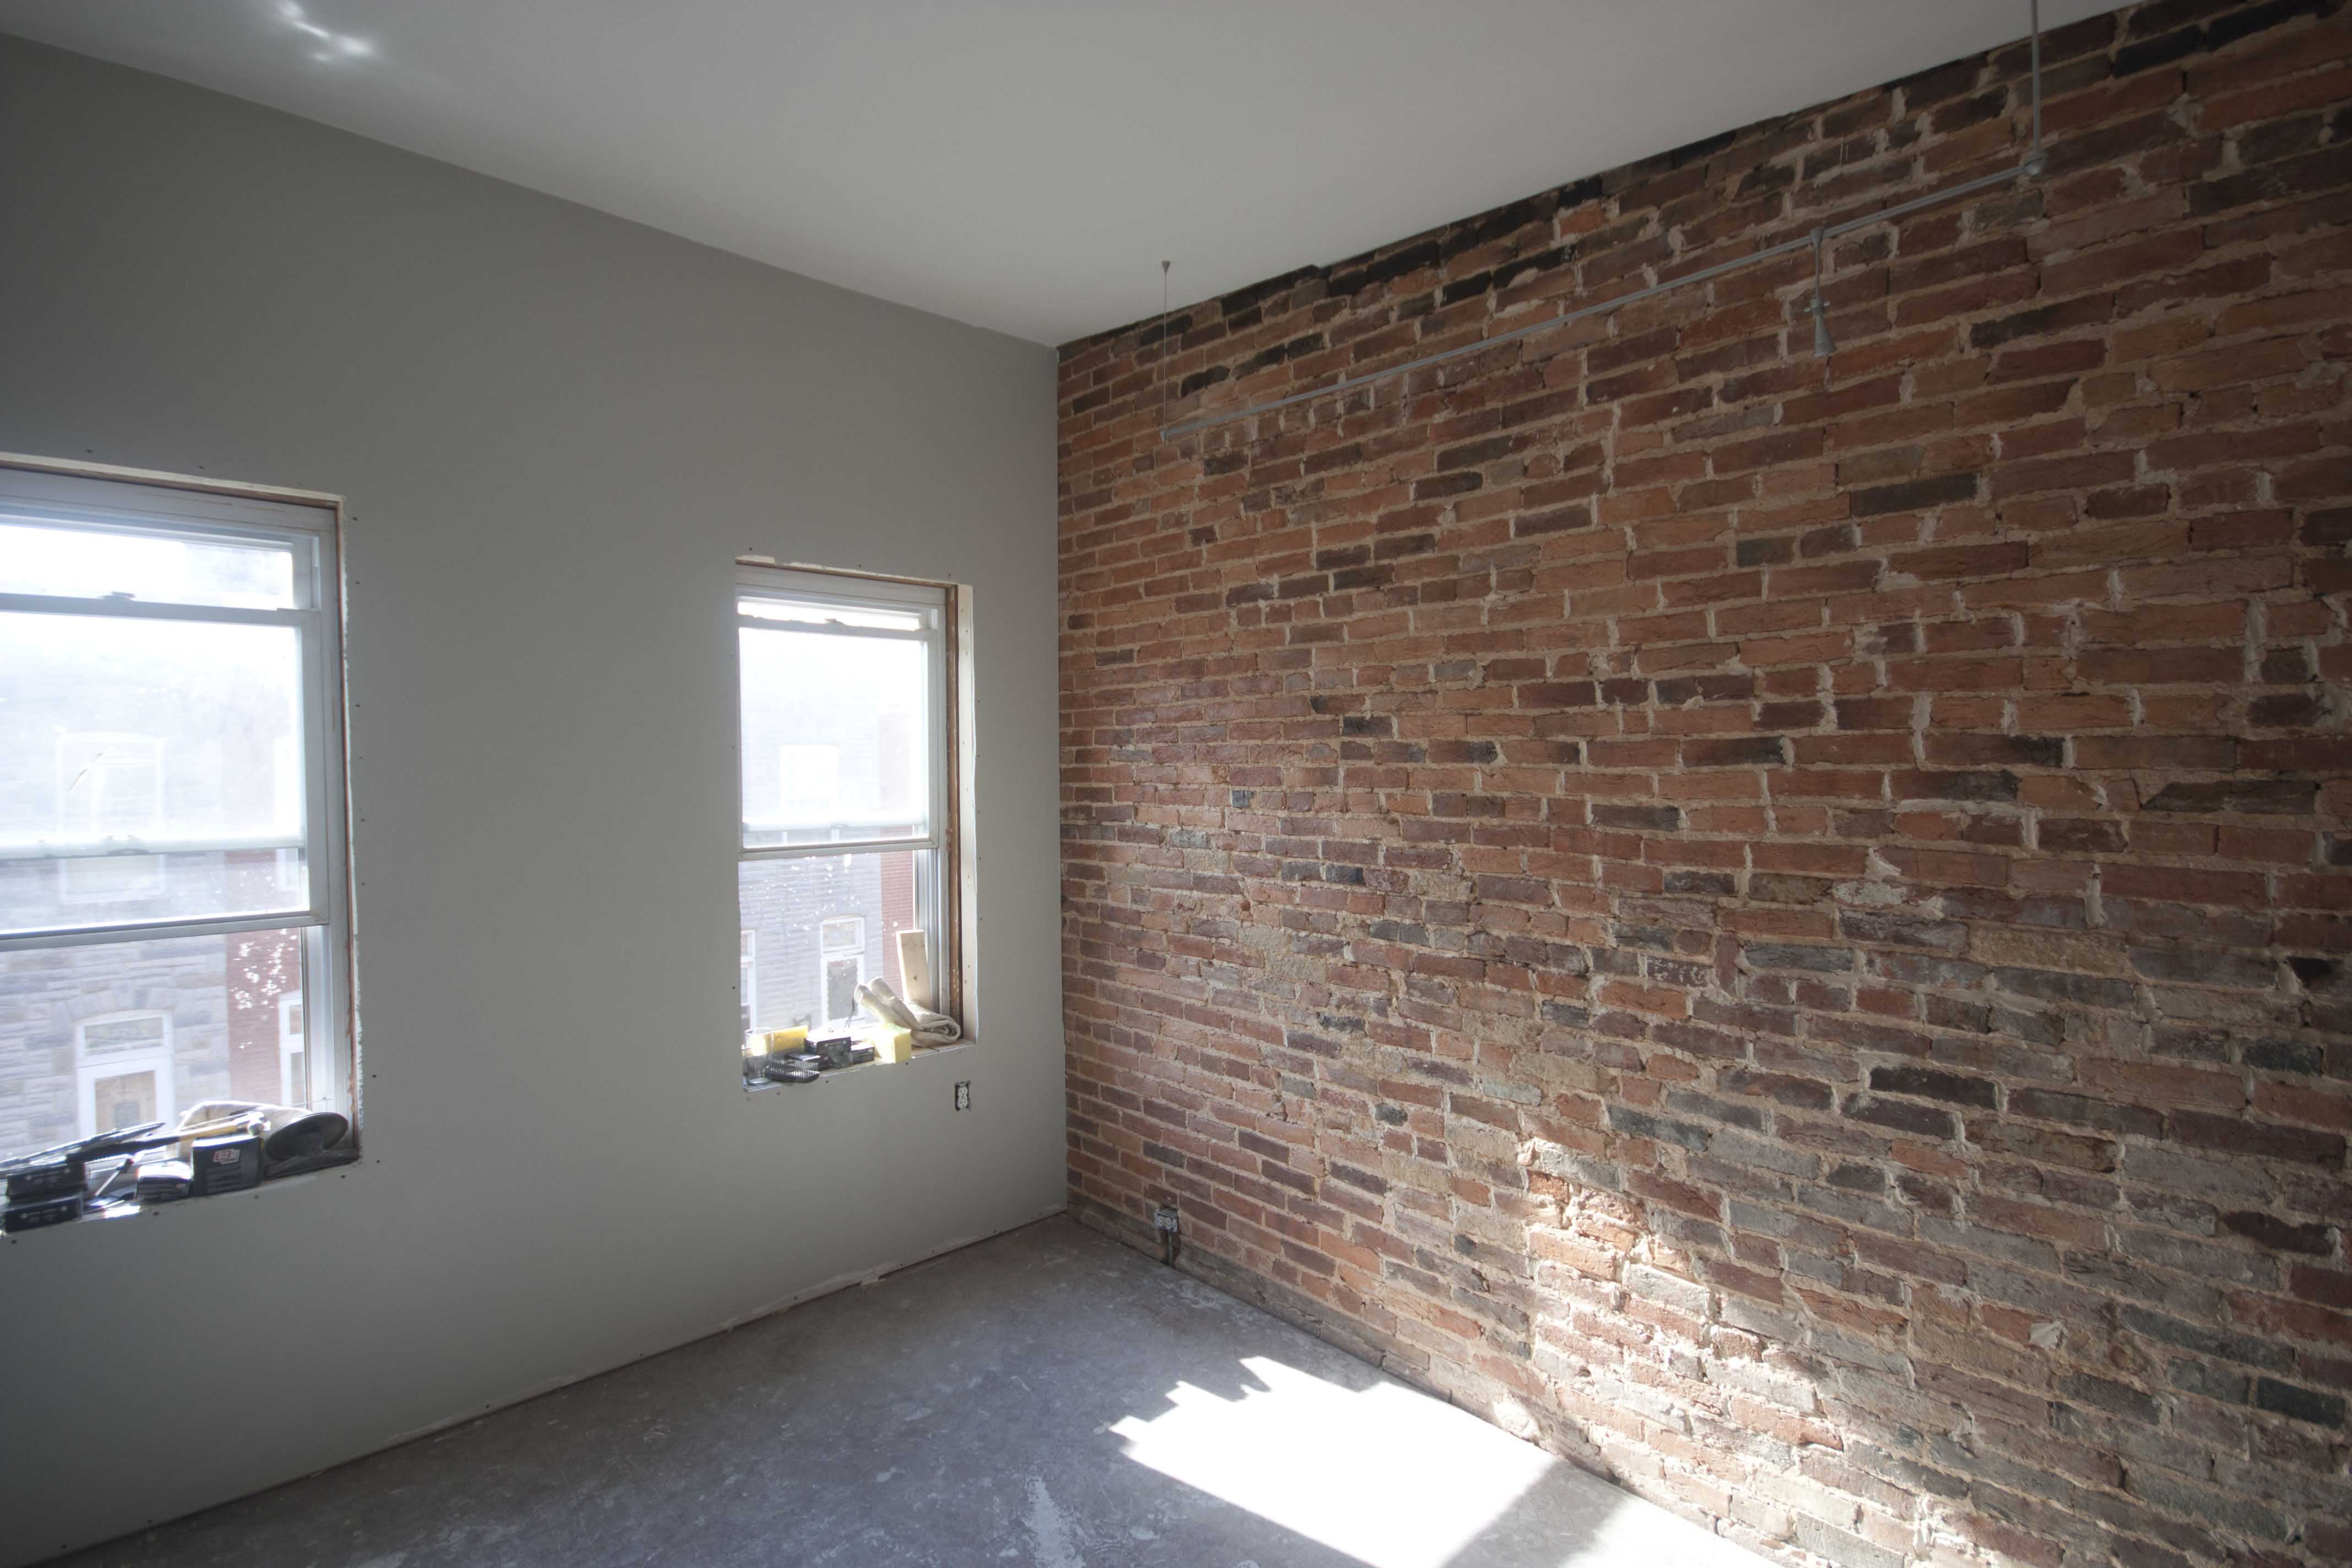
The room all cleaned up and ready to chip the plaster away from the brick.

So this process sucks. I used a cold rolled chisel, and a hammer. So much effort goes into this process. Lots of hours. Its like excavating dinosaurs. I hate it.
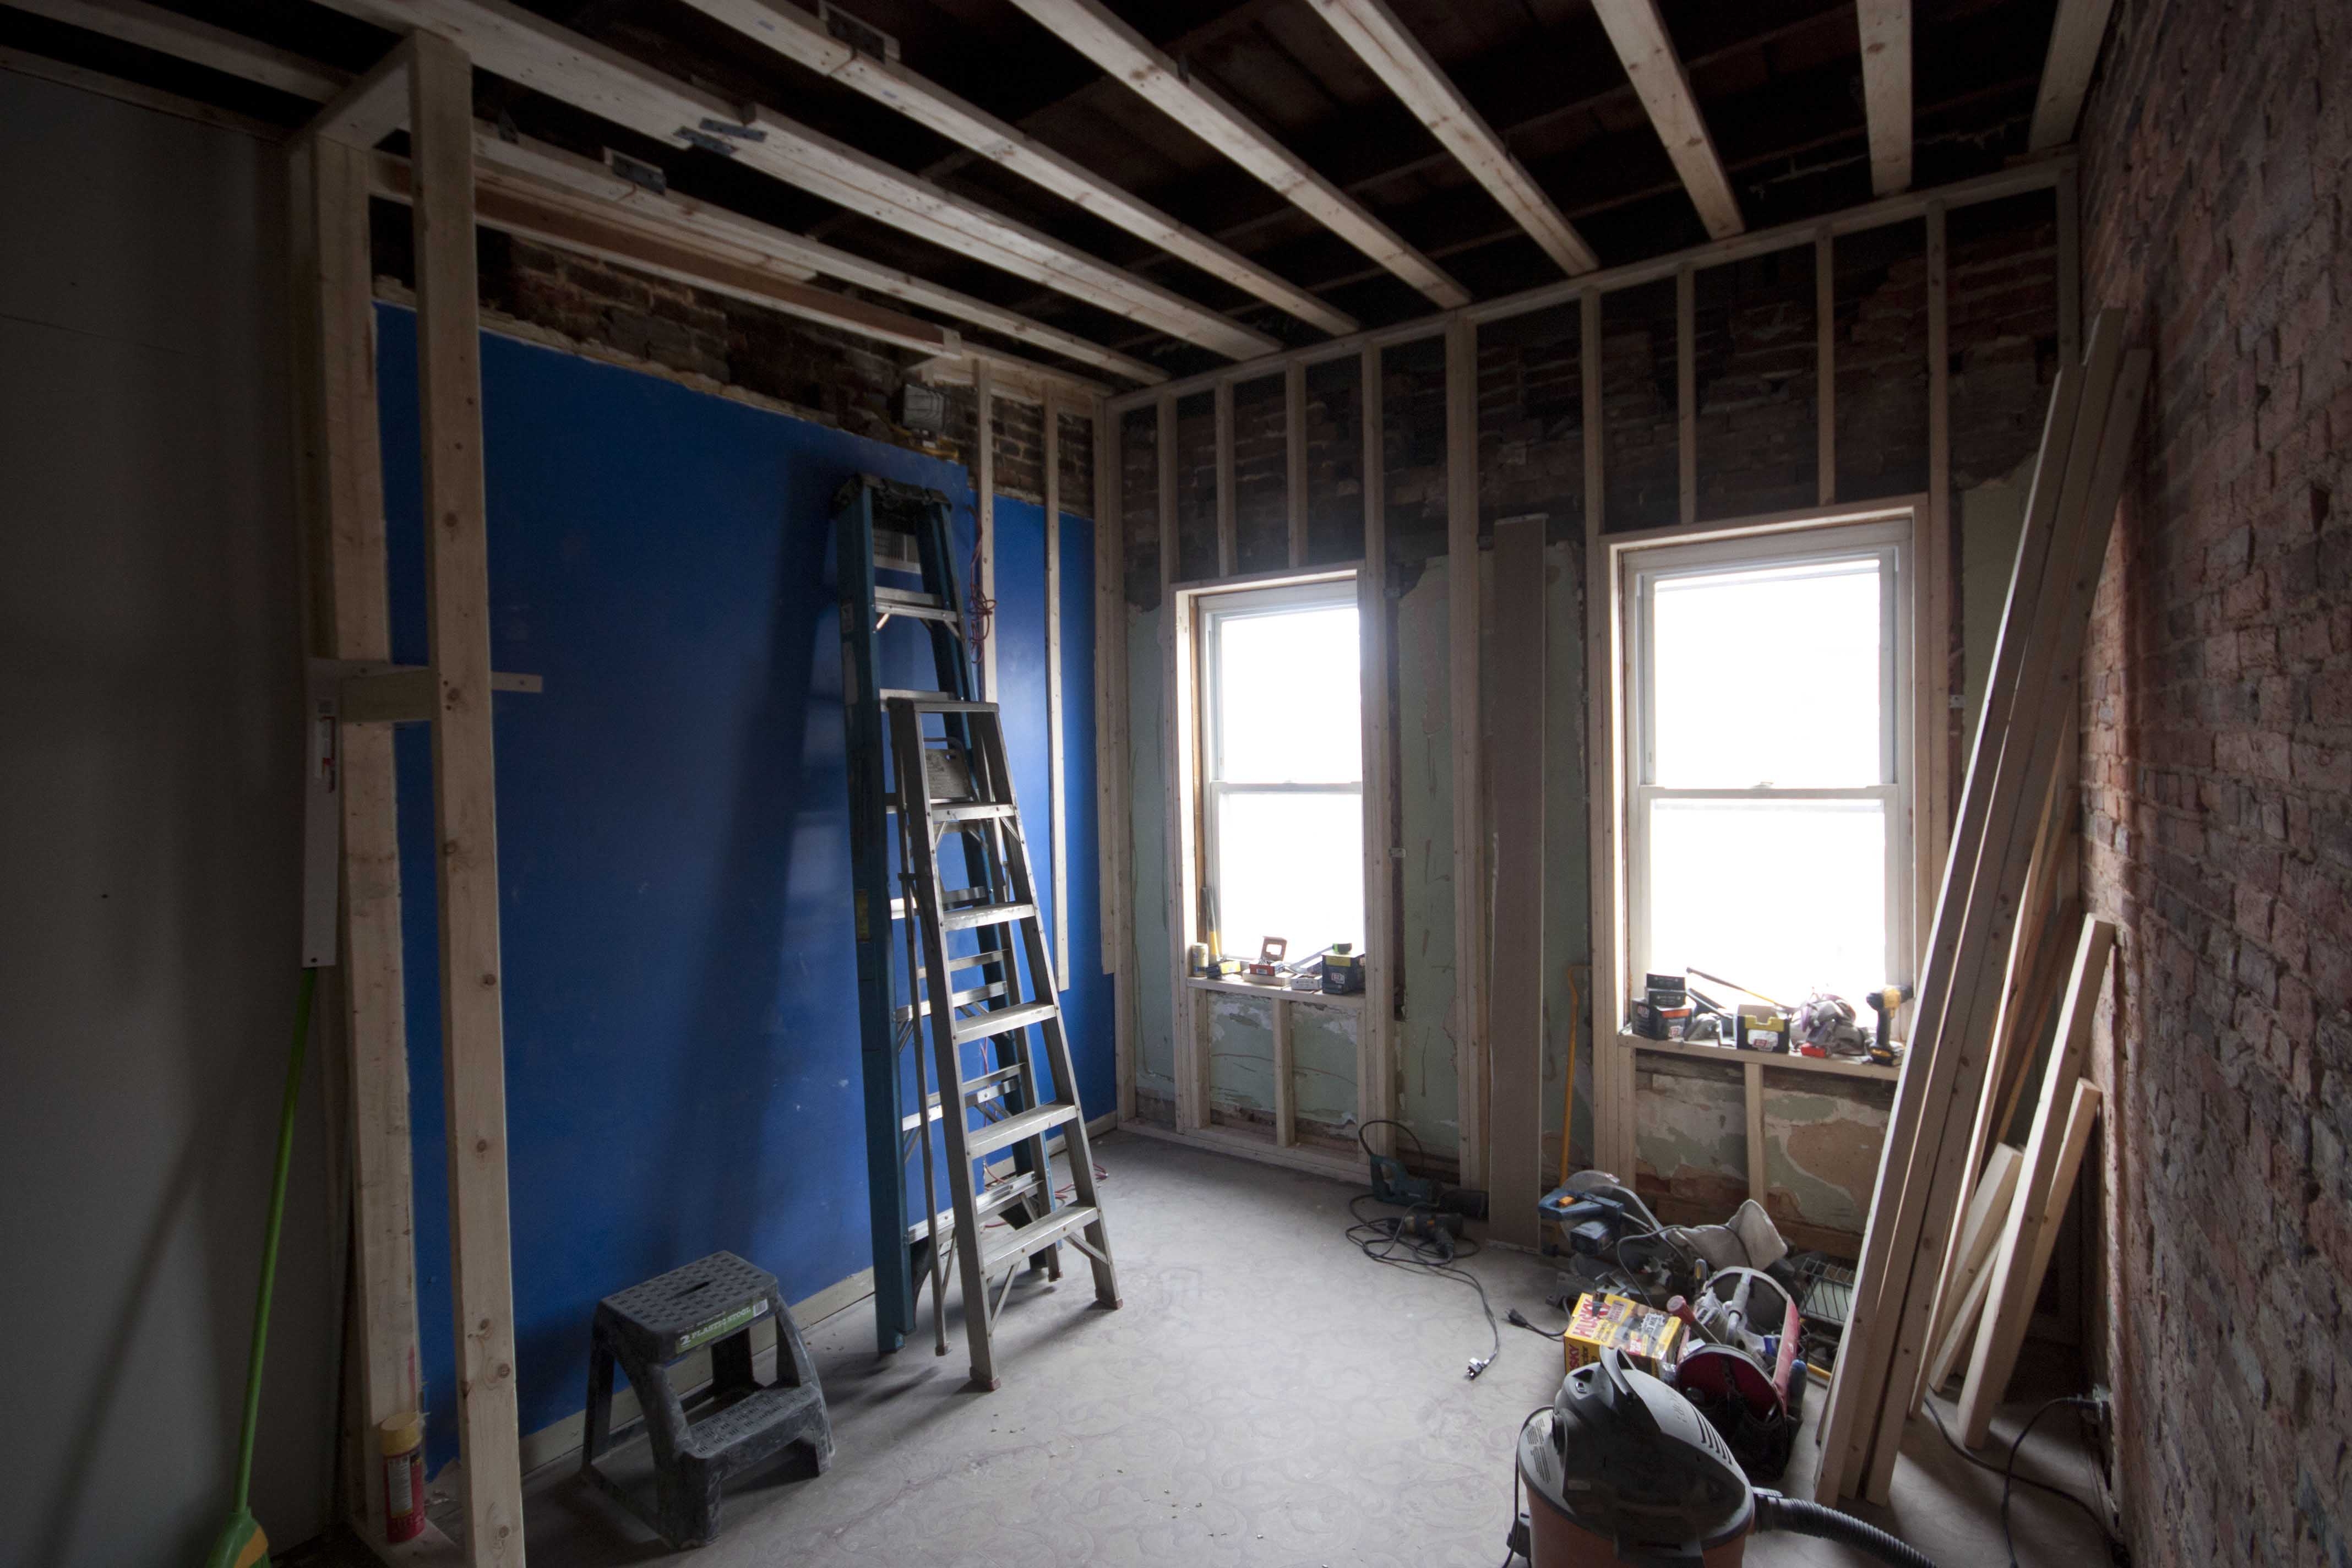
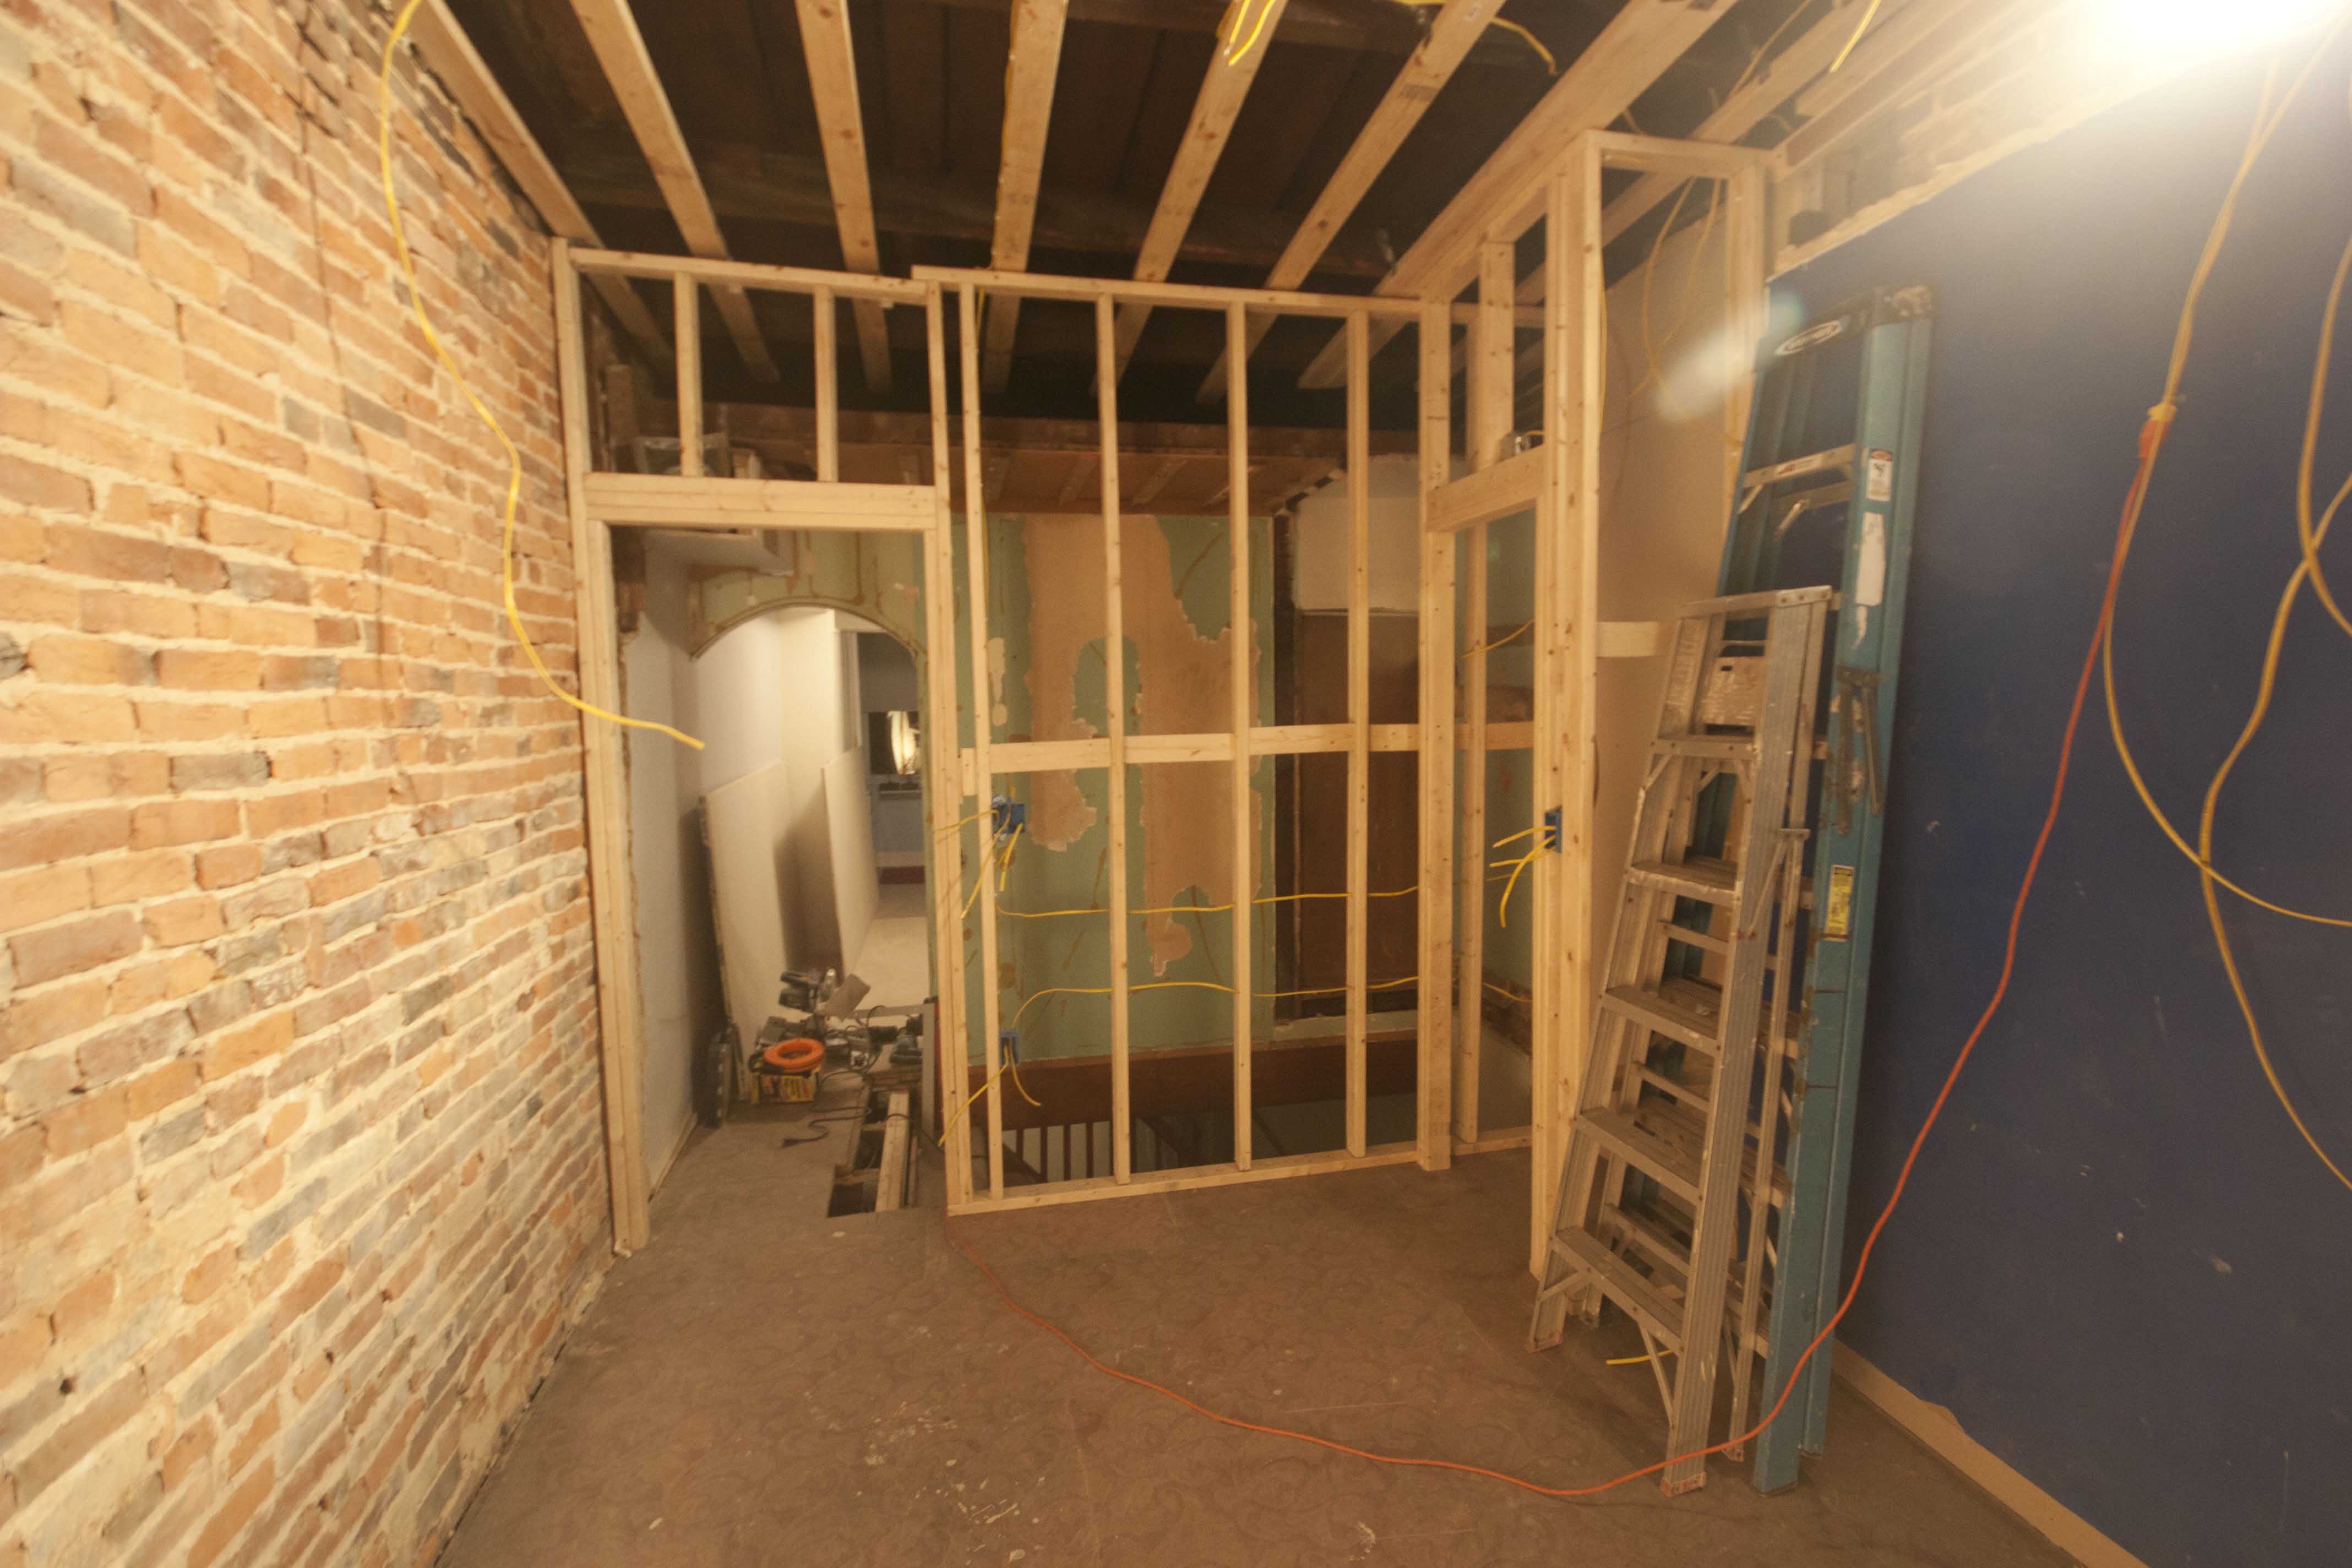
Studding out the walls and framing the new closet.
Running Electrical.
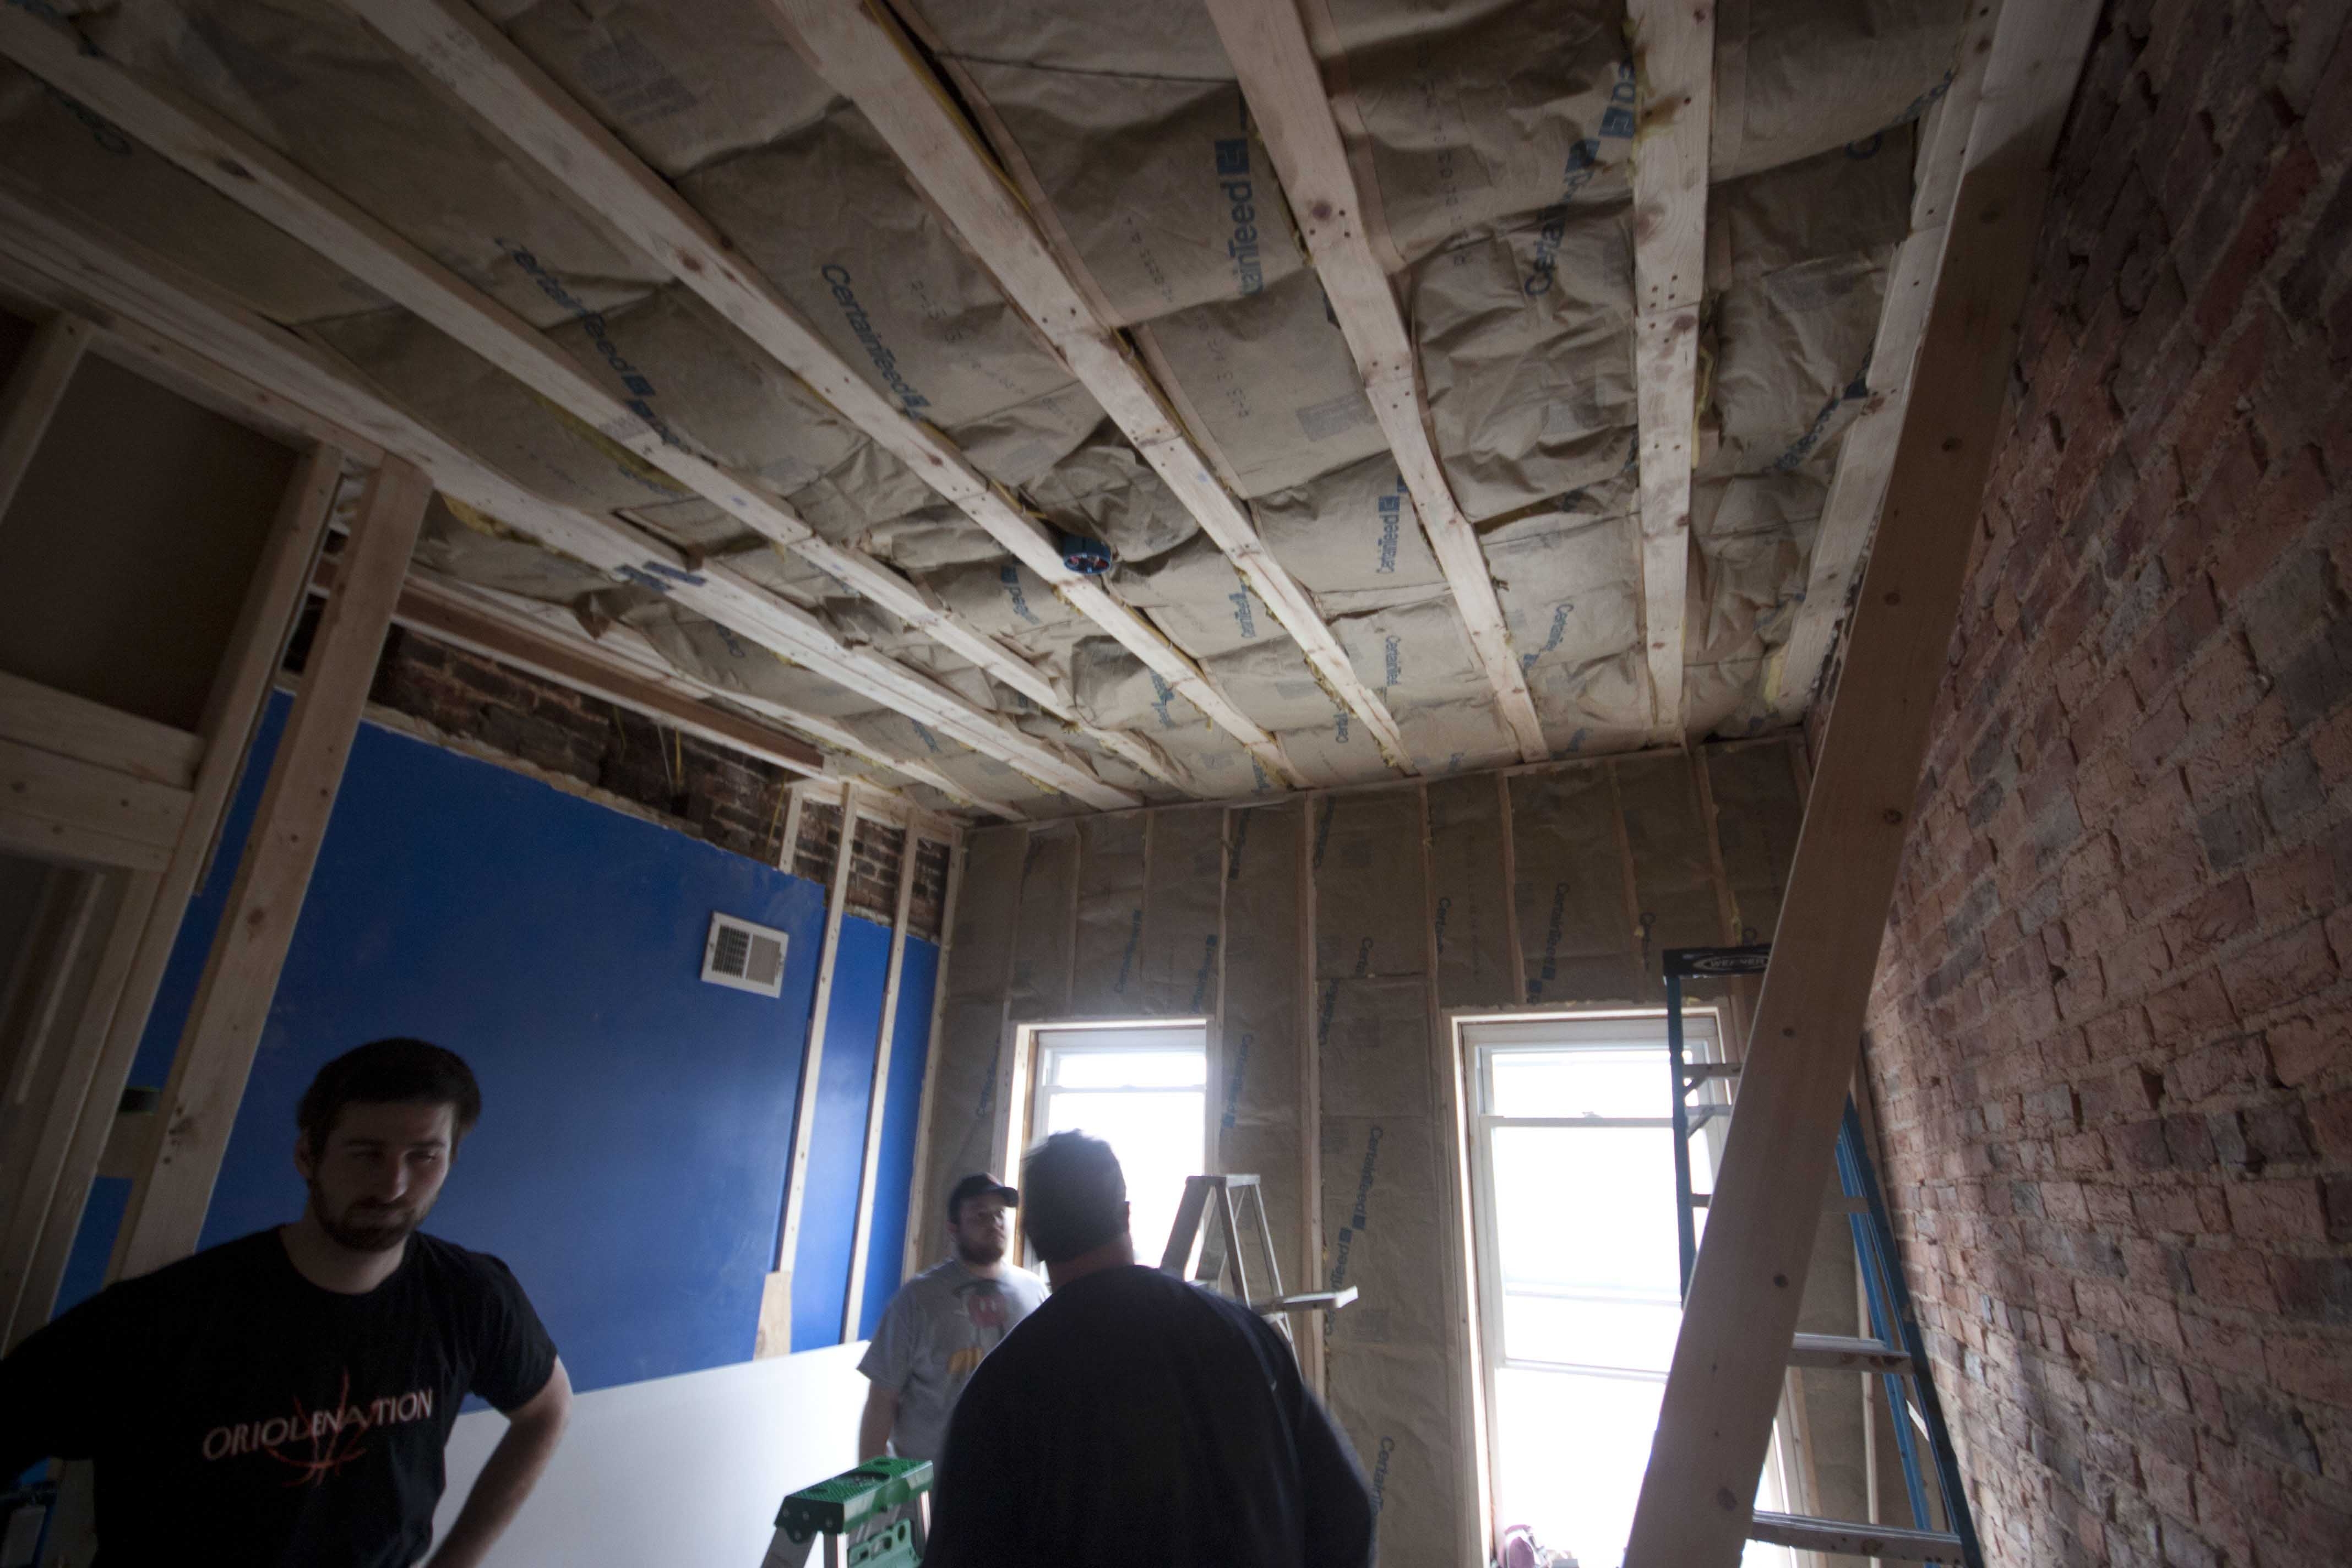
Insulated, and ready to hang drywall. I had Kyle, my brother, and dad help me on this step. It went up pretty fast.
Mud (x3) and sanding (x2) time, I hate this shit
Paint
Floors
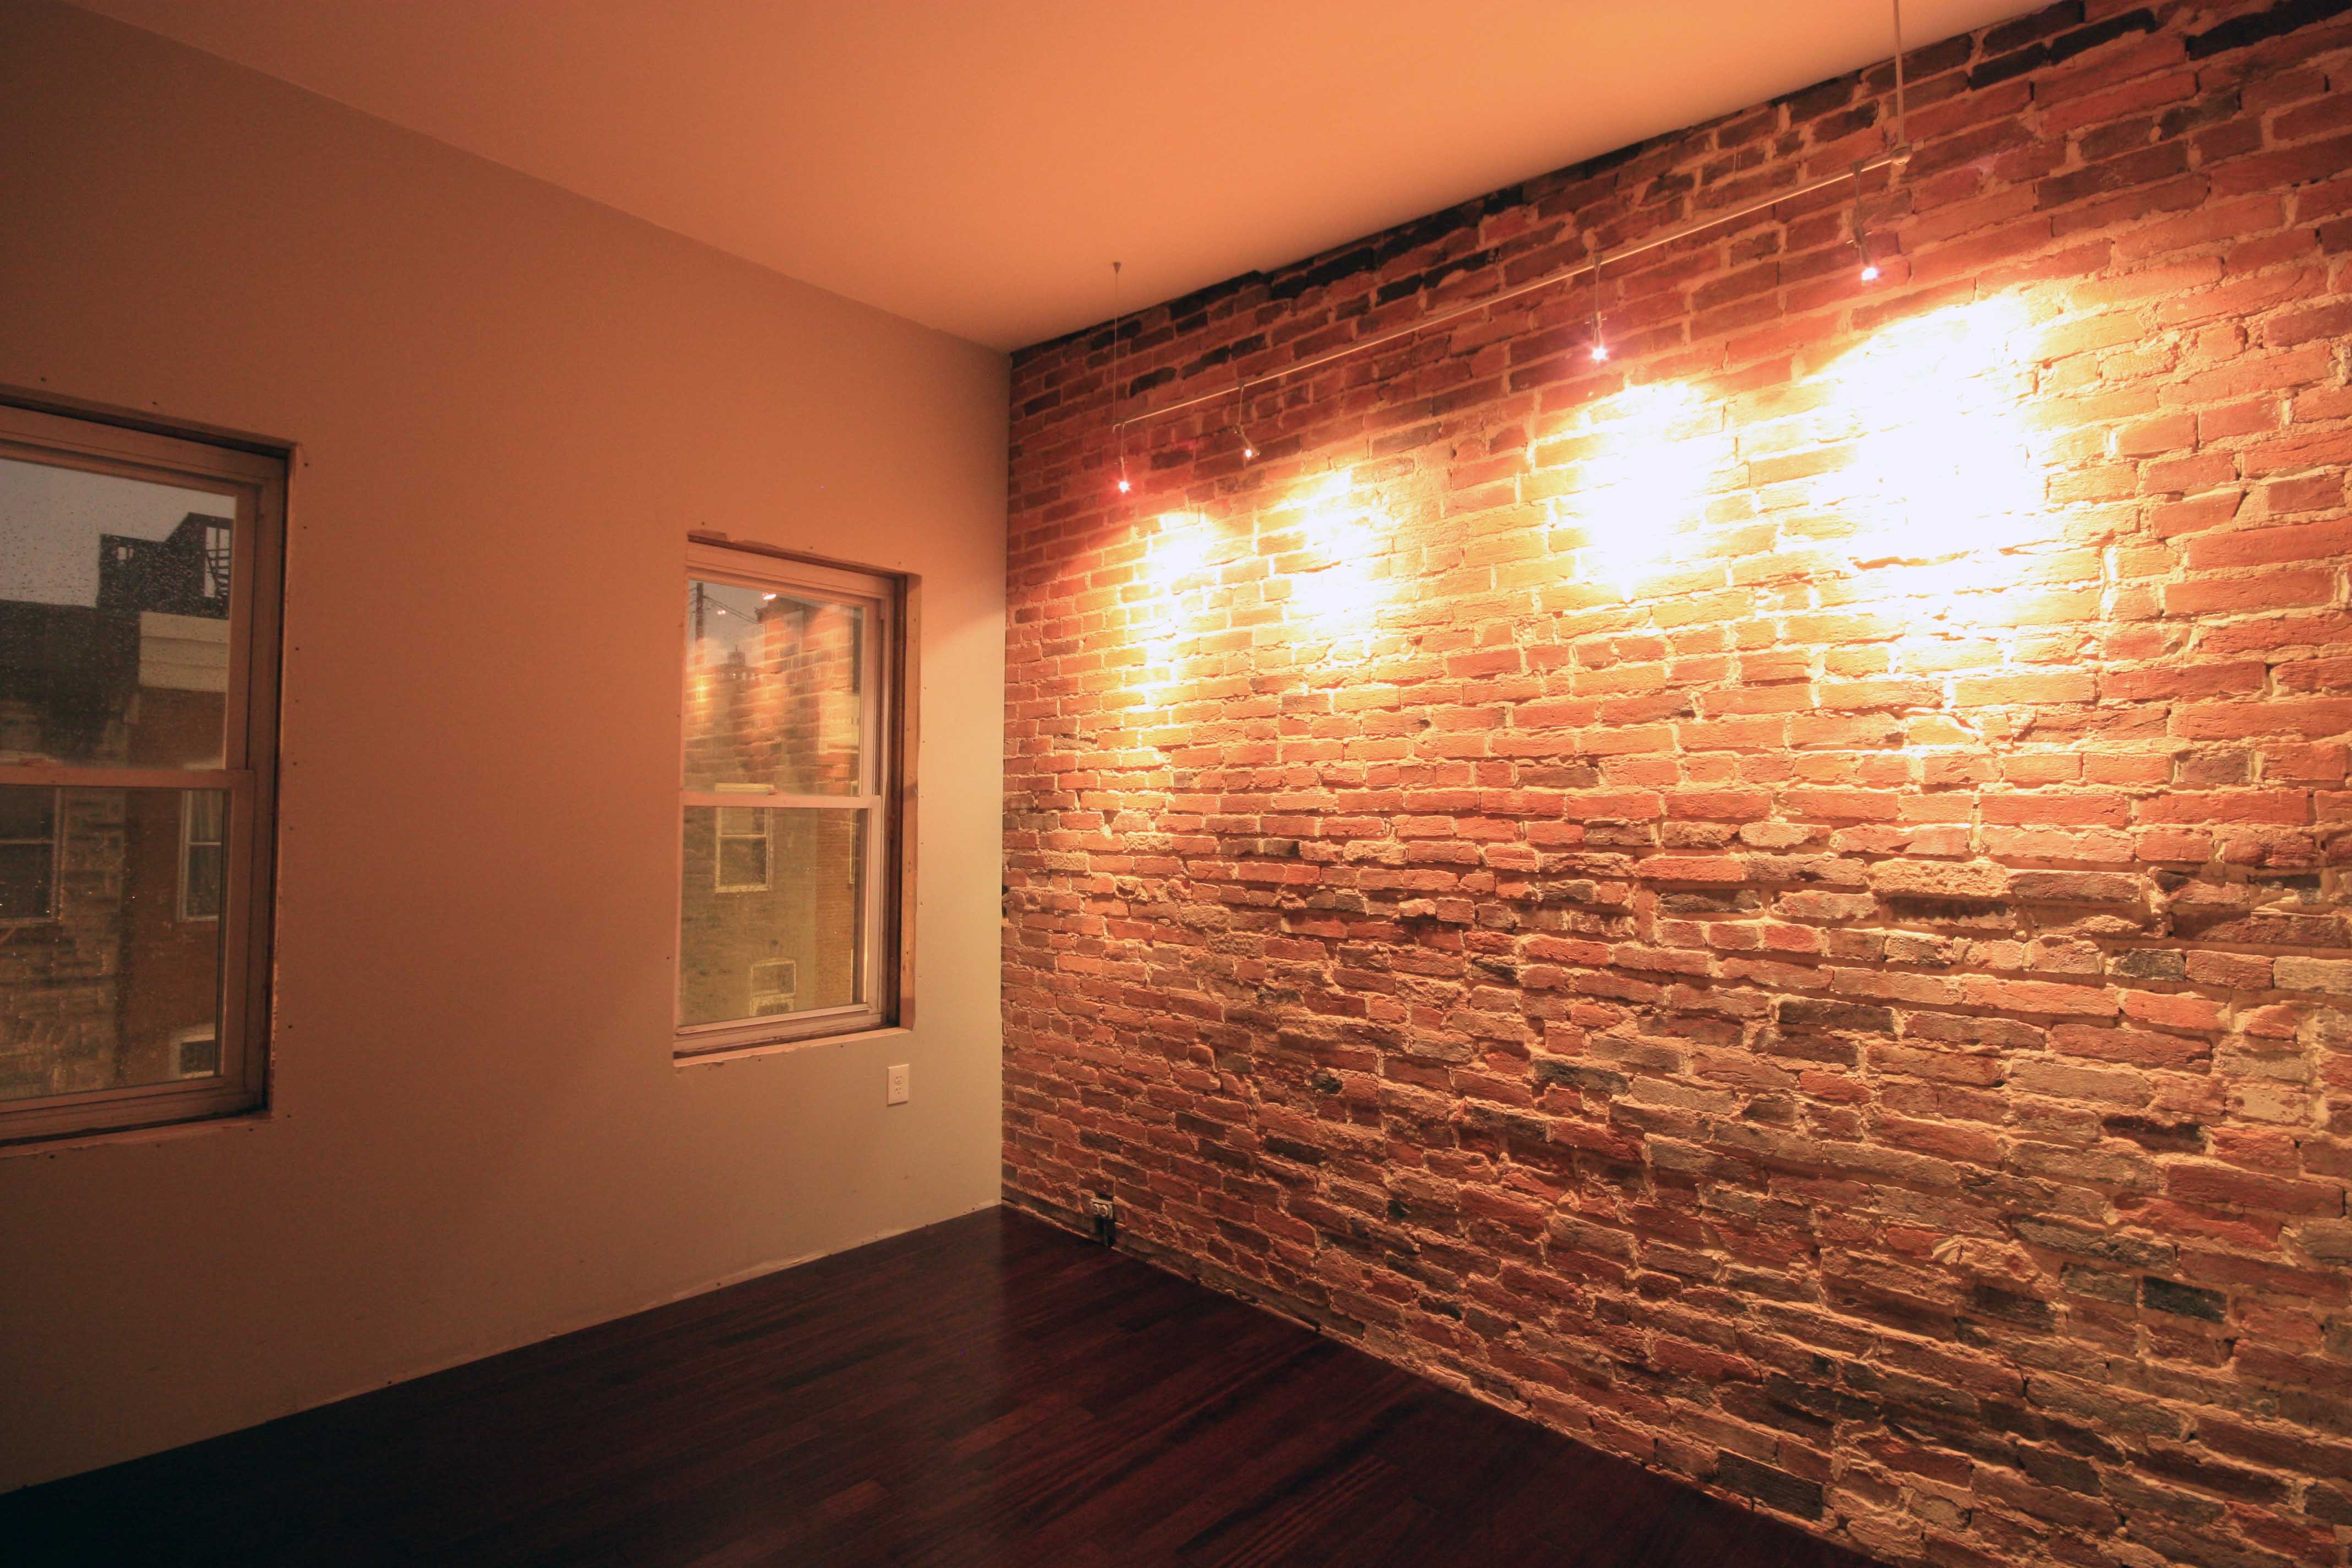
Final Photos!
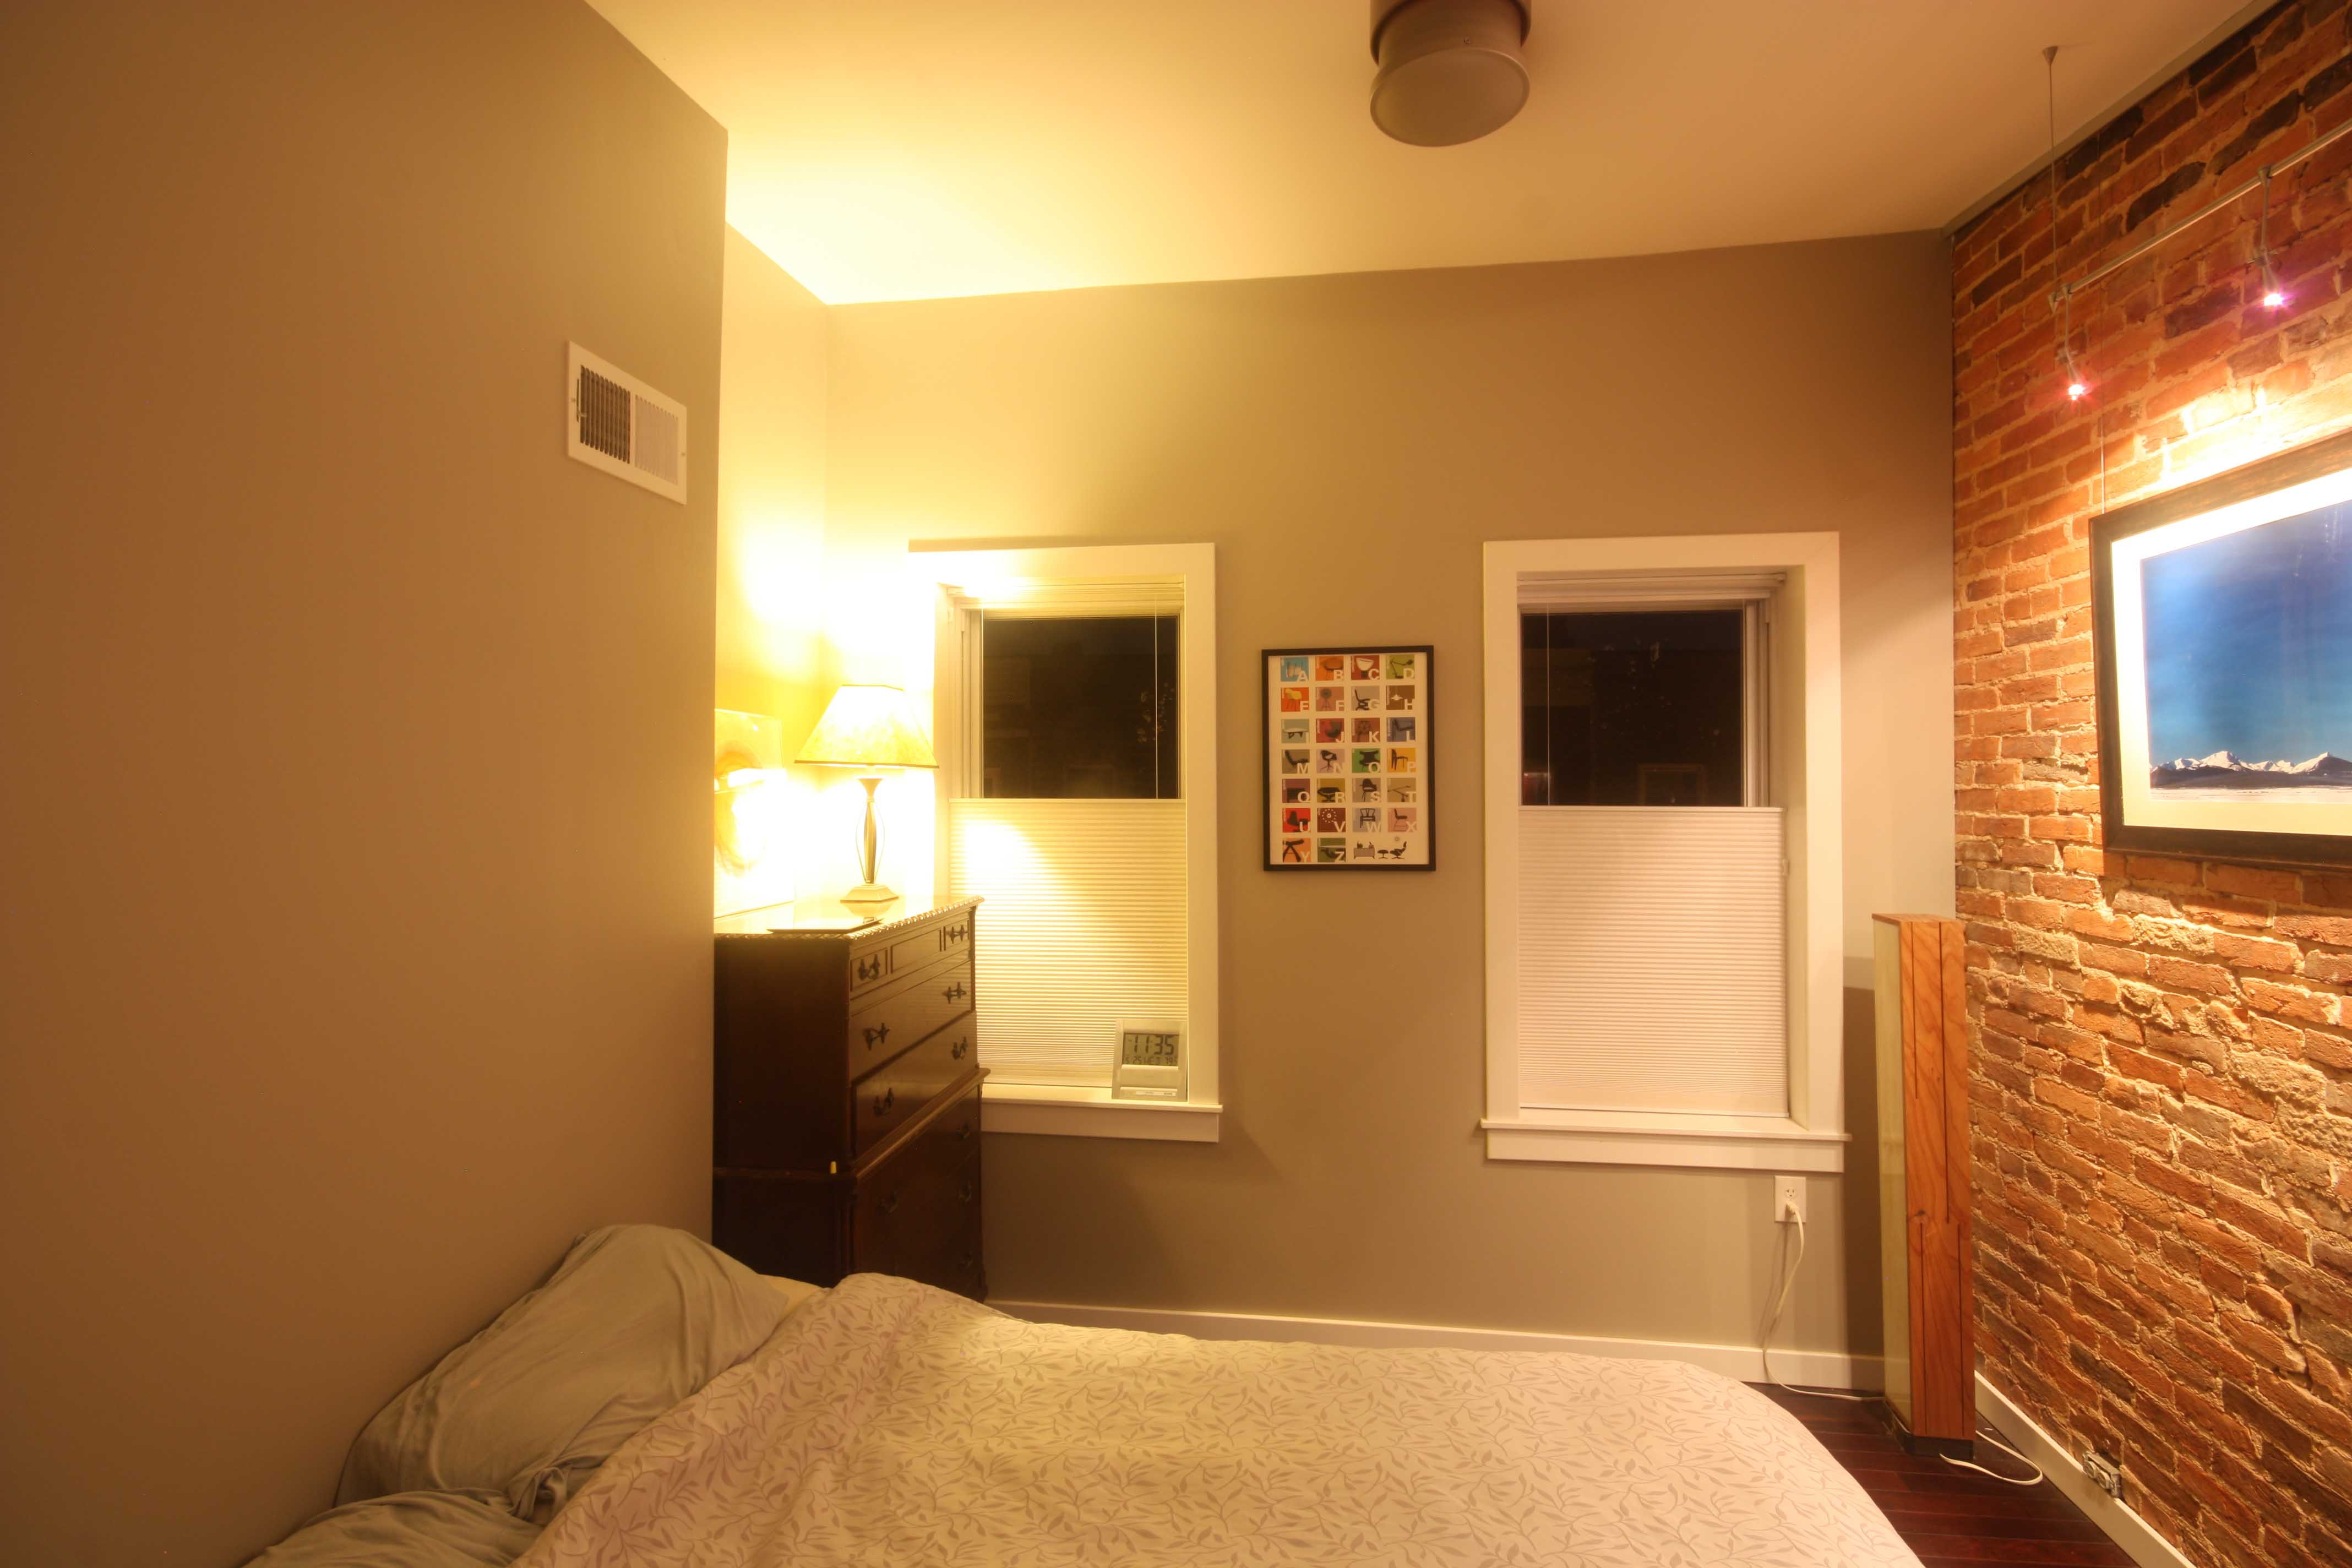
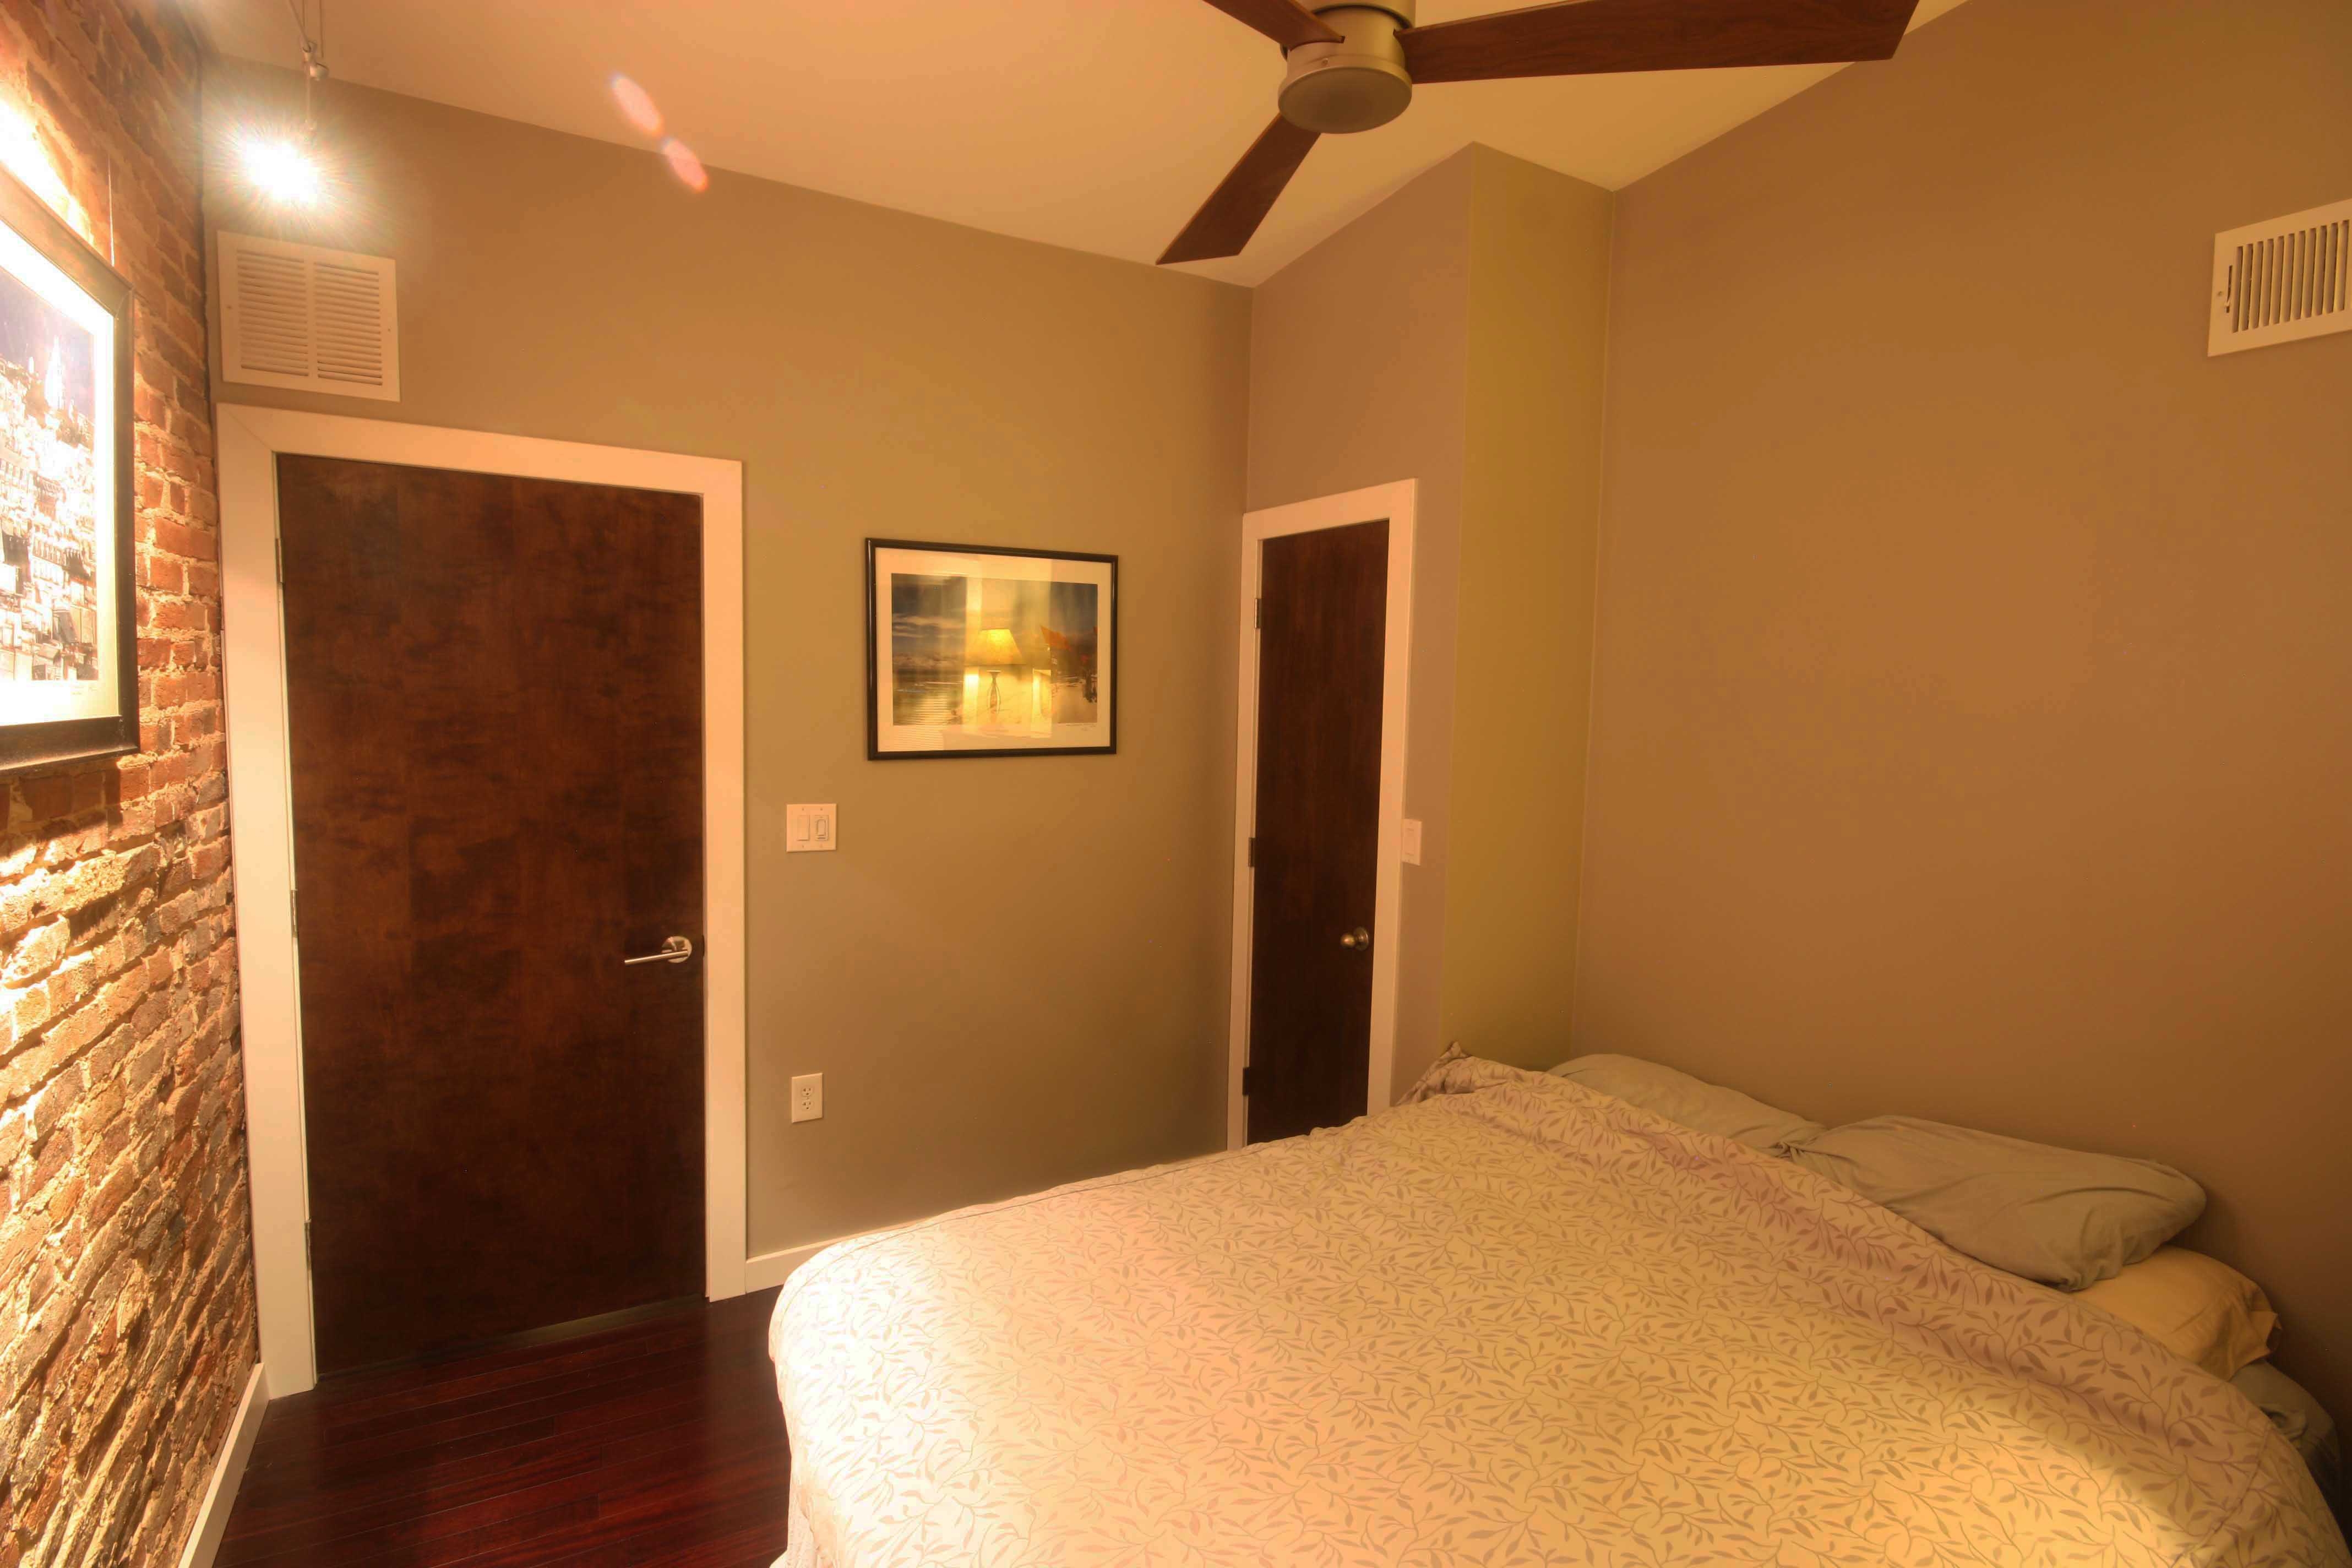
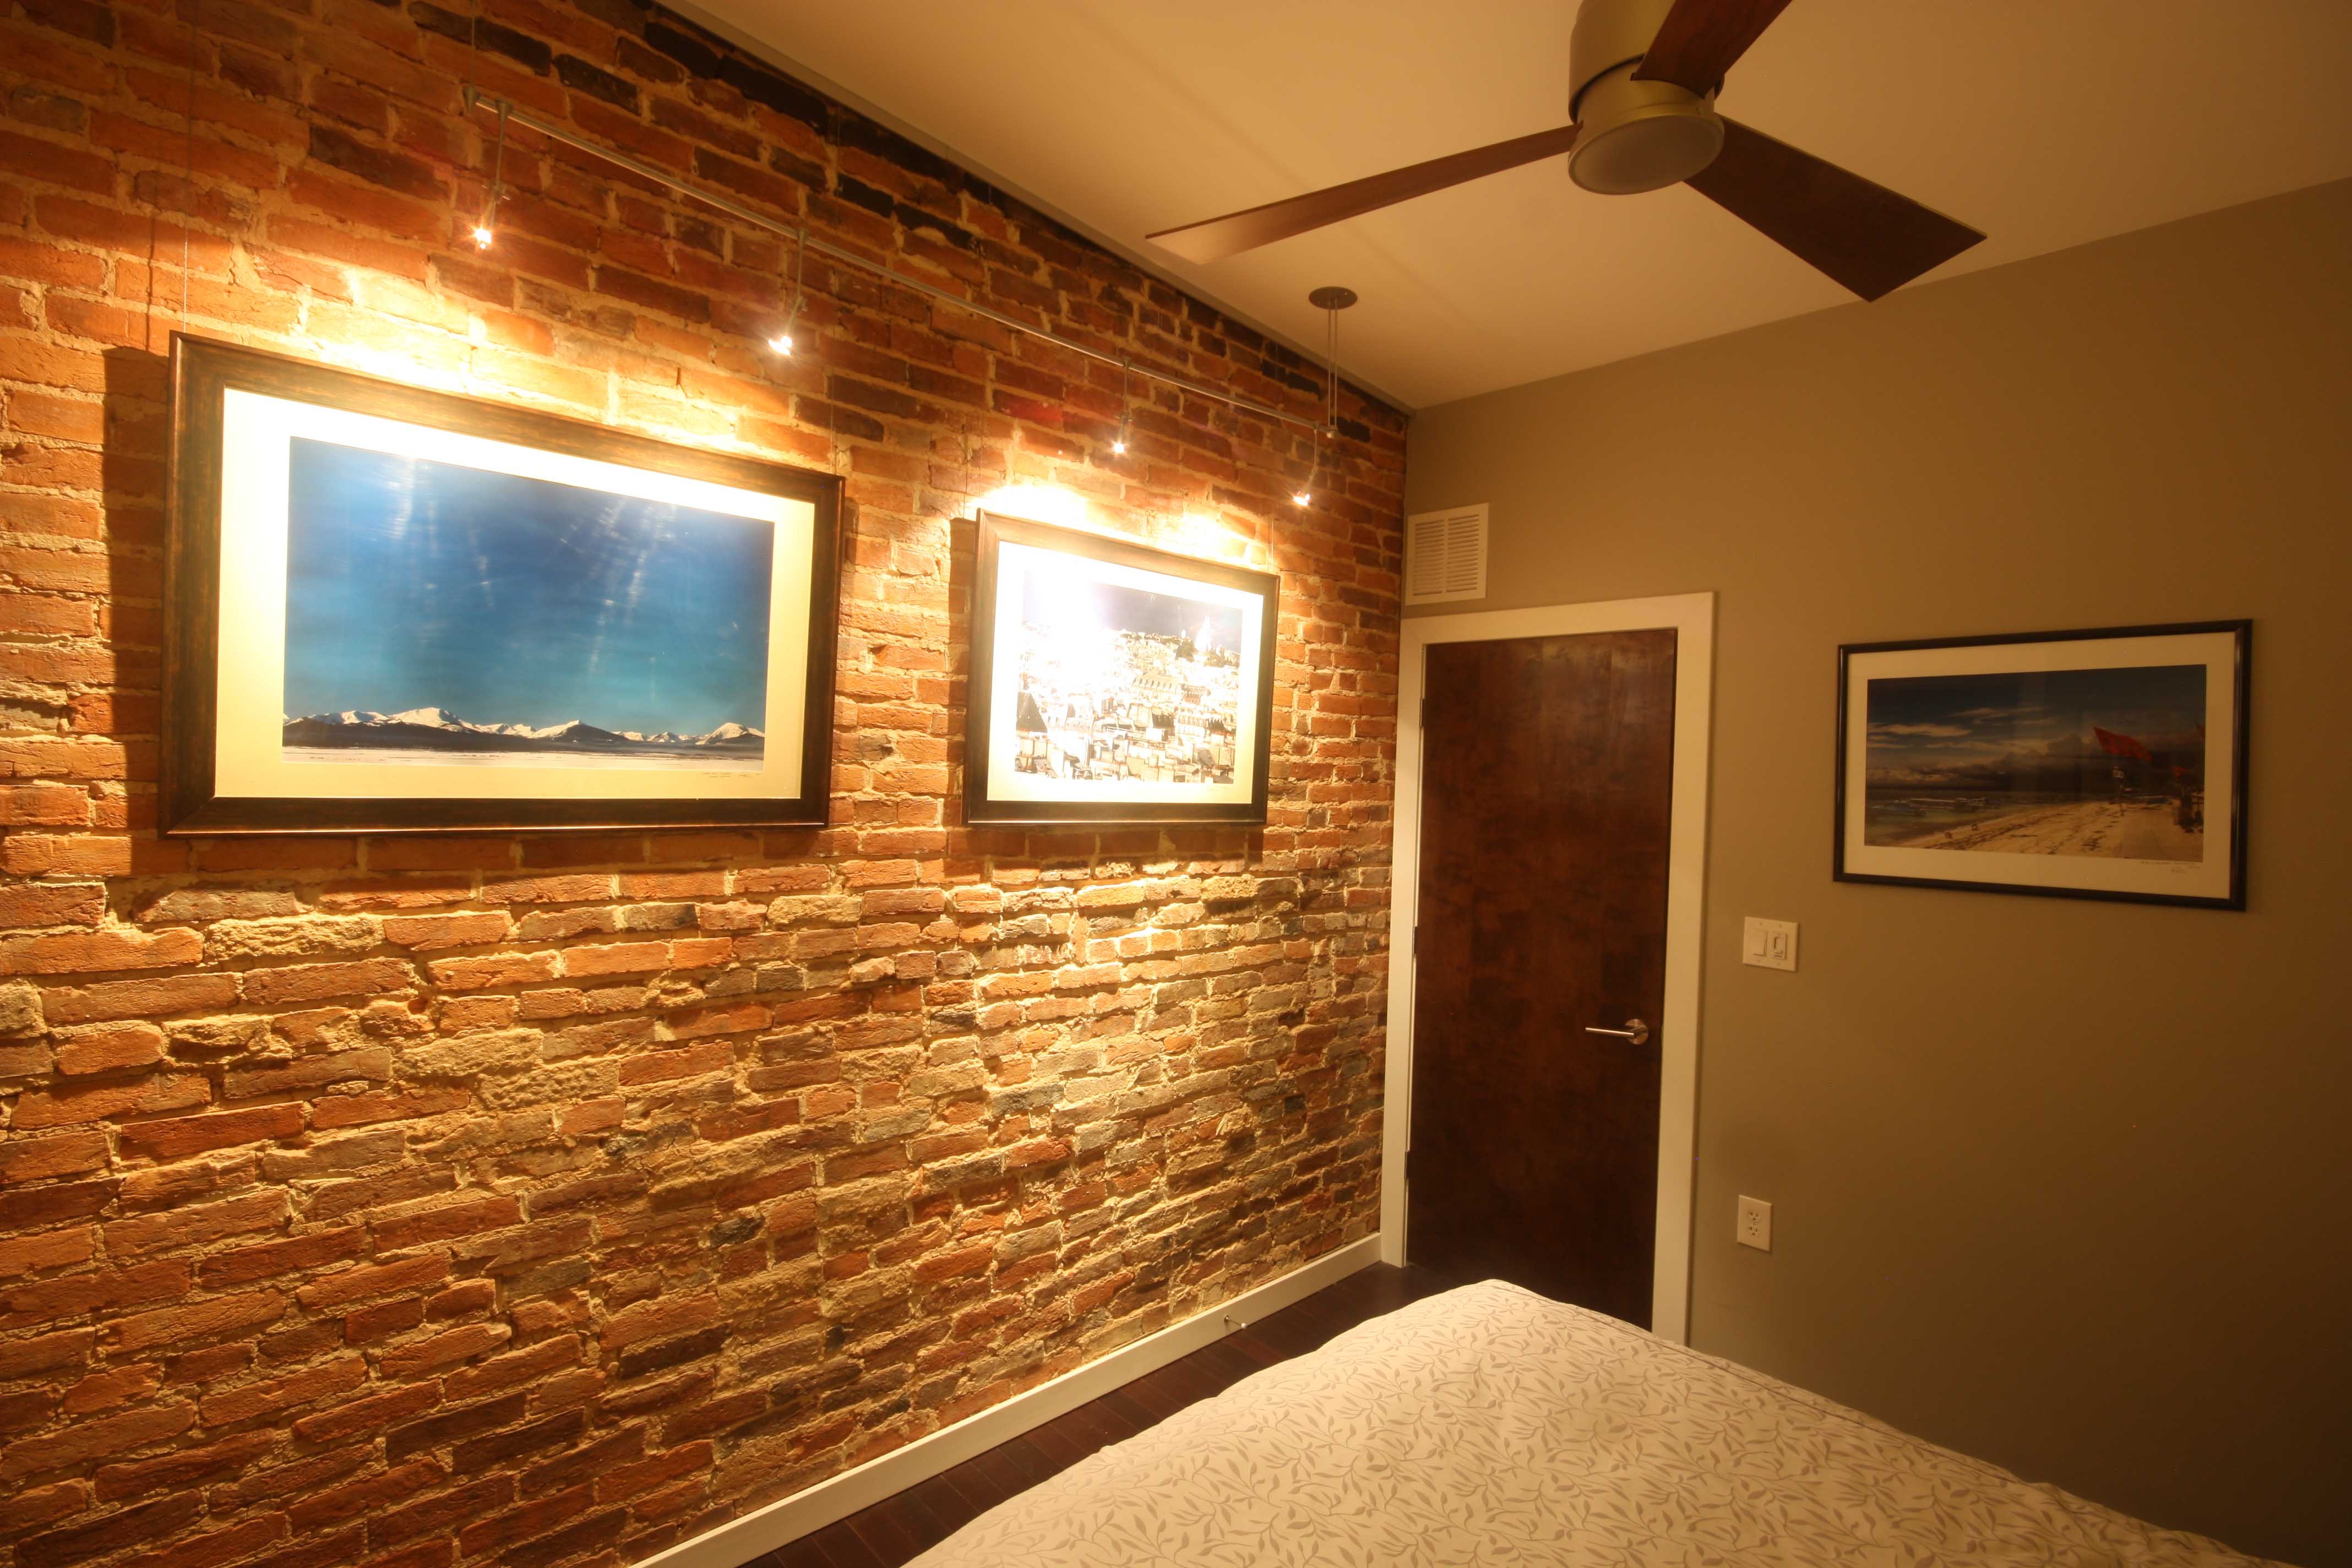
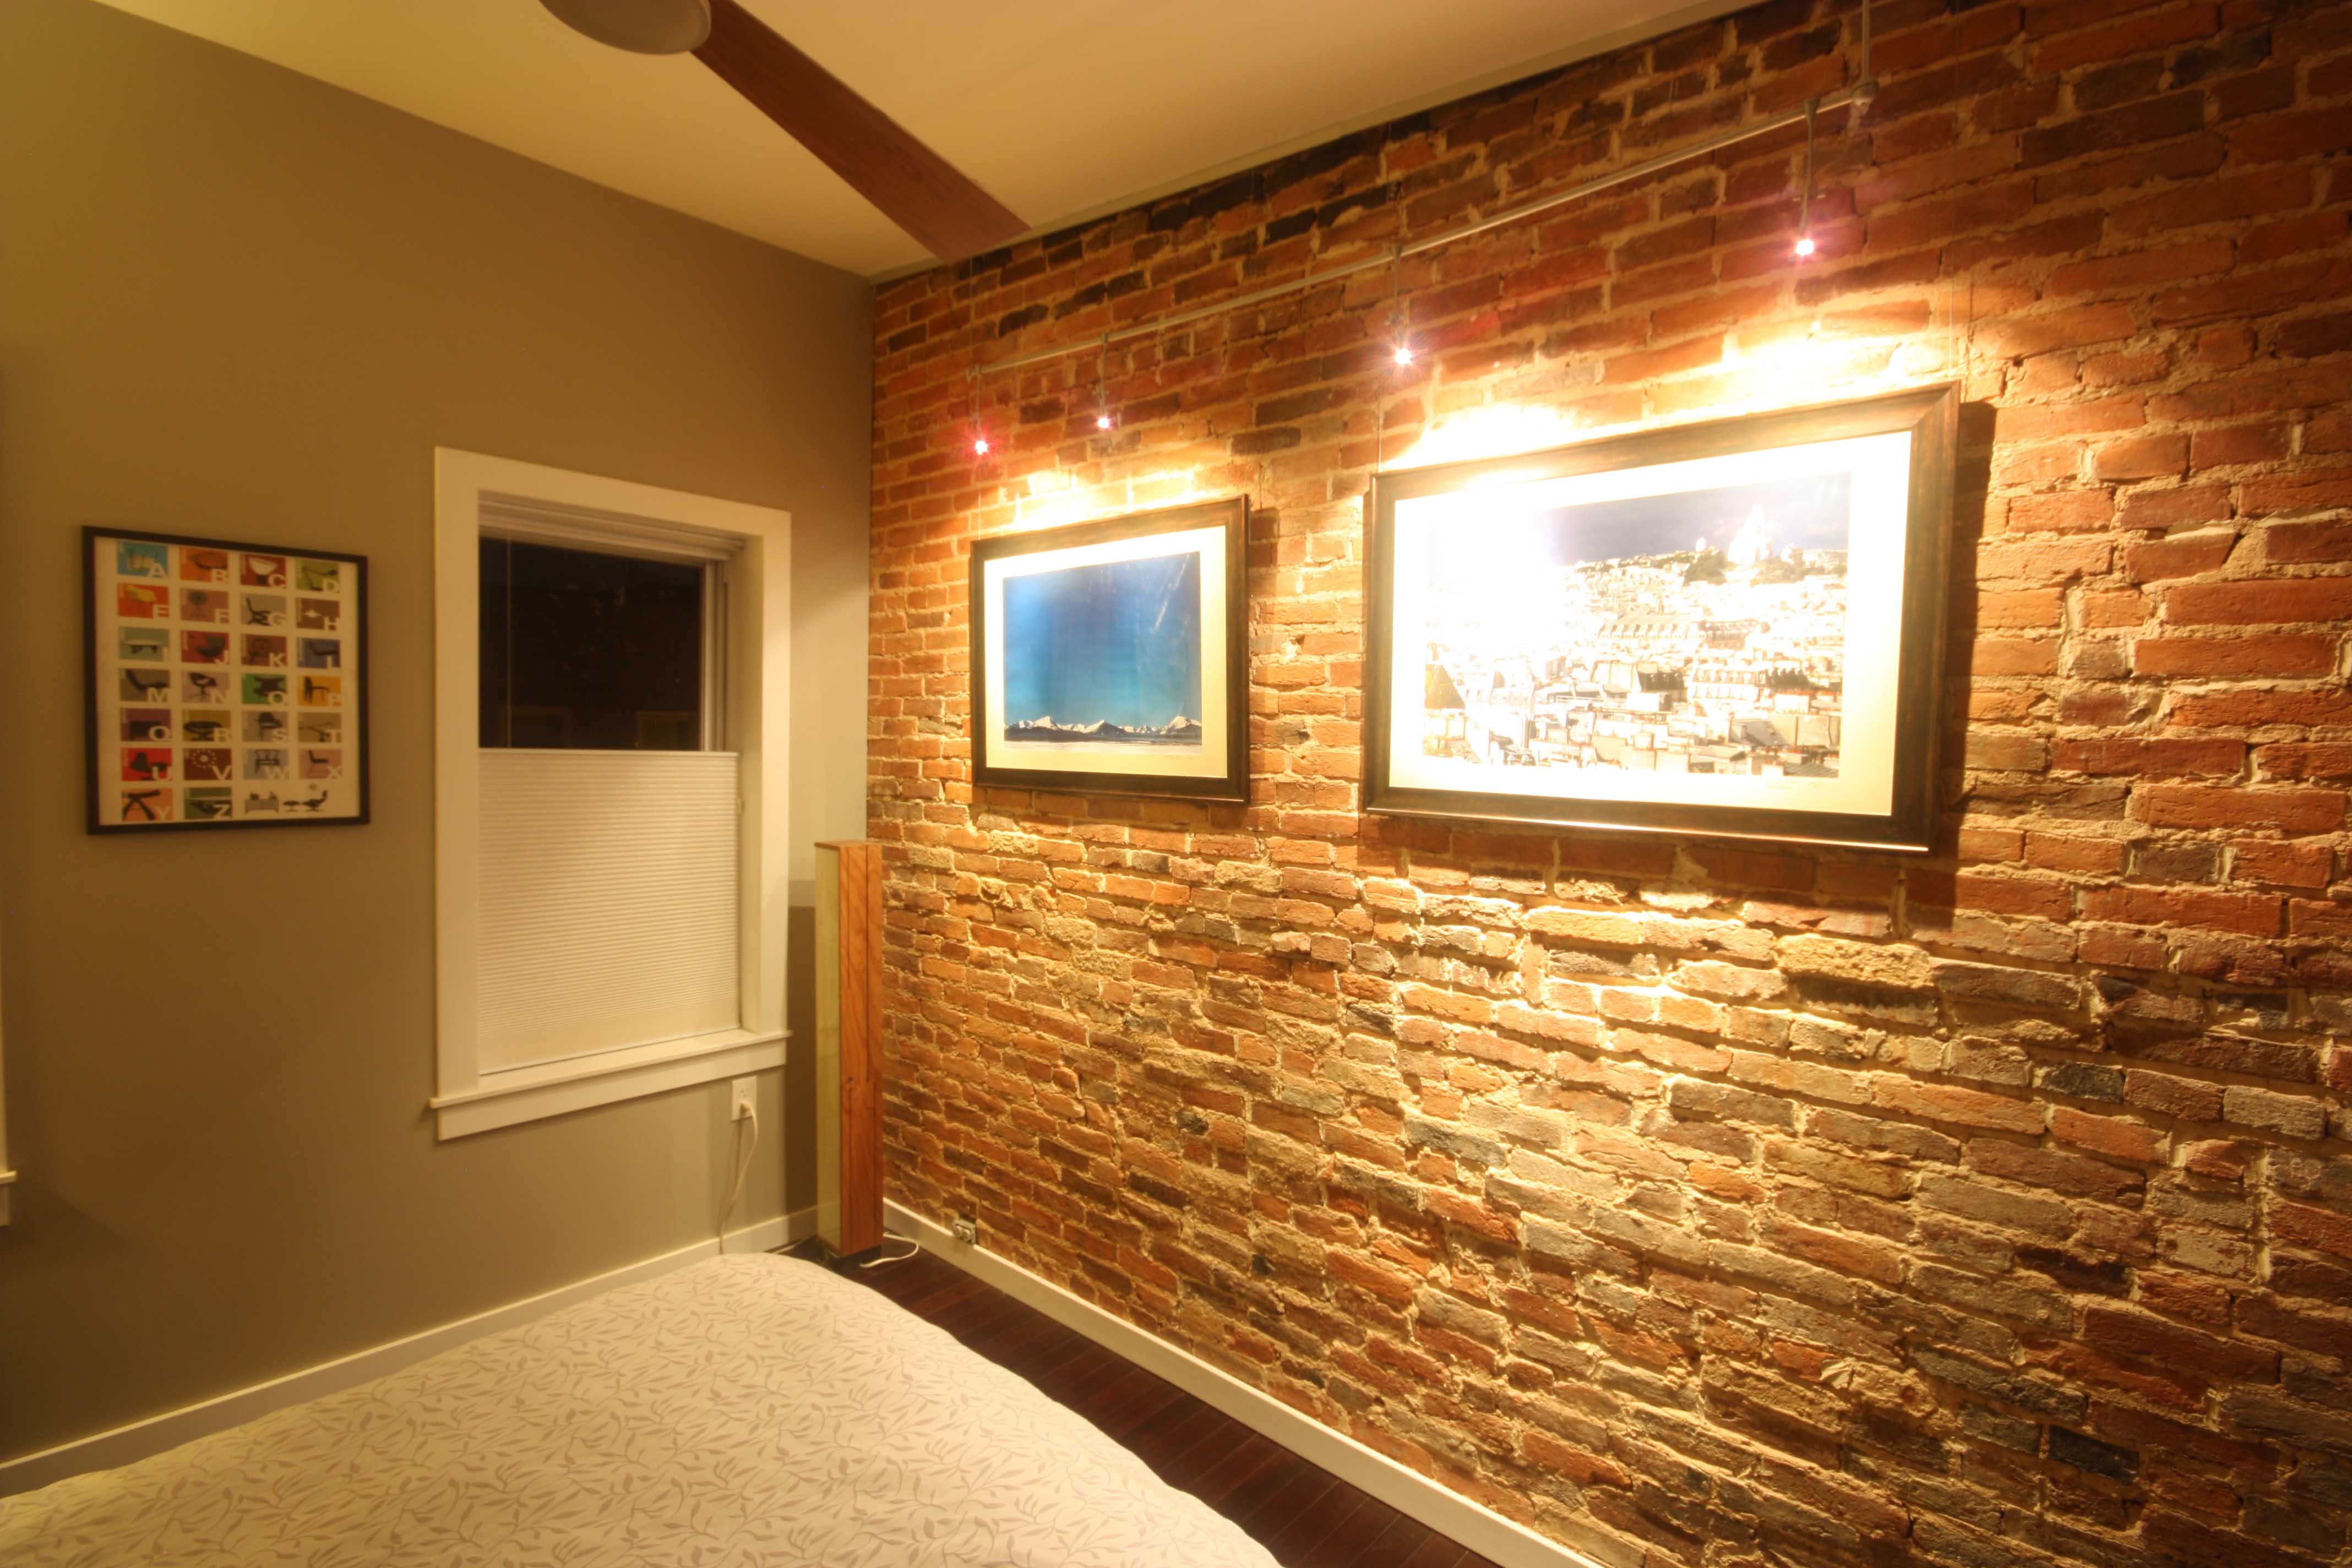
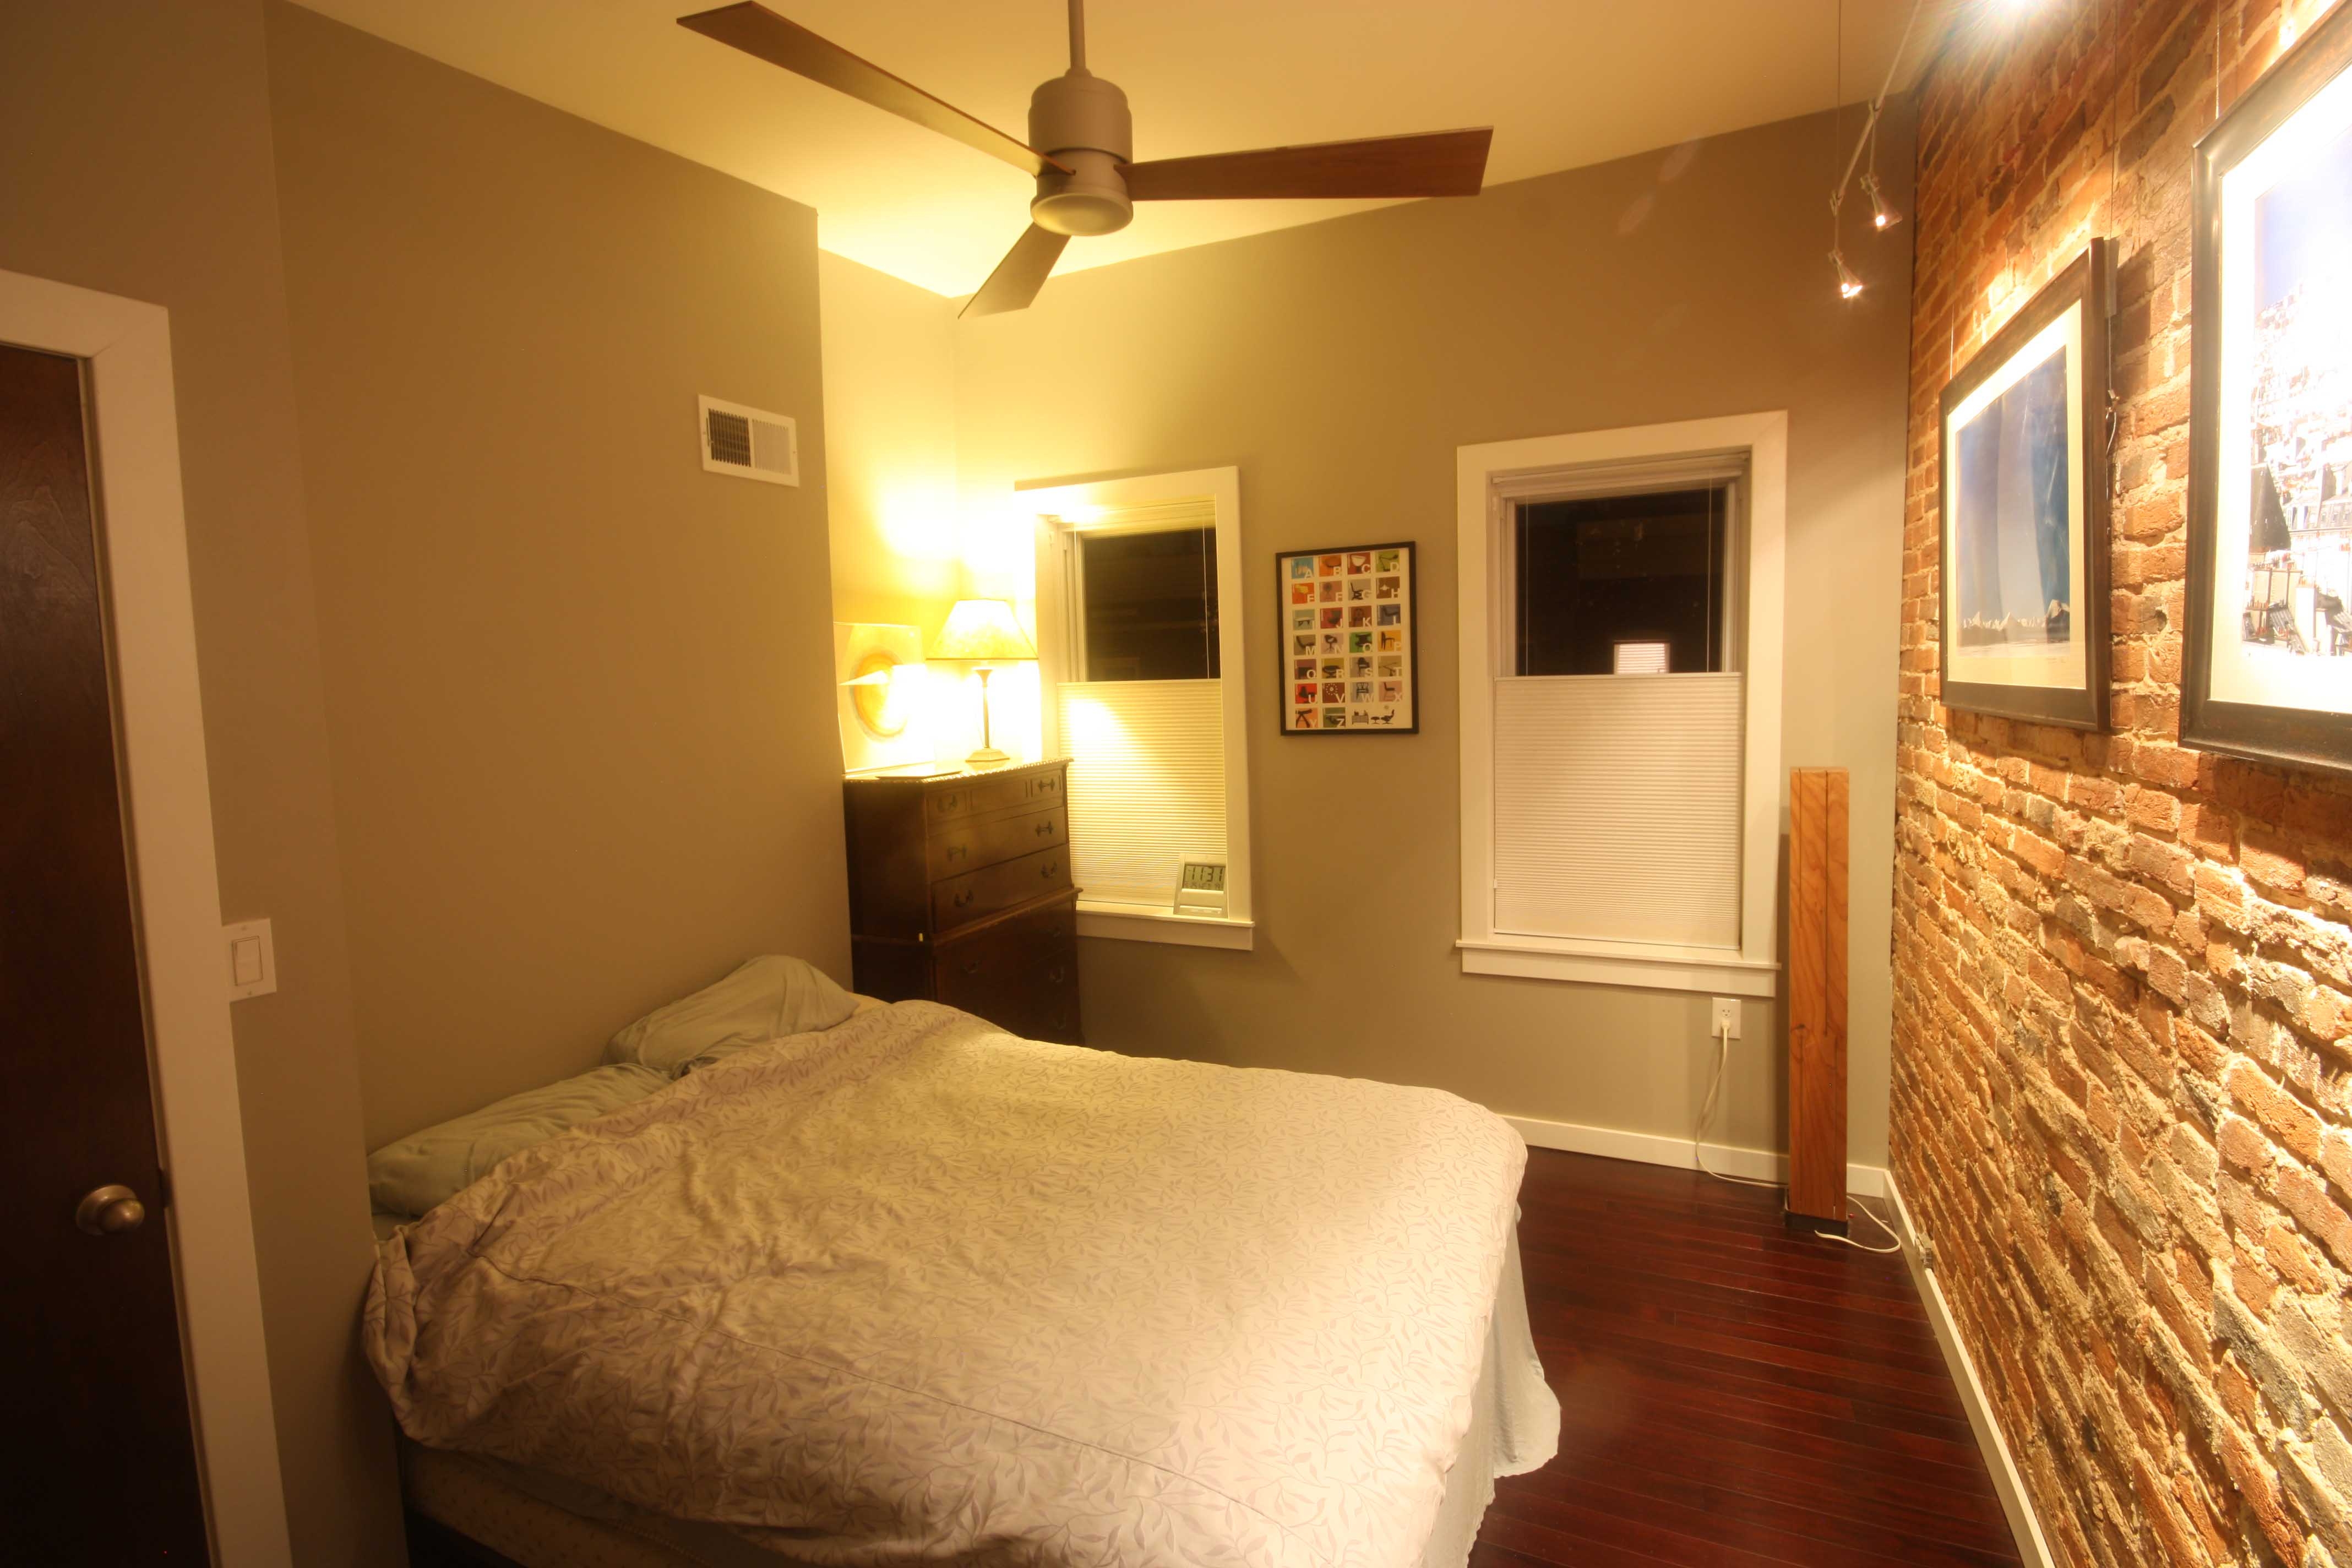
All done.
As I was uploading these photos, I thought, man this looks simple.
Yeah, not so much. It was really hard work. Also this was my first time doing construction, so I learned a lot through the process.
Total cost $5,300 136 sqft renovated area $39 per square foot. It was nice to have something done at this point. I was able to have at least one room in my house where I could escape to.
I finished this space in June 2014 (5 months), and didn’t work on the house again until January 2015. I needed the break.
I’m about to start up on my last and final phase of the house renovation in September. Stay posted for that one… I’d like to get feedback on the design.
It’s the pièce de résistance of the house. Coincidentally, the most expensive and difficult.
What a huge difference! That bedroom was super rough before the remodel ! It’s crazy how much debris you produce when you are doing this kind of work.
The Remodel Turned out really great. I like that you lit the the exposed brick it’s nice to see the light washing the wall. The slopped ceiling really helps to make a small space feel much larger. I really like the fan. The closet seems maybe a little small, although knowing you I am sure it is plenty of space for your needs, and old houses are always a compromise you can’t make one thing bigger with out messing something else up.
The space feels really good, clean, and modern, but with nice details that reference the age of the house like the exposed brick. Nice work!
also it is good to see the lamp you built in college and the poster I sent you find a good spot in your house.
Wow, such a huge difference. The beginning photo makes the room look pretty rough. Pardon my ignorance by why are the ceiling studs laid on face and not on edge? How much did that ceiling raise by angling it?
I echo what Logan said, the space looks thoroughly modern and clean but fits its context quite well.
Thanks Logan,
The room was pretty rough before the renovation. I gained about 12″ in the entrance side of the room, and about 18″ in the entrance of the room by and 24″ in the front of the room.
So funny you ask about the studs. It probably makes more sense to lay the studs on the side. Since this was my first time hanging drywall in a ceiling condition, I wanted more surface area to screw into when hanging the gyp to the ceiling. 3.5″ as opposed to 1.5″, (3/4″ on the stud per sheet). A more experienced crew wouldn’t have done it that way. But it was my training wheels. Also I wanted as much height as possible.