The OEM steering wheel in the Miata had seen better days, After 21 years of use it was gross and cracked. My 1995 Miata was the Leather Package, which came stock with a Nardi Torino gear shifter. It was in pretty bad shape, it looked to be some kind of blonde wood, I couldn’t really tell. Sorry no before pictures.
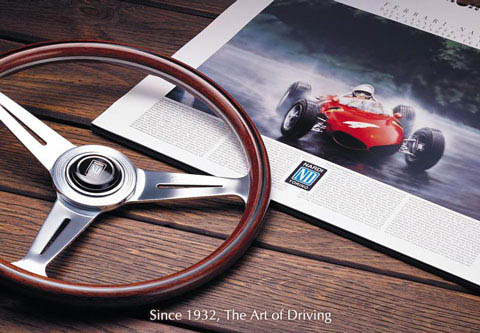
Nardi is an Italian manufacturing company; they have been making steering wheels for over 70 years, and were the primary supplier to Ferrari for decades. You can see the Nardi wood rim steering wheels in most Ferrari racing and street cars of the 50s through the 60s and early 70s. They also supplied many other manufacturers, including Alfa Romeo and Lamborghini. Nevertheless they are a pretty cool company and I wanted to replace my old nasty steering wheel with a cool wood one to match my gear shifter.
As I started looking for one, I realized they were pretty expensive. I started looking on ebay for a used one. For some reason most ones I found on ebay were in Japan. I bought one is okay shape, and got it shipped to the US for a total cost of 195$.
The one I bought looked okay. Around the perimeter of the wheel the finish had cracked off. You couldn’t see it from the front of the wheel, but when you drove with it, it felt awful. I knew about this issue from the ebay photos, and didn’t think I would mind it, but using it, I really hated how it felt. The chipped off finish was particularly sharp. A steering wheel is something you are constantly interacting with and I was bummed out that I spent good money on something that really didn’t live up to my expectations. (sorry no before photos).
So when winter approached, I put the Miata in the garage for the winter and decided to take the steering wheel off and refinish it.
Easy right….
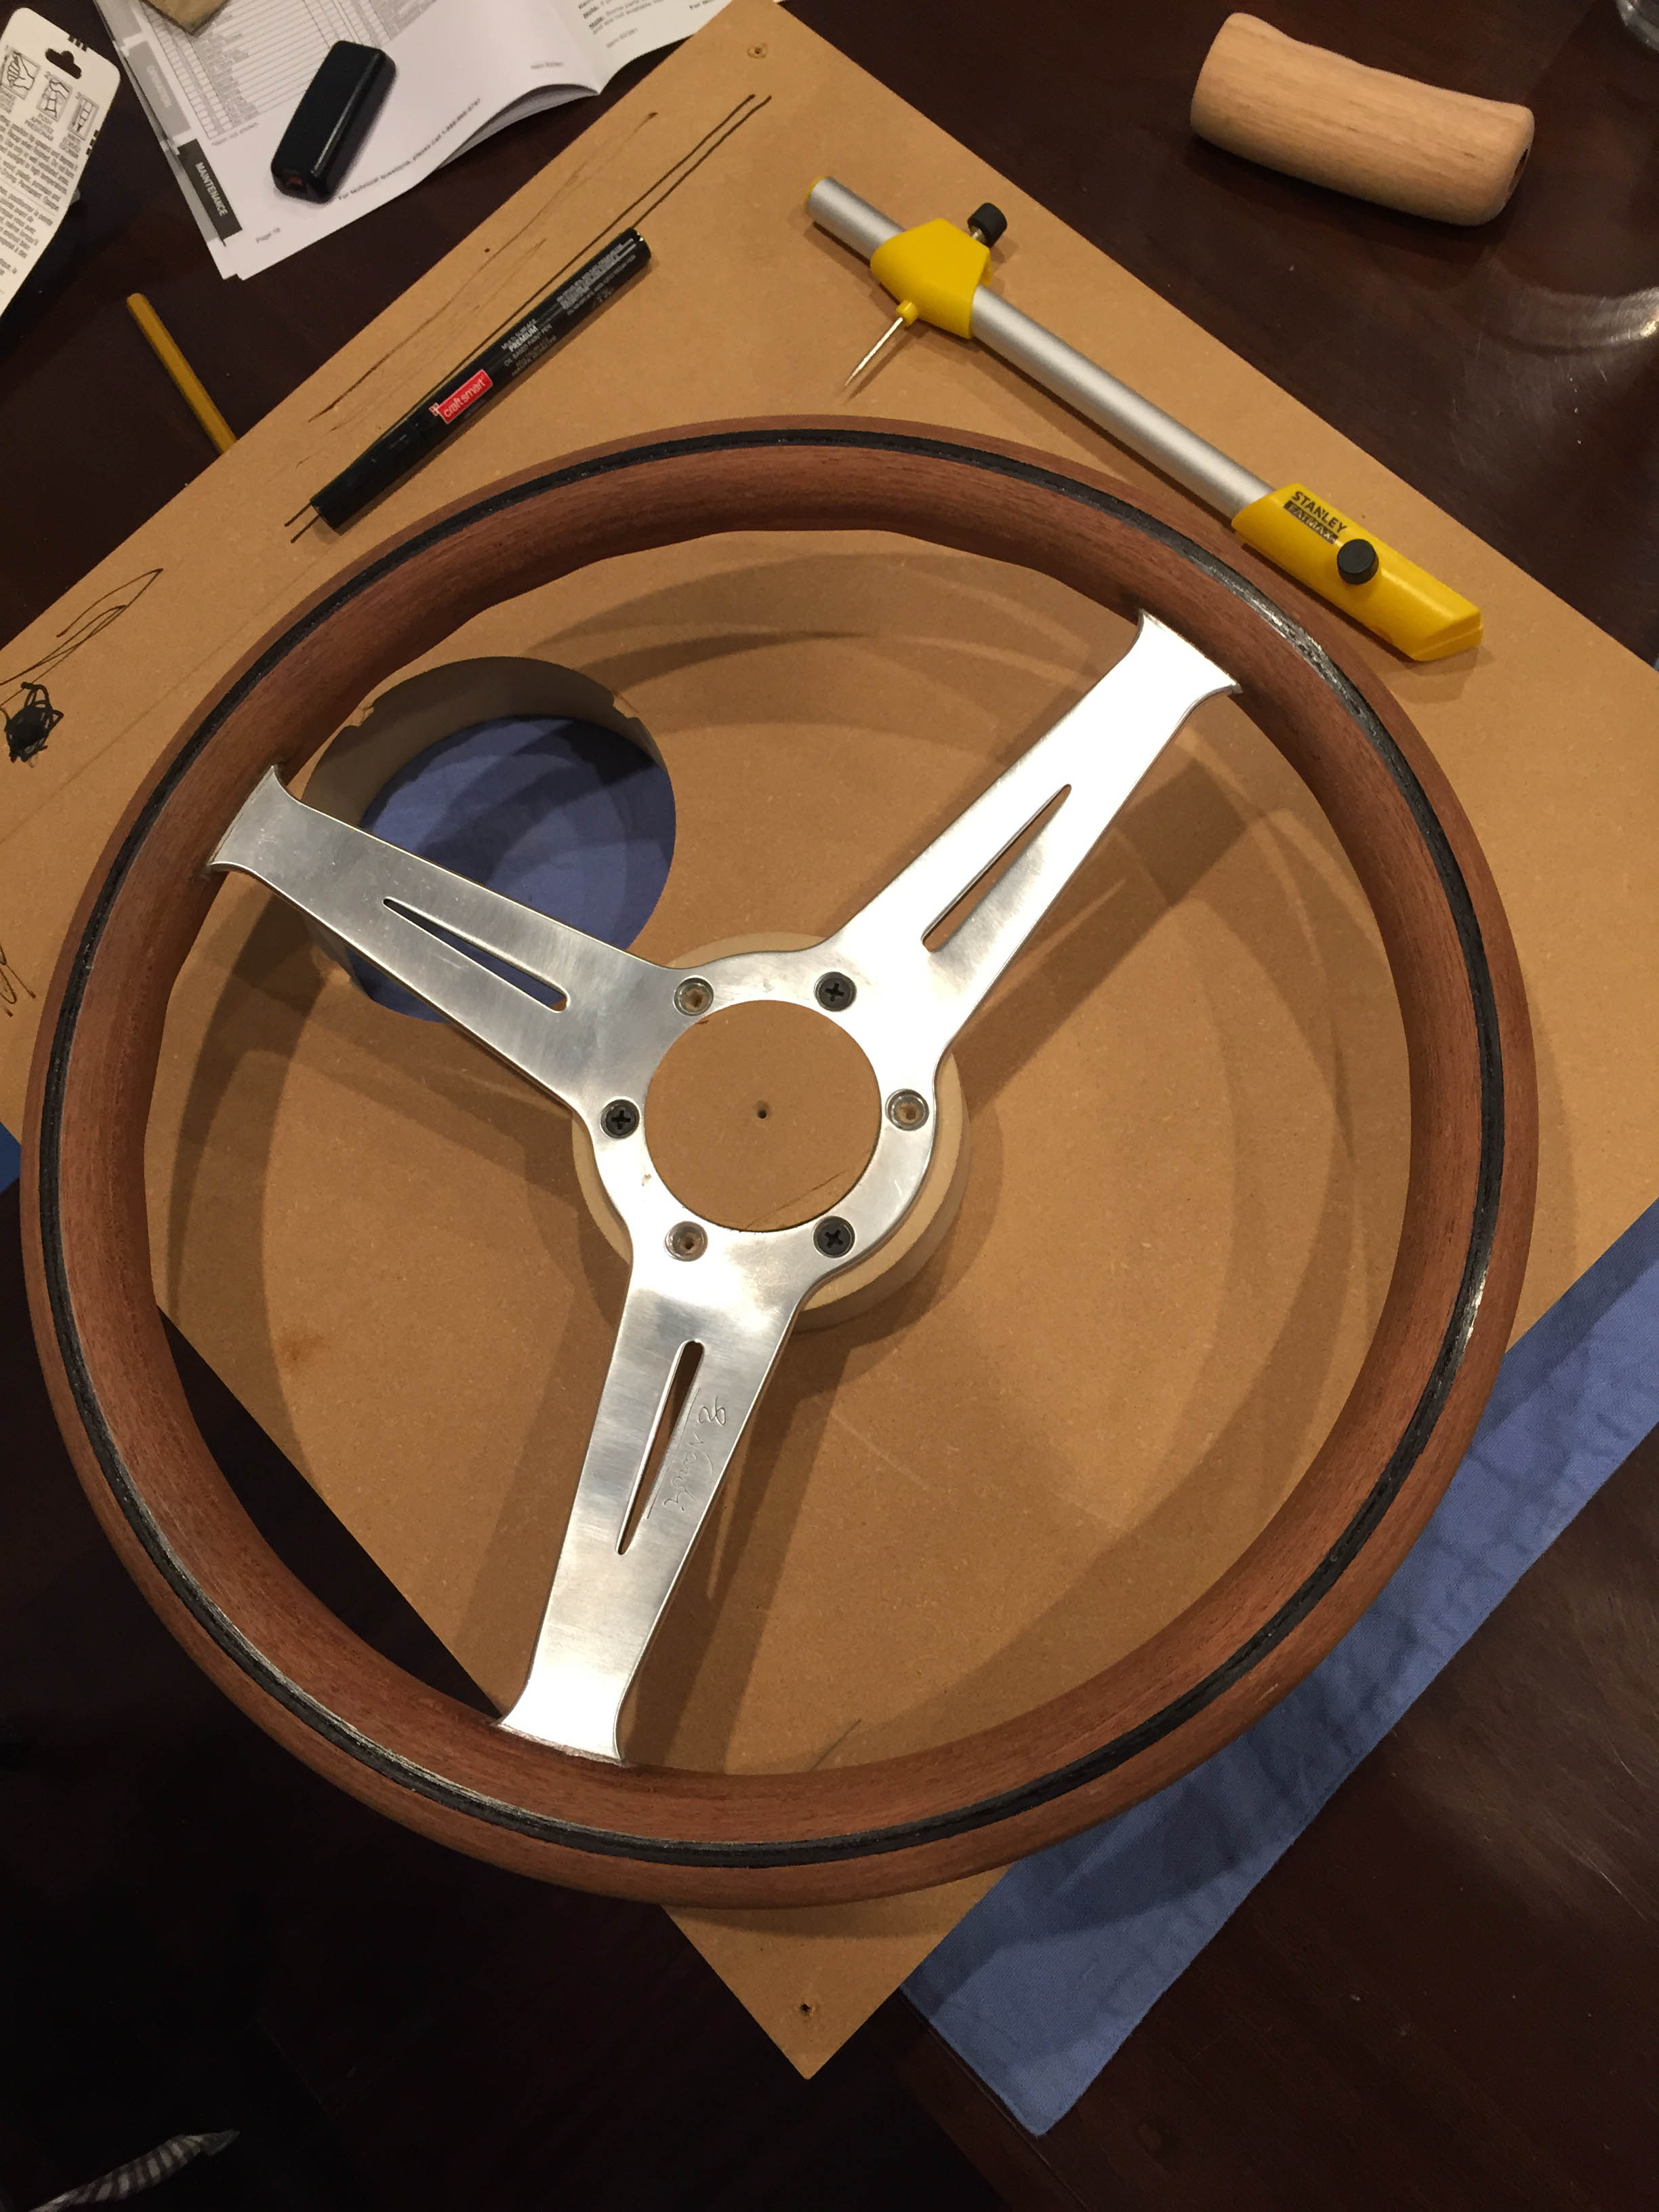
One of the defining characteristics of a Nardi wheel is a black strip painted on the face of the steering wheel. I knew I needed to keep this, because after all, whats a nardi wheel without the stripe?
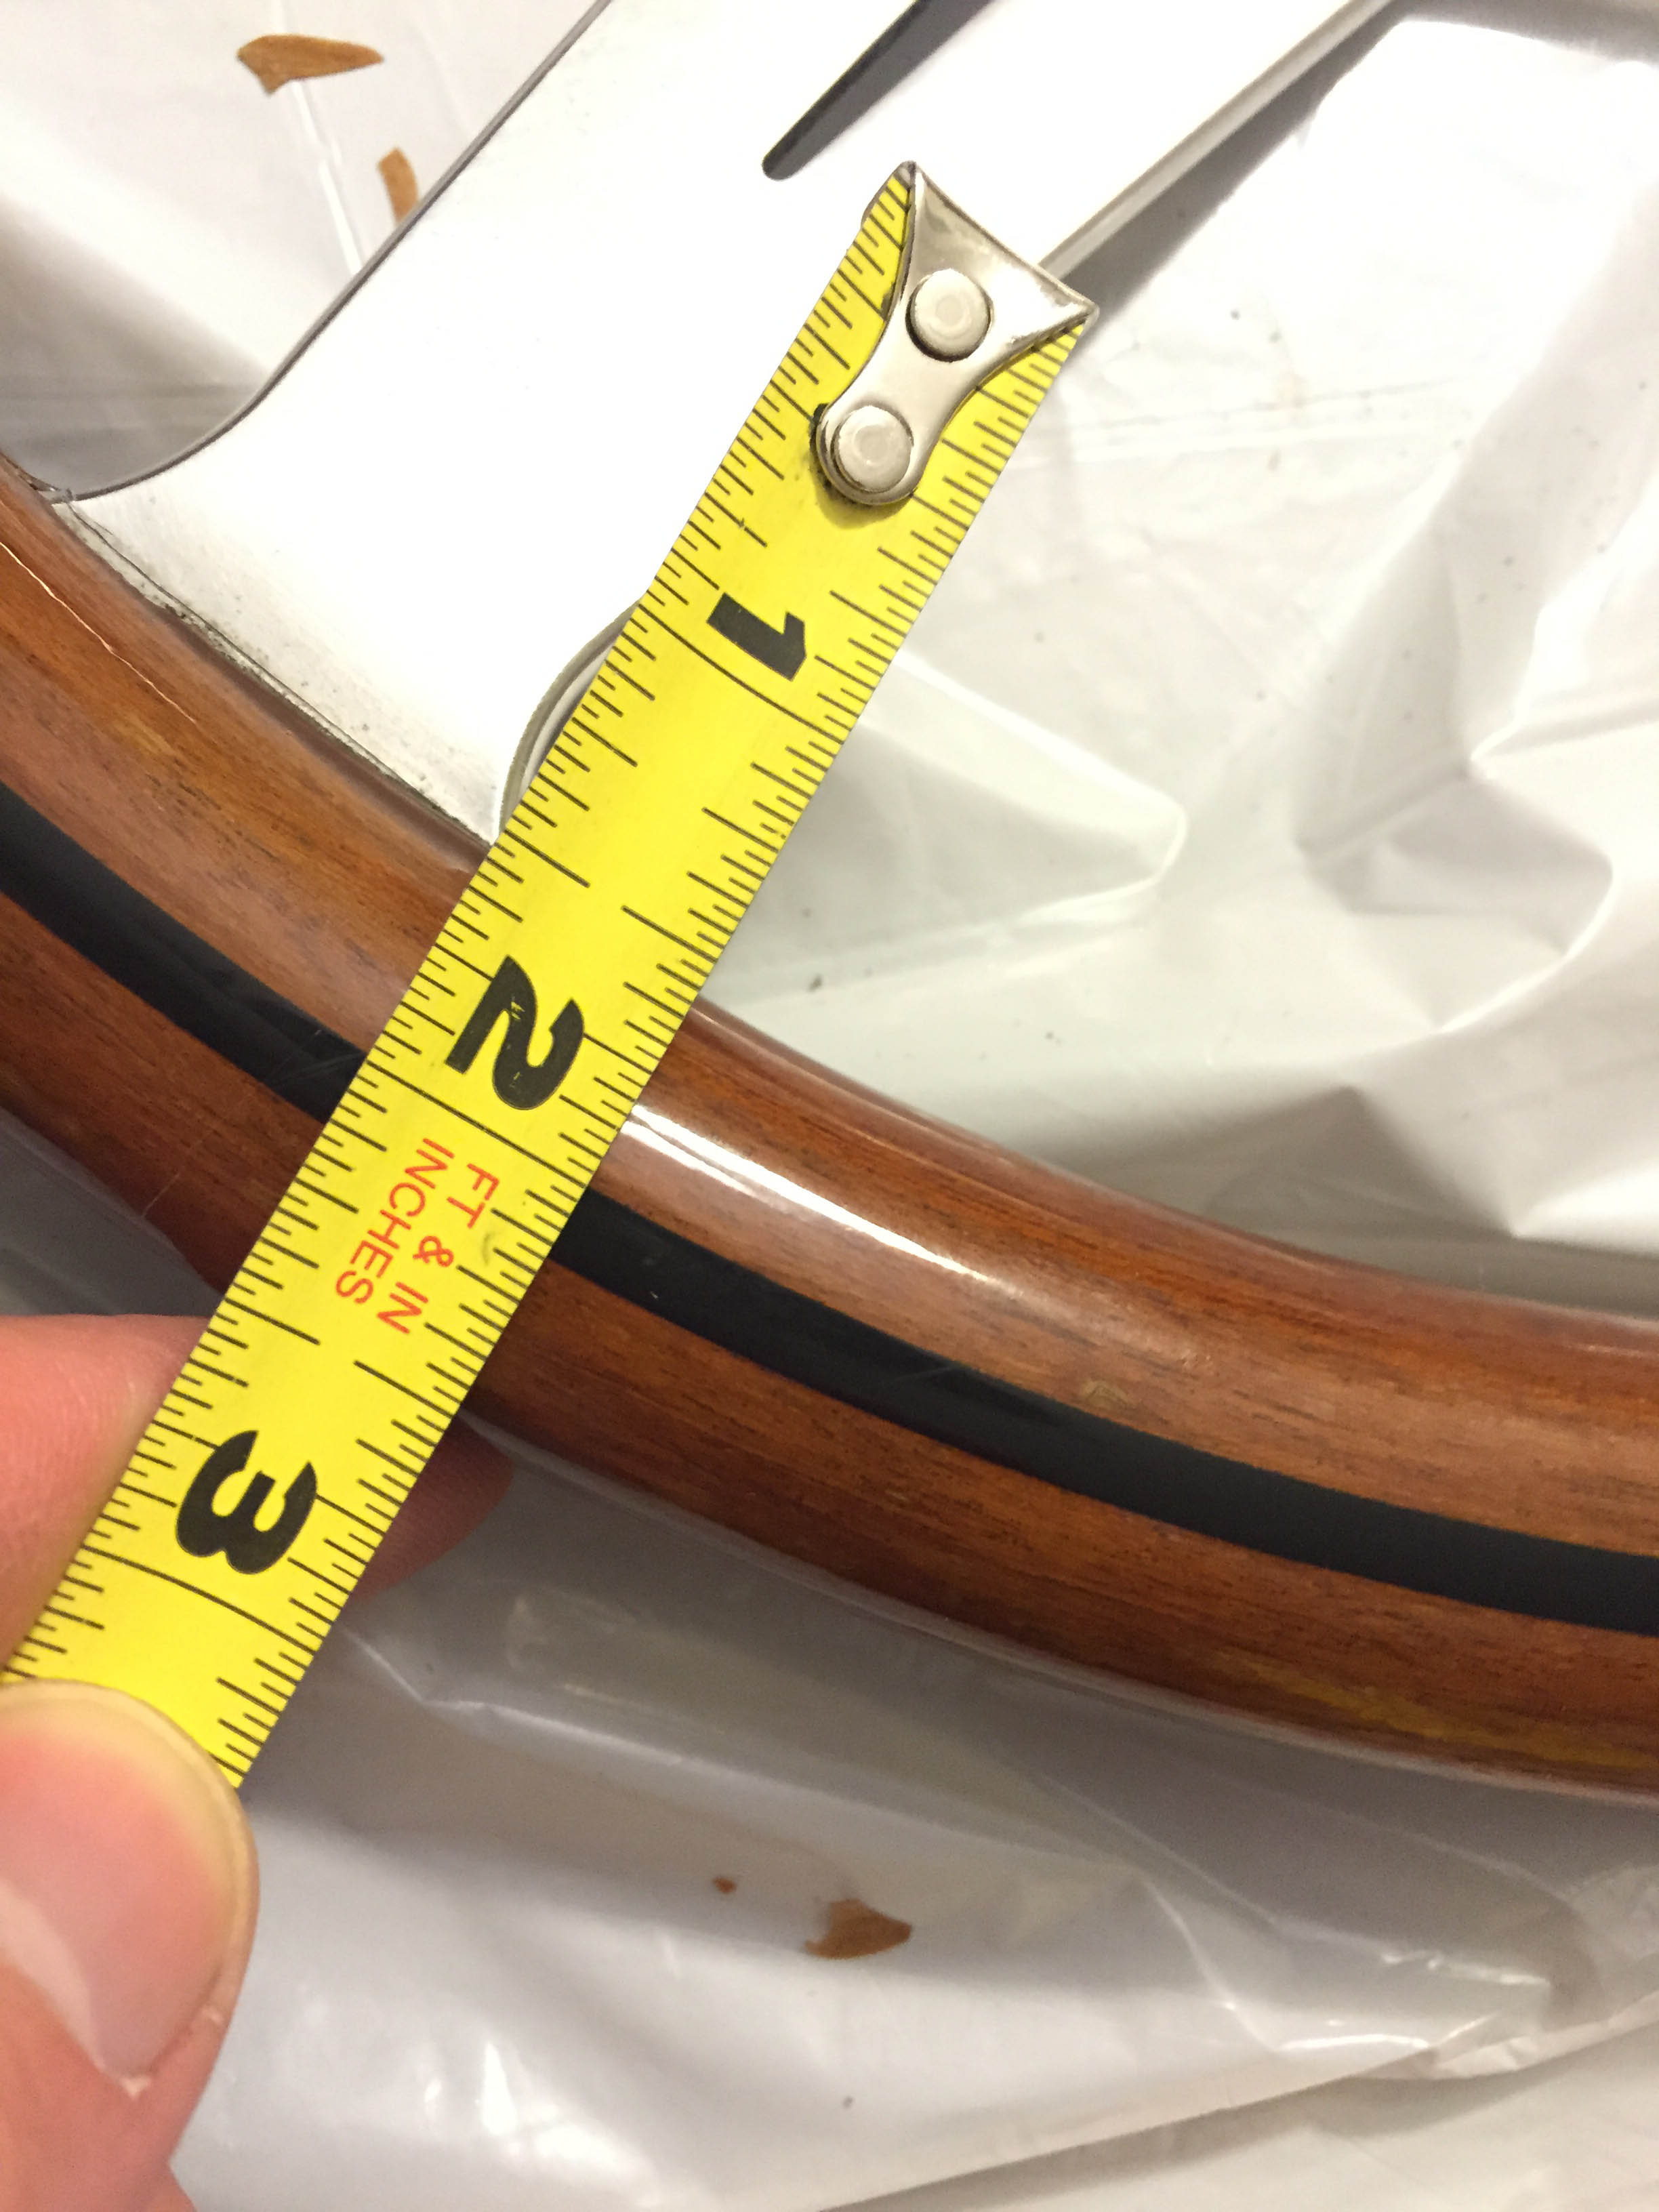
I was hoping it was maybe an ebony inlay, Nah, just paint. Italians can be so lazy… Here is the wheel before I started working on it.
So I stripped of the finish and off came the stripe.
As far as stripping of the finish goes, it was horribly challenging. I’m not sure when the wheel was made but the finish was very brittle, and very hard to strip off. I tried using chemicals to take it off, but nothing I bought worked on this crazy varnish. It was really thick too. Sanding was out of the picture, it would have taken forever to sand it off because of how thick this finish was on. Around the outside of the wheel, that was previously chipped off when I got it, I took my exacto and started chipping it off. By those edges it came off pretty good. but on areas where the finish was on snug, the finish was chipping off with sizes about as large as a pin head.
This is going to take forever…
My saving grace was a heat gun. I heated up the varnish and that allowed me to strip off the finish in larger chunks with my exacto. about 2″ strips at a time. Doesn’t sound like a lot, but compared to pieces the size of a pin head it was amazing.
Long story short it was a very painful process and I would never do it again, but now lets get to refinishing this beast.
As I eluded to before, as I took off the varnish the paint came too. Additionally, I had to sand the wheel down to get it feeling real nice. I think I did 60>120>220>400 grit on it. After the 400 she felt amazing.
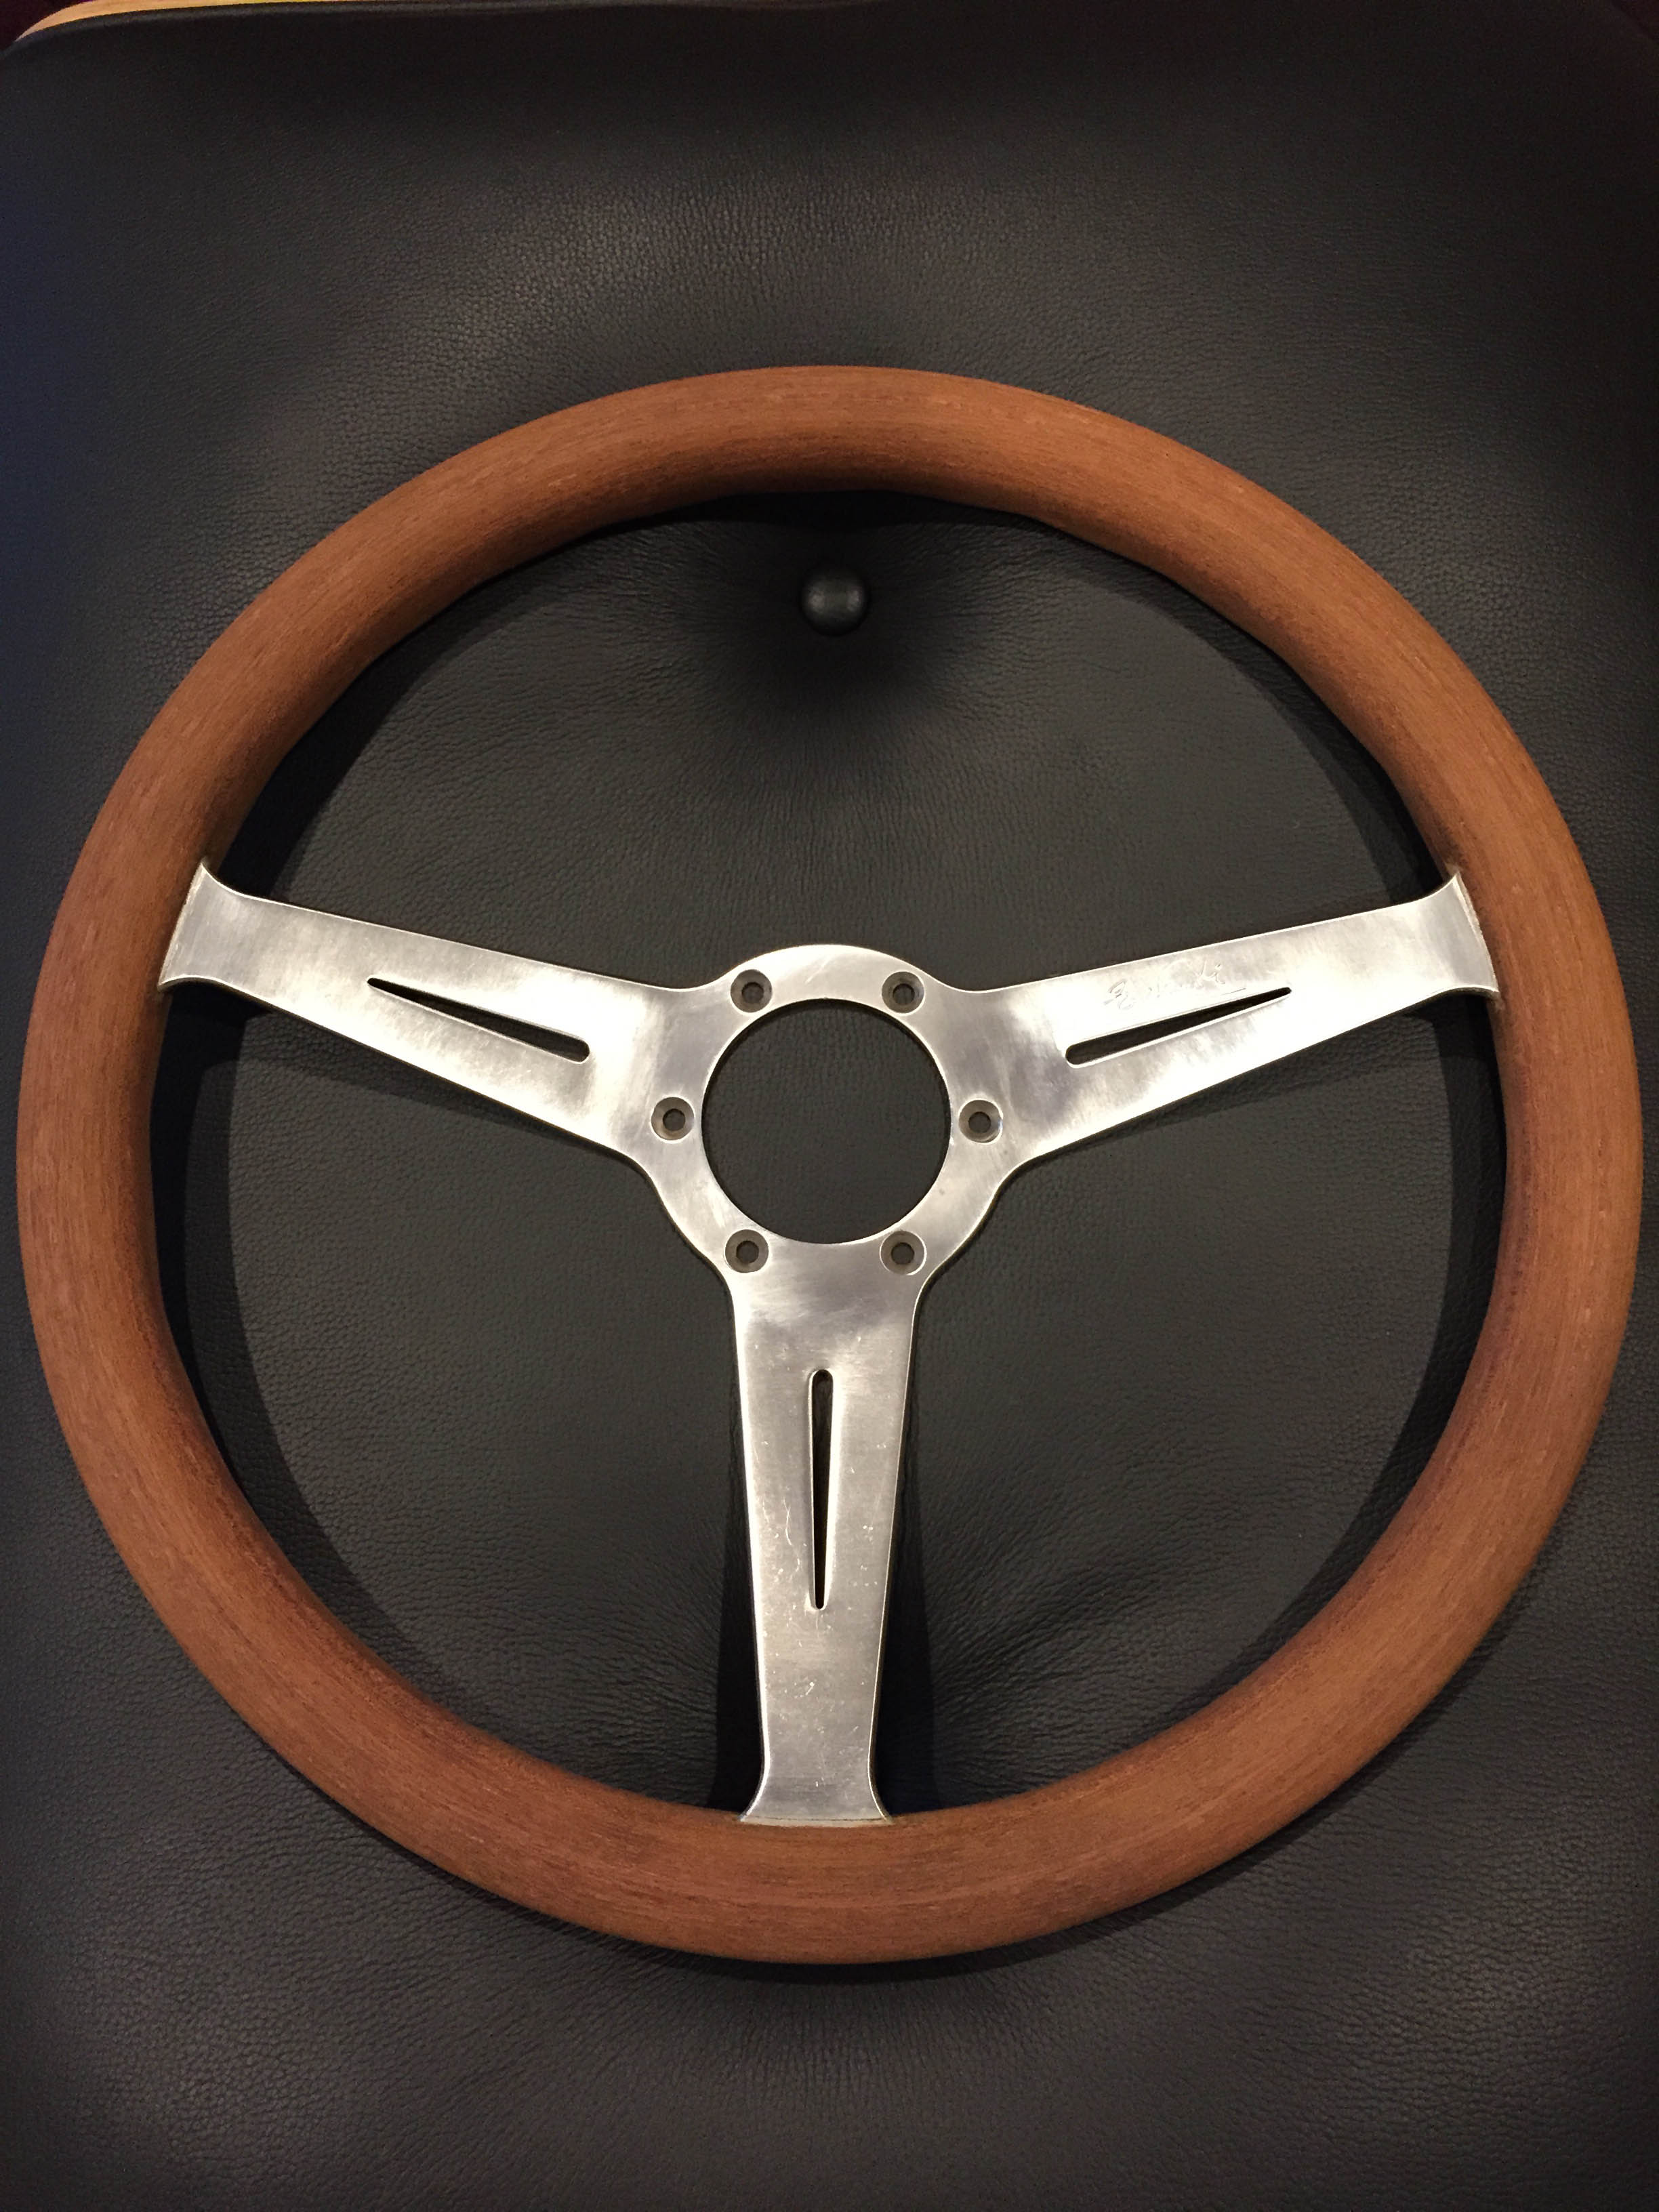
But no stripe anymore…
I racked my brain for a while about how to get this stripe on the wheel. It’s really challenging because its a perfect circle, painted at 1/4″ consistently around the wheel, on the face of the wheel, on a curved surface in section.
I knew I couldn’t paint it on by hand. Ever tried drawing a circle, bet it looked like shit. Now try drawing that same circle with the same thickness on a curved plane. No one could do that.
As per usual, I came up with a overly complicated solution. I laugh at it now, but at the time, this seemed like the only way.
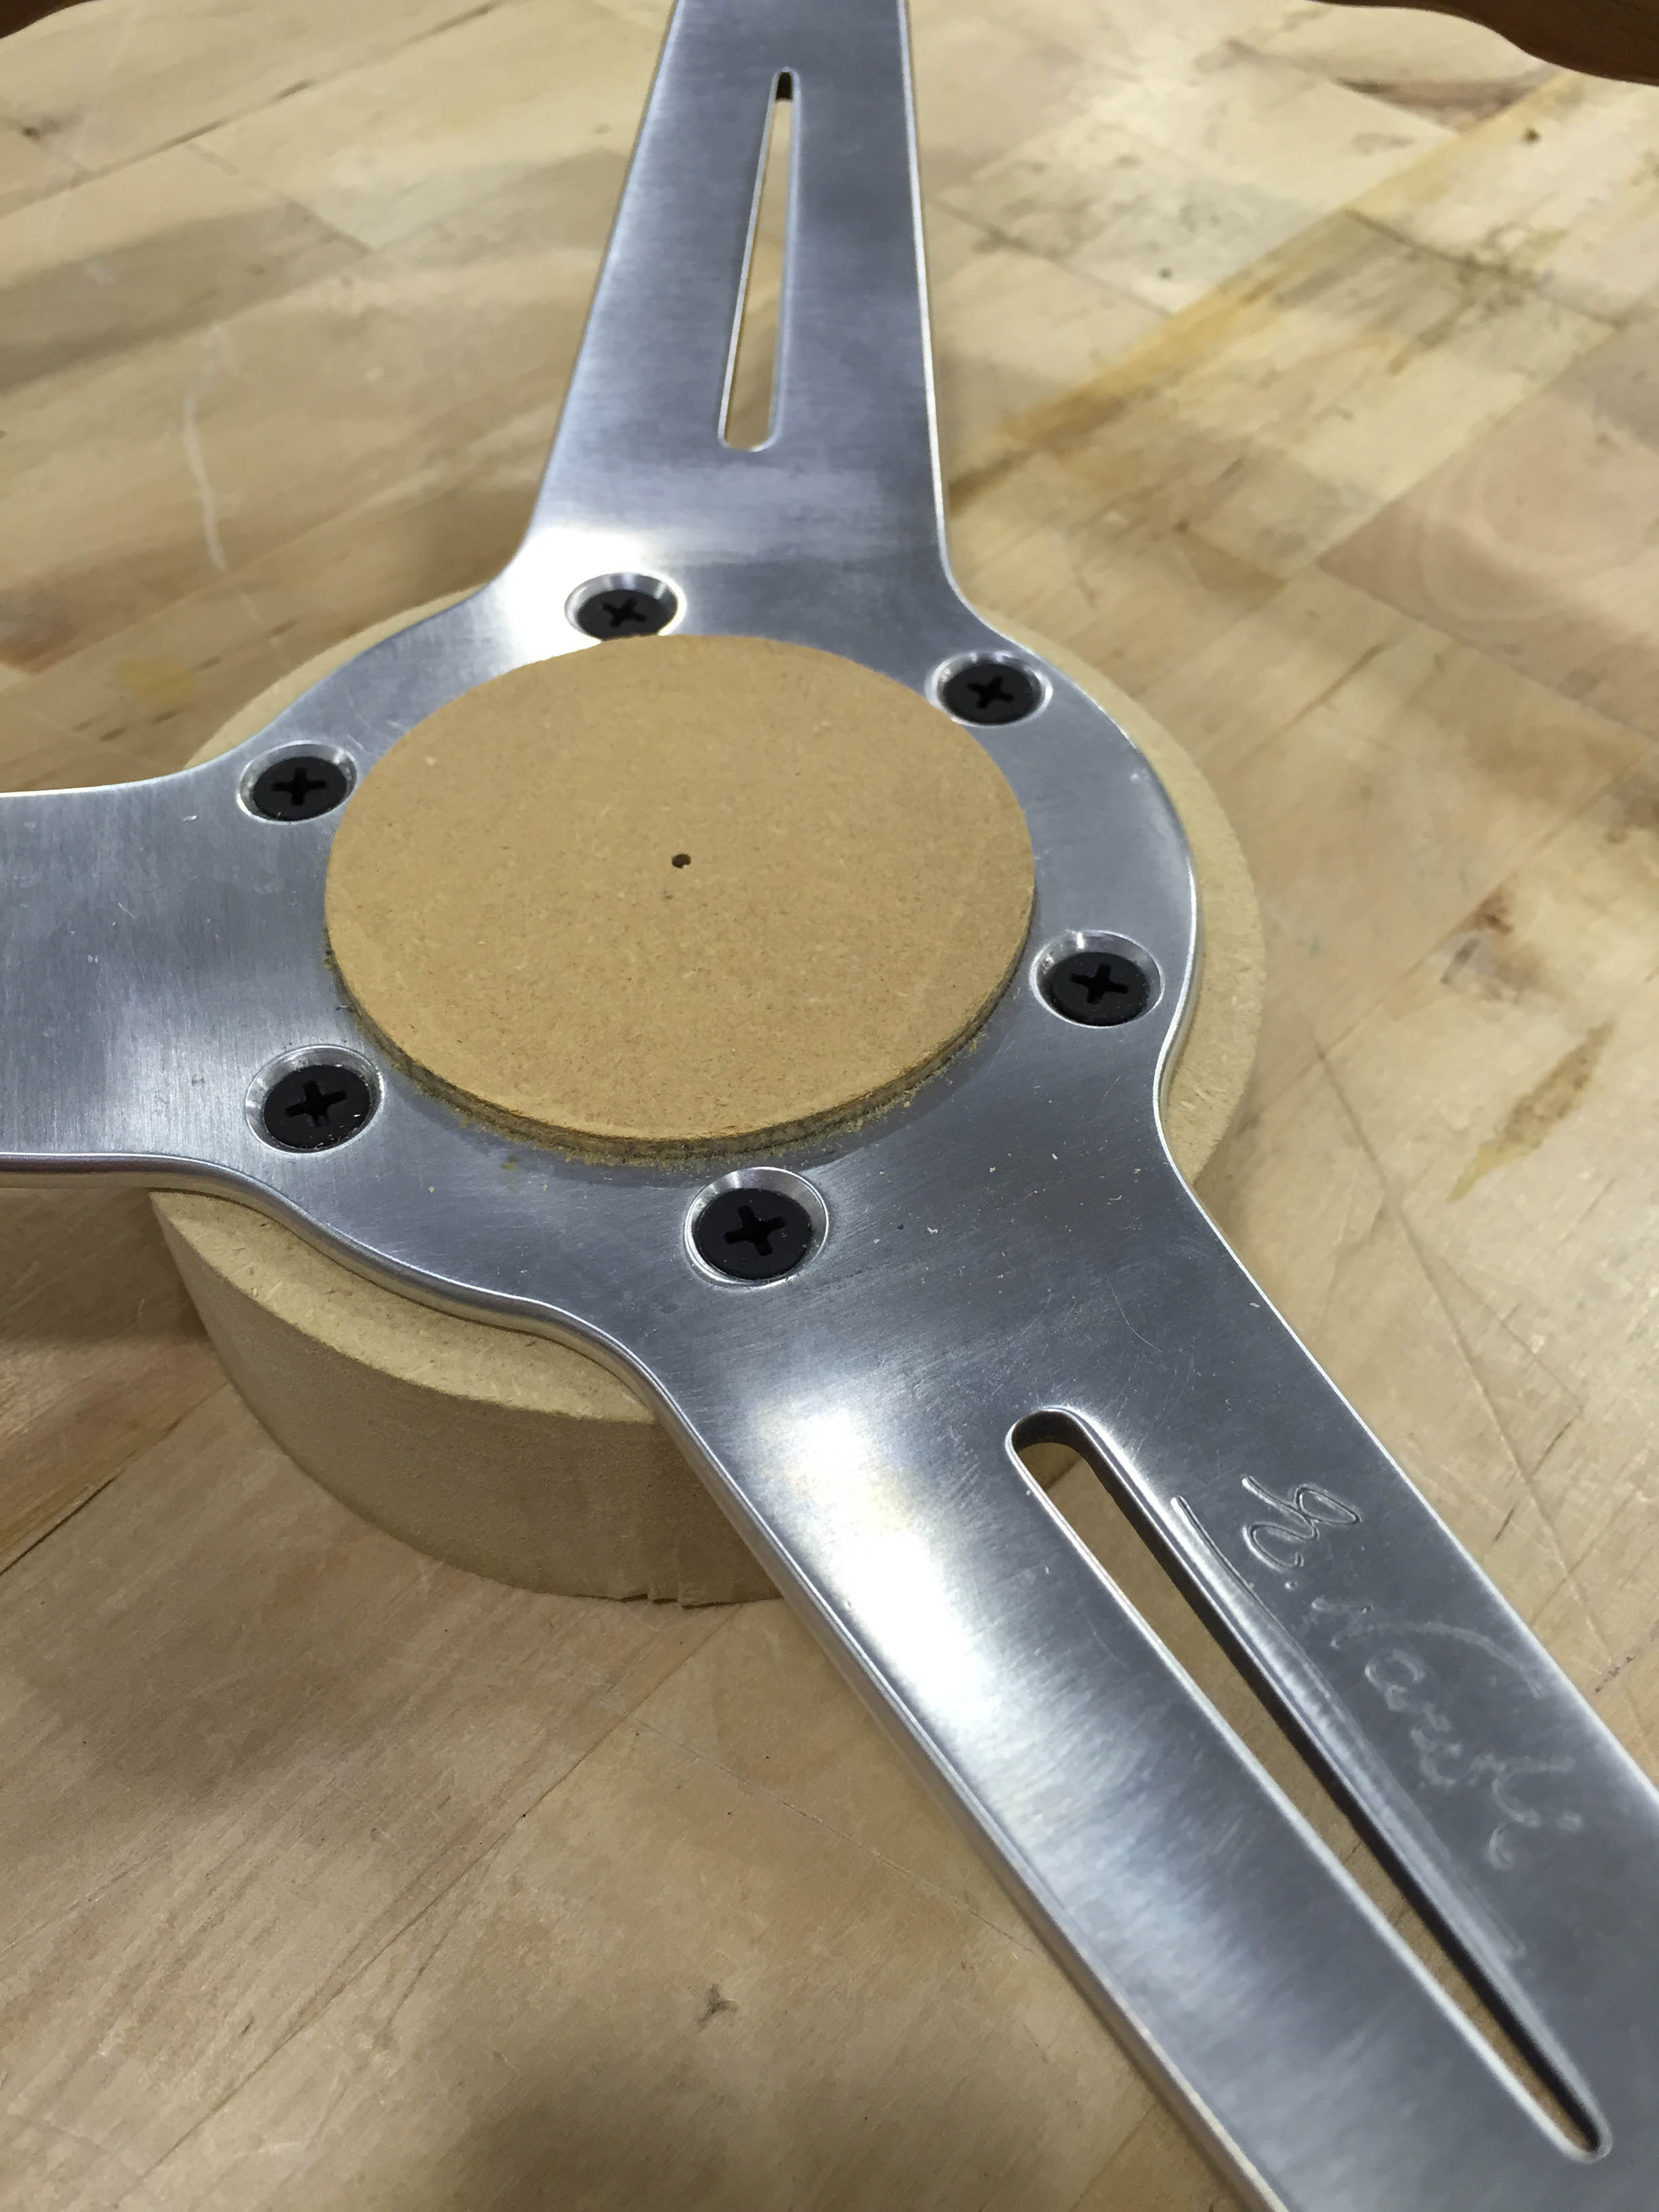
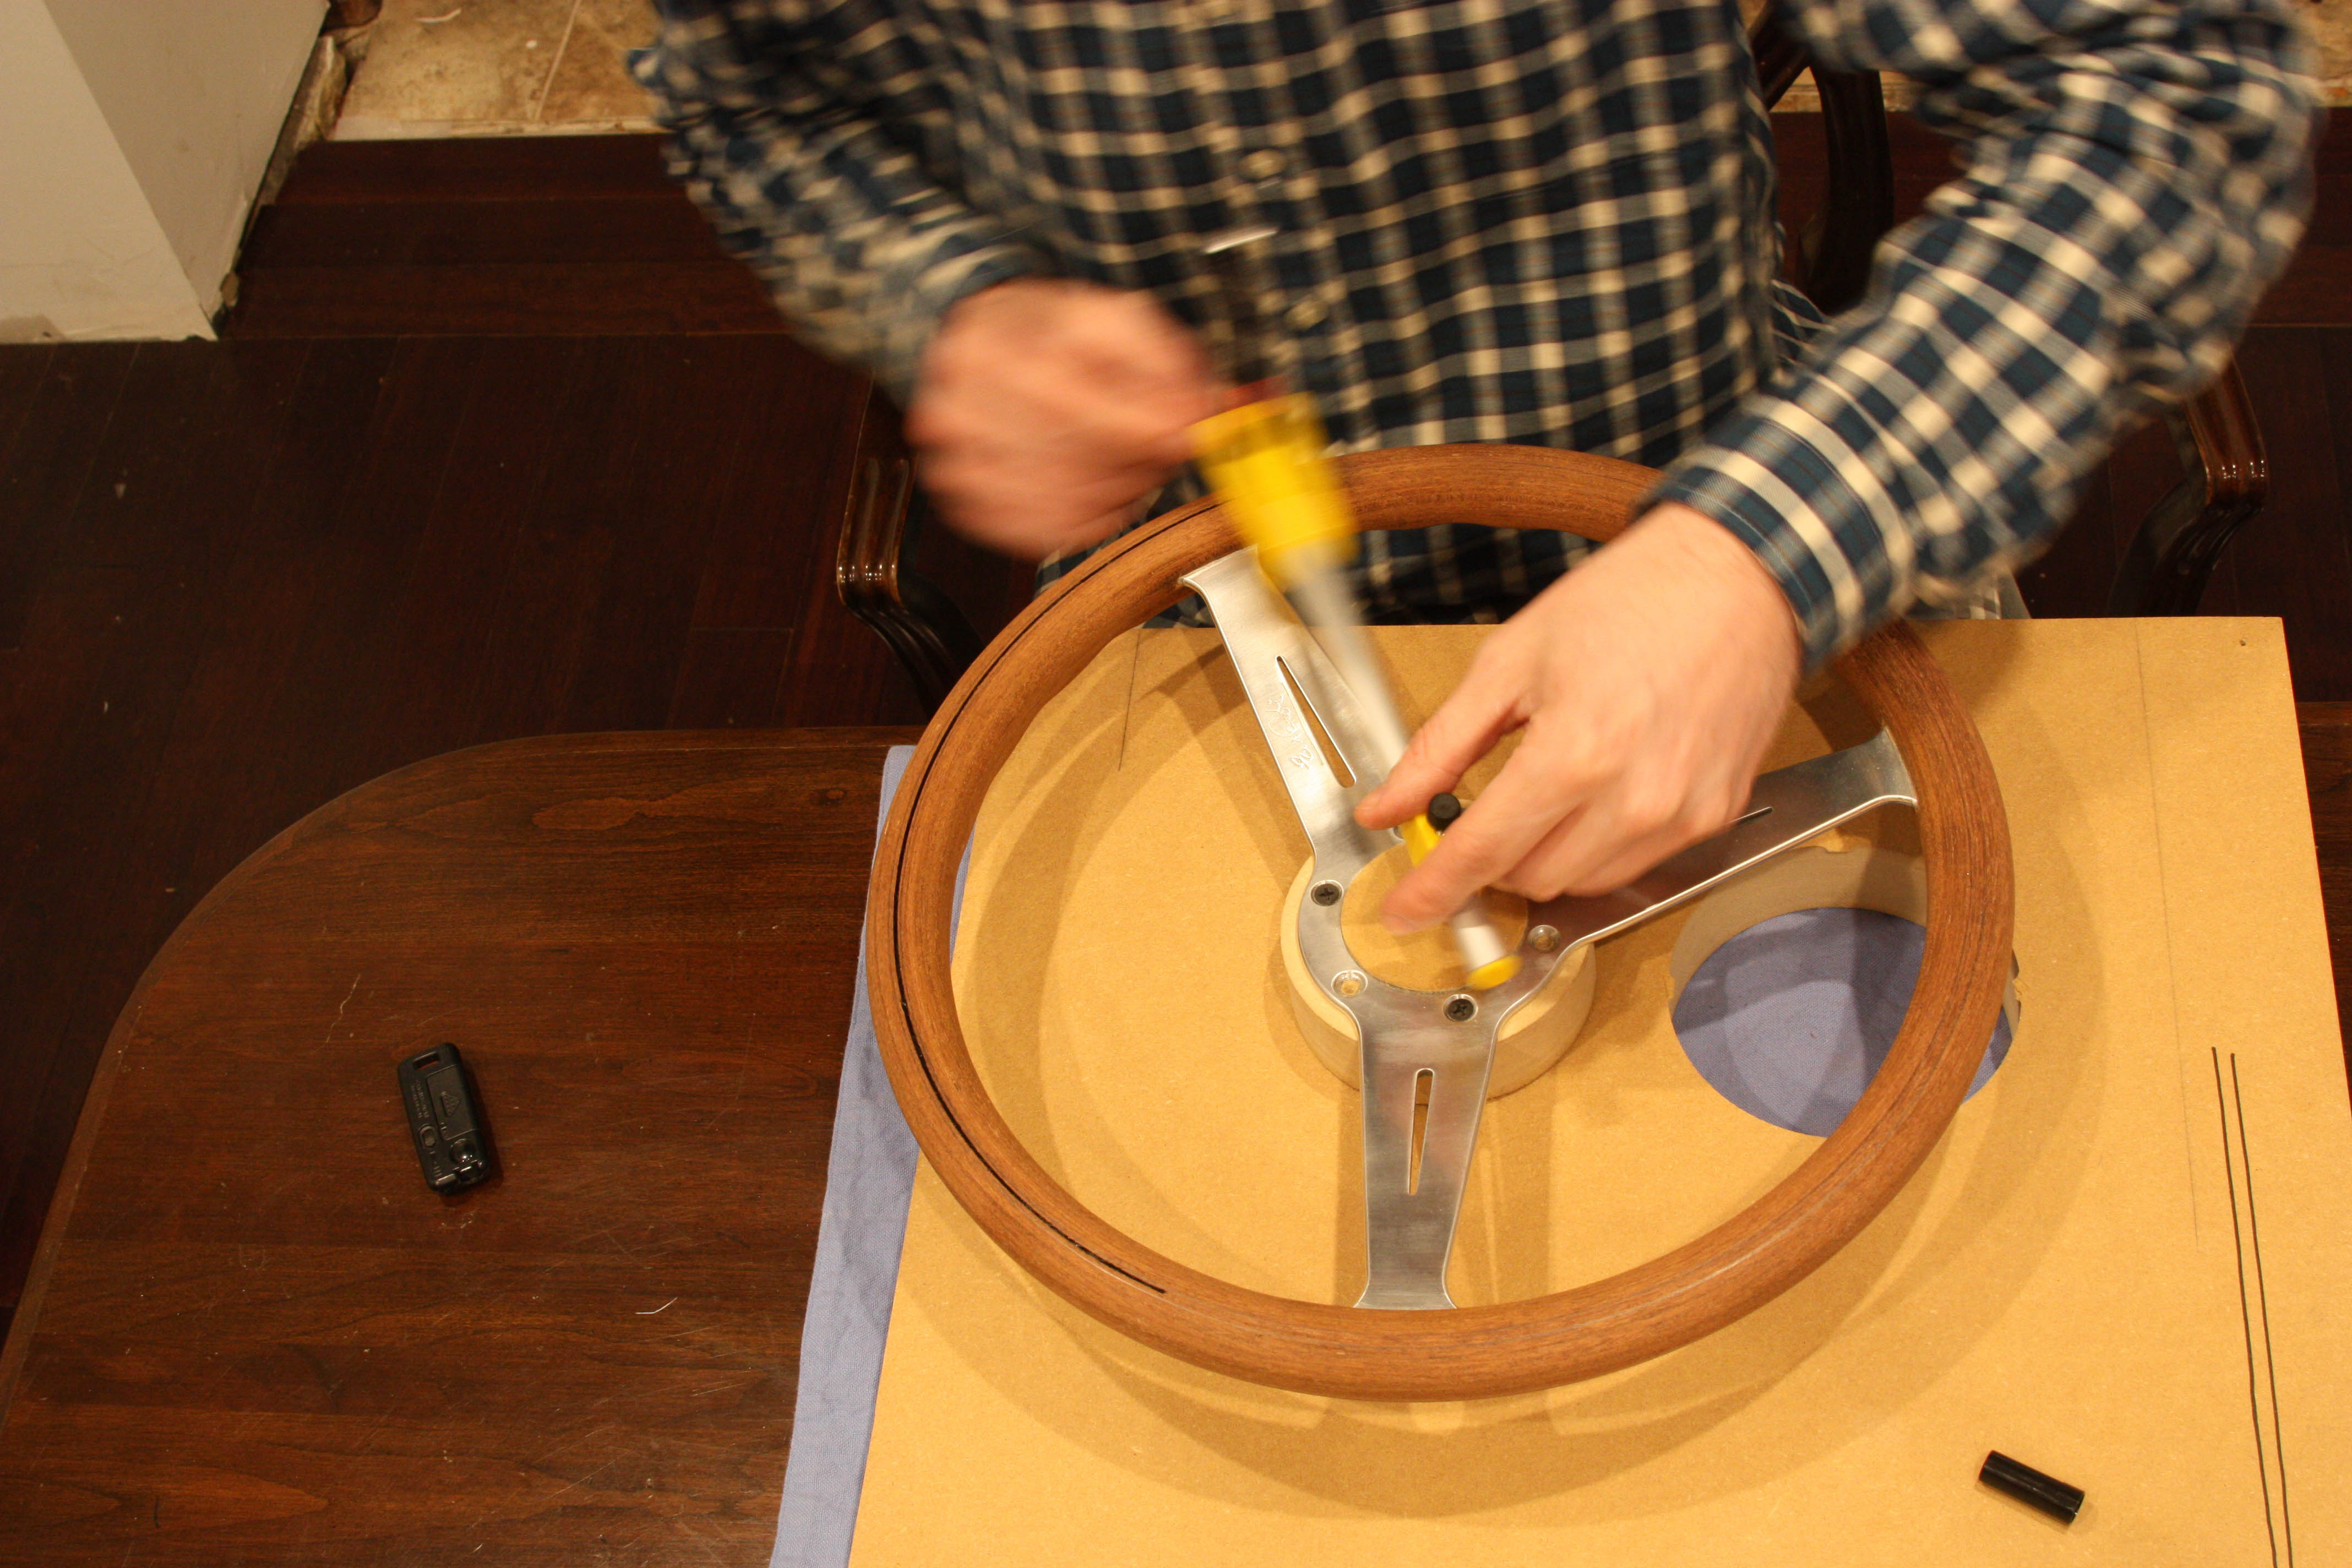
Step 1: Cut out some kind of hub I could mount the steering wheel to
Step 2: Get the wheel spinning somehow
Step 3: Lower a paintbrush onto the spinning wheel and paint on the stripe.
Done! A perfectly painted stripe!
First things first. Let’s get this hub cut out.
I decided to CNC a hub out of 1.5″ MDF. So measured the diameter of the hole and got that into Rhino. Then found the center point. I figured that would be necessary. Just like that I cut my hub out. This is going great!
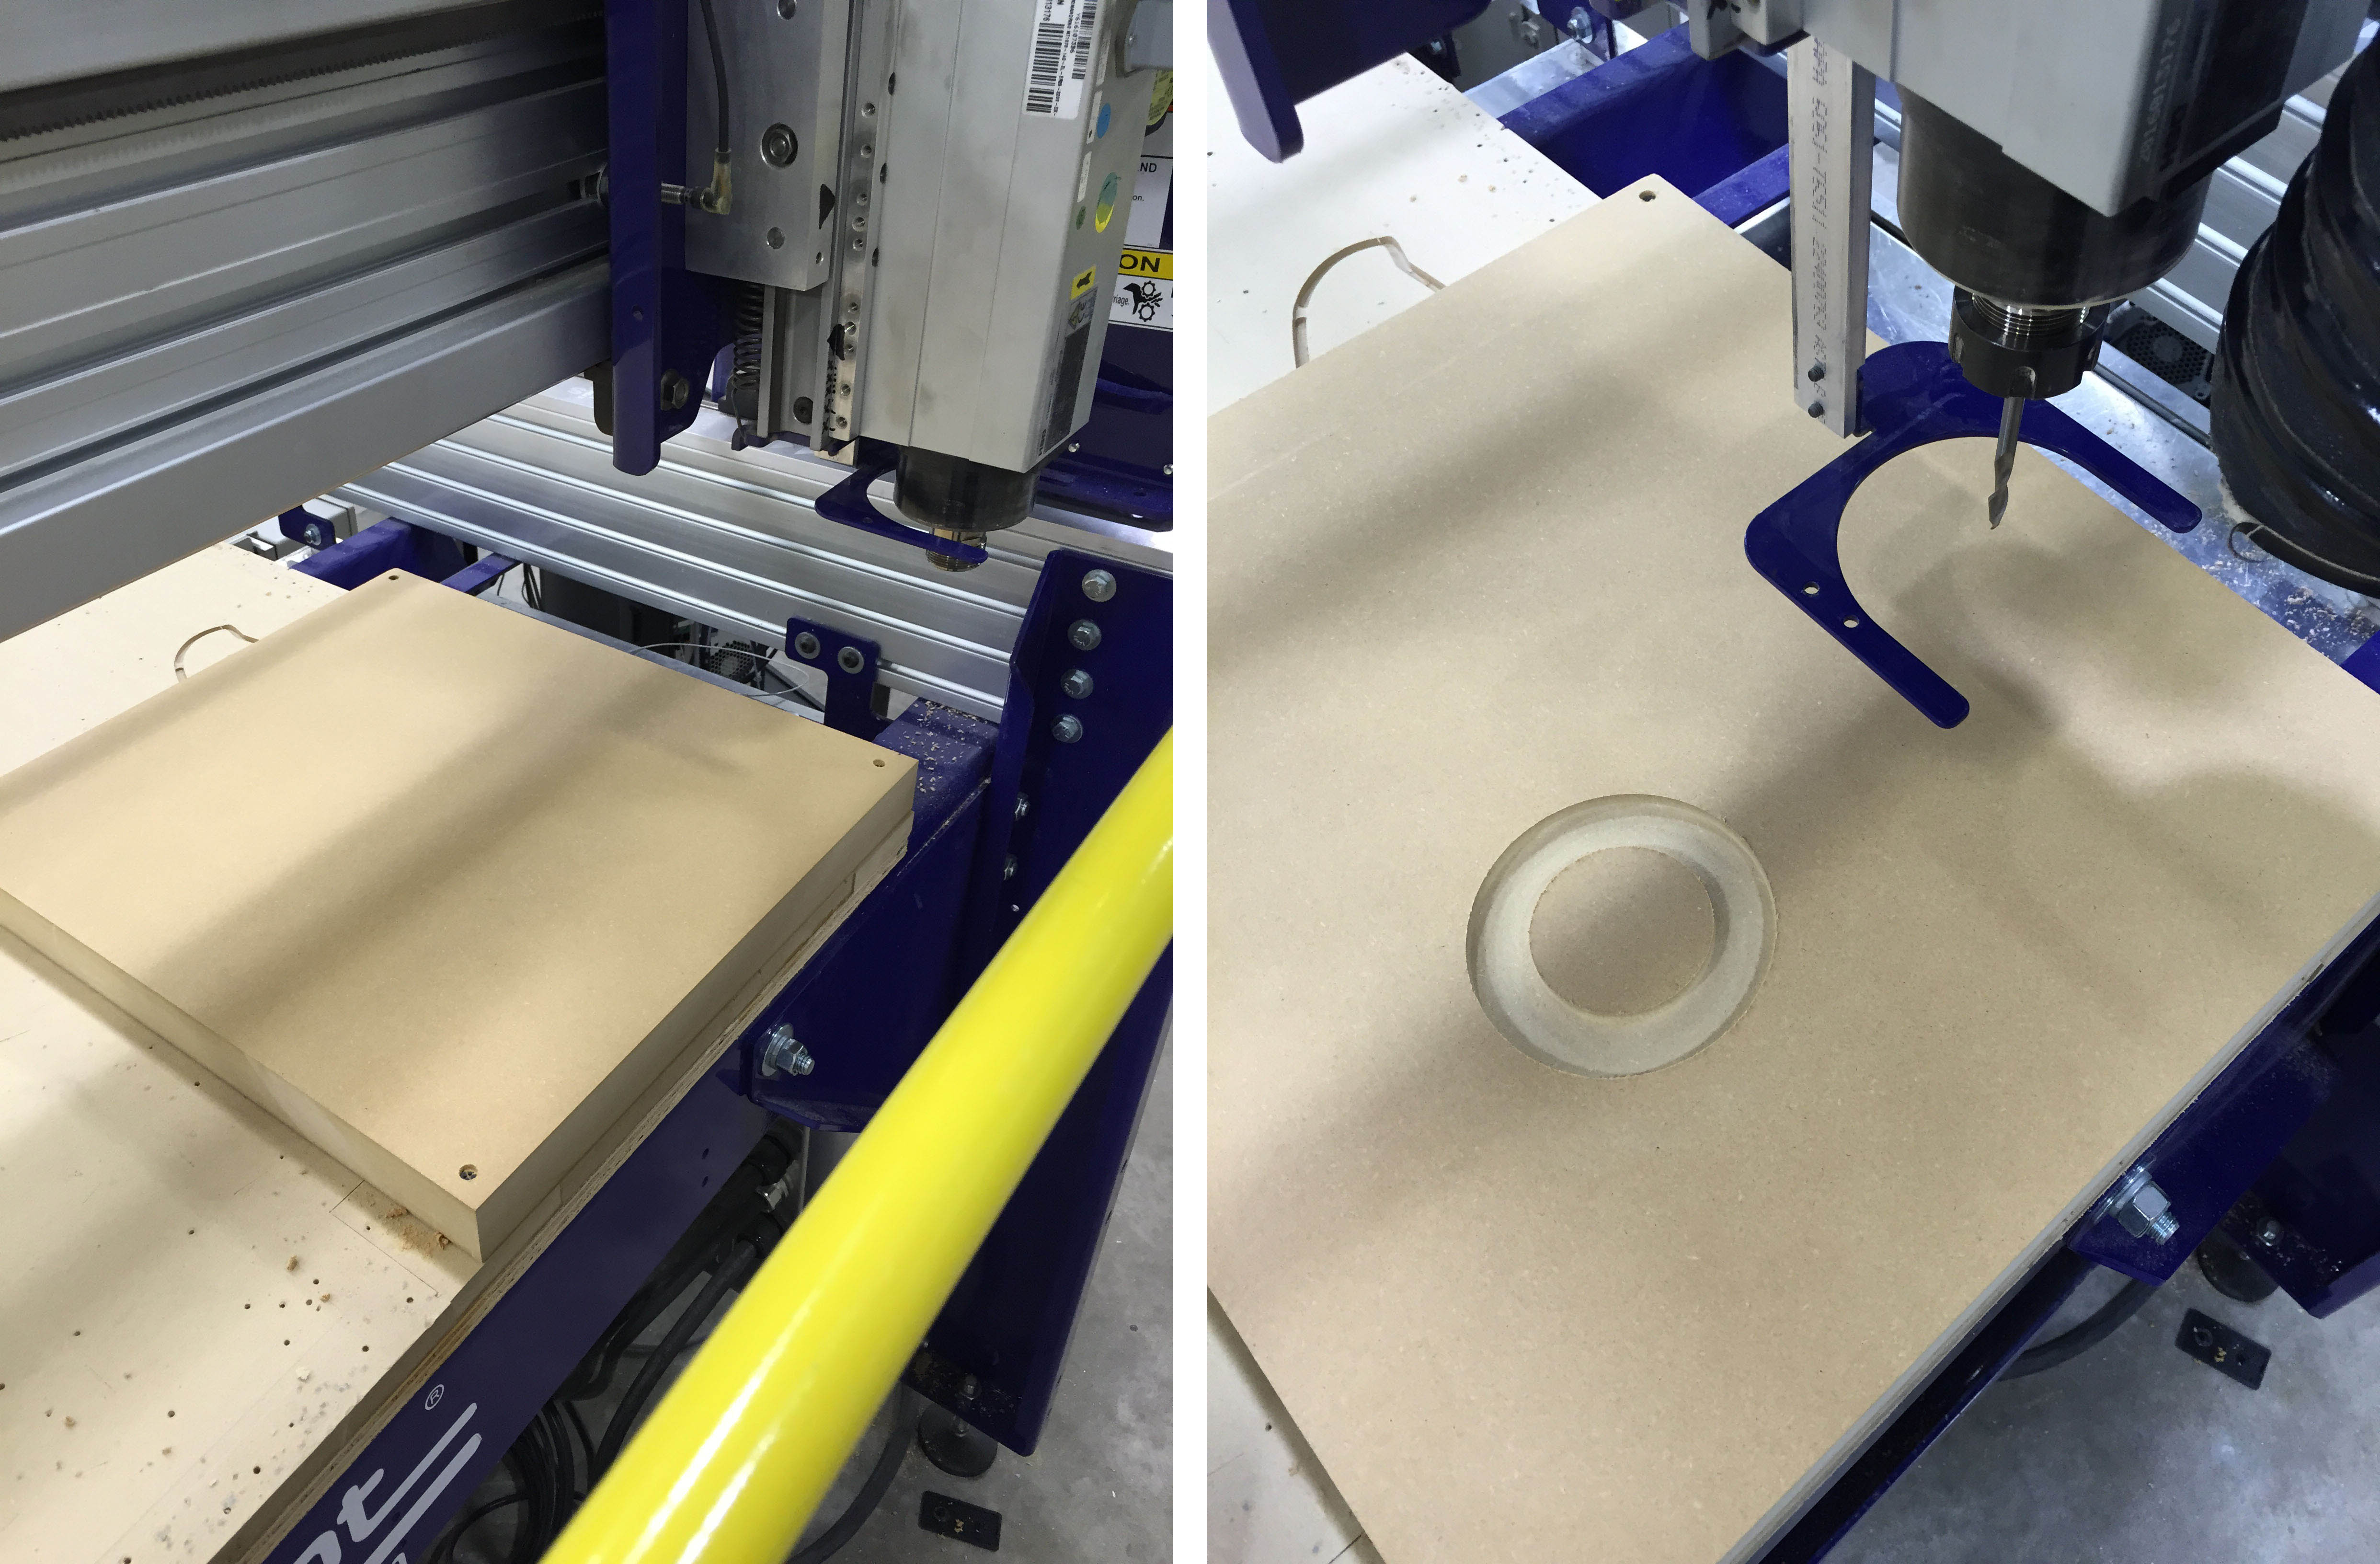
Okay, I have the wheel mounted to the MDF Hub. Now lets get this thing spinning.
How the shit do you get the wheel spinning?
Okay, let’s put it on a lathe! They spin things!
Got the wheel mounted on a lathe, and got it spinning. I quickly noticed one thing. The spokes of the wheel were off, bent in the x axis and while the steering wheel was spinning just fine, it was wobbling towards and away from the surface I wanted to paint upon.
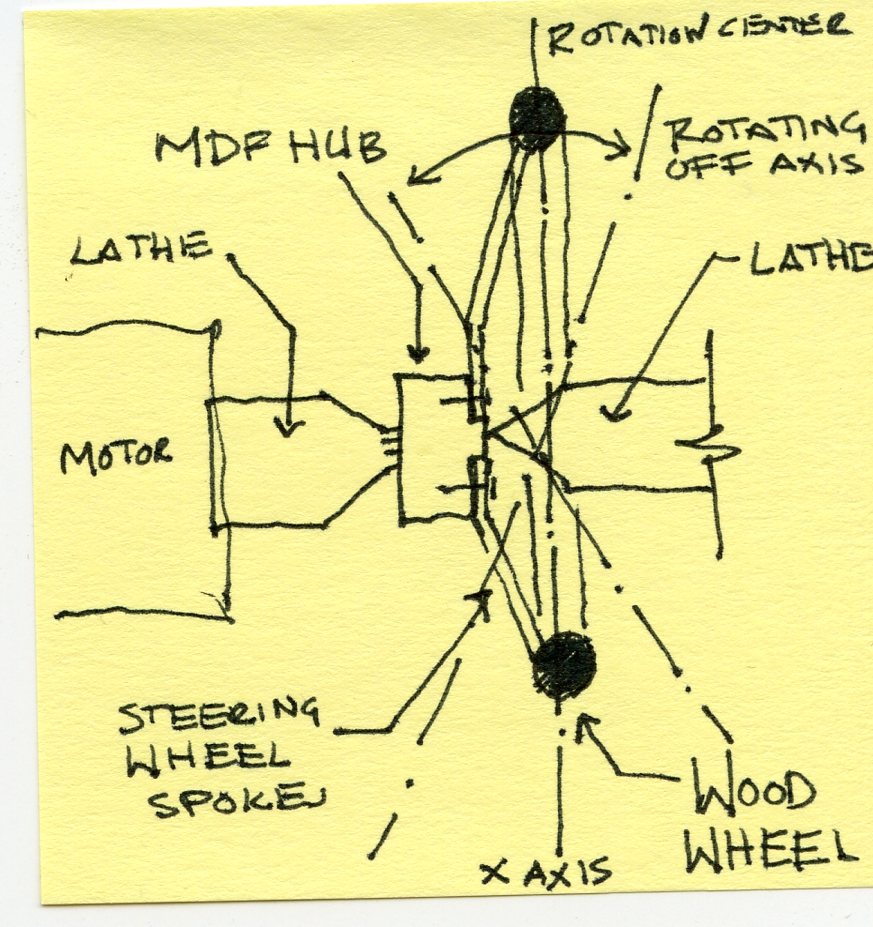
Shit. lets test this out with a pencil first.
worked terribly, I could only get the pencil to mark on the top half of the wheel, as the wheel spun, and it came towards the pencil, it made a mark, but as it went way from the pencil it made no mark. If this was a paint bush, and I tried to put pressure on it, the stripe would be fat on the top and skinny on the bottom, Not the 1/4″ that I needed to be perfect.
Okay, lets rethink this.
Step 1: Cut out some kind of hub I could mount the steering wheel to
Step 2: Get the wheel spinning somehow
Step 3b: Cover the wheel with some kind of contact paper / sticky plastic over the wood.
Step 4: Use an hand held exacto cut out the contact paper as the wheel is spinning slowly to cut out the 1/4″ needed from the contact paper leaving the wood bare in just the 1/4″ area needed for the stripe. I can just rotate the wheel slow by hand on the lathe, ( I just need it to rotate around the center point). I can use my hand to account for the wobble.
Step 5: simply paint the masked region with black paint,
Good solution Pat, Thanks Pat.
I masked the wheel with contact paper, and attempted plan B on the lathe again.
Initially, it was going pretty well. I got the exacto to cut a nice circle in the contact paper, and I thought I had done a pretty good job staying 1/4″ apart for the second cut. The problem came when I attempted to remove the newly cut section from the steering wheel. I guess in some areas the knife didn’t cut all the way through and the contact paper did not come off smooth. The whole idea was shot.
Back to the drawing boards.
Okay, this is way too complicated and needs to be rethought entirely. I went home for a family dinner shortly after the latest failure with the stripe, and I was chatting about the ridiculous effort I was going through to restore this steering wheel. My mom suggests, why don’t you just use a compass.
Parents are always right…
A compass?! Perfect idea! I started searching for ones online that were hopefully not like the ones we used in middle school and found a 6$ contractor compass at home depot.
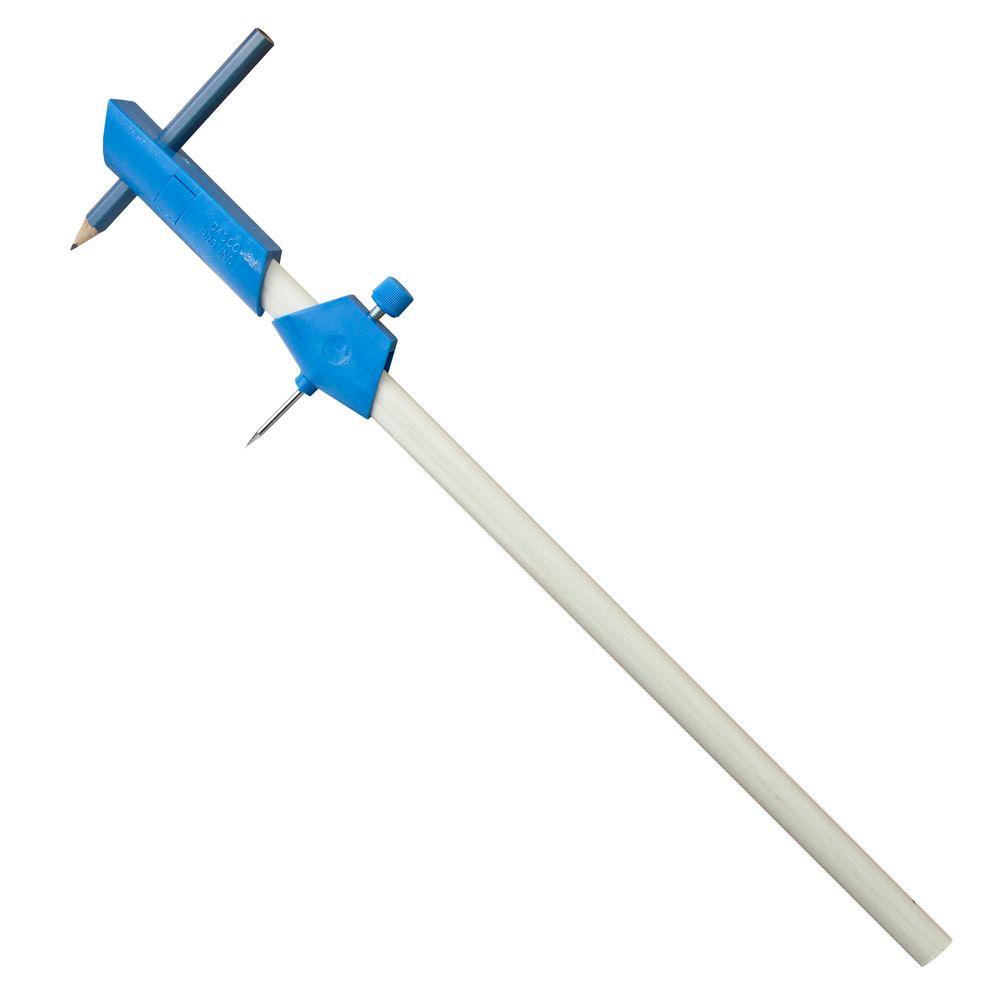
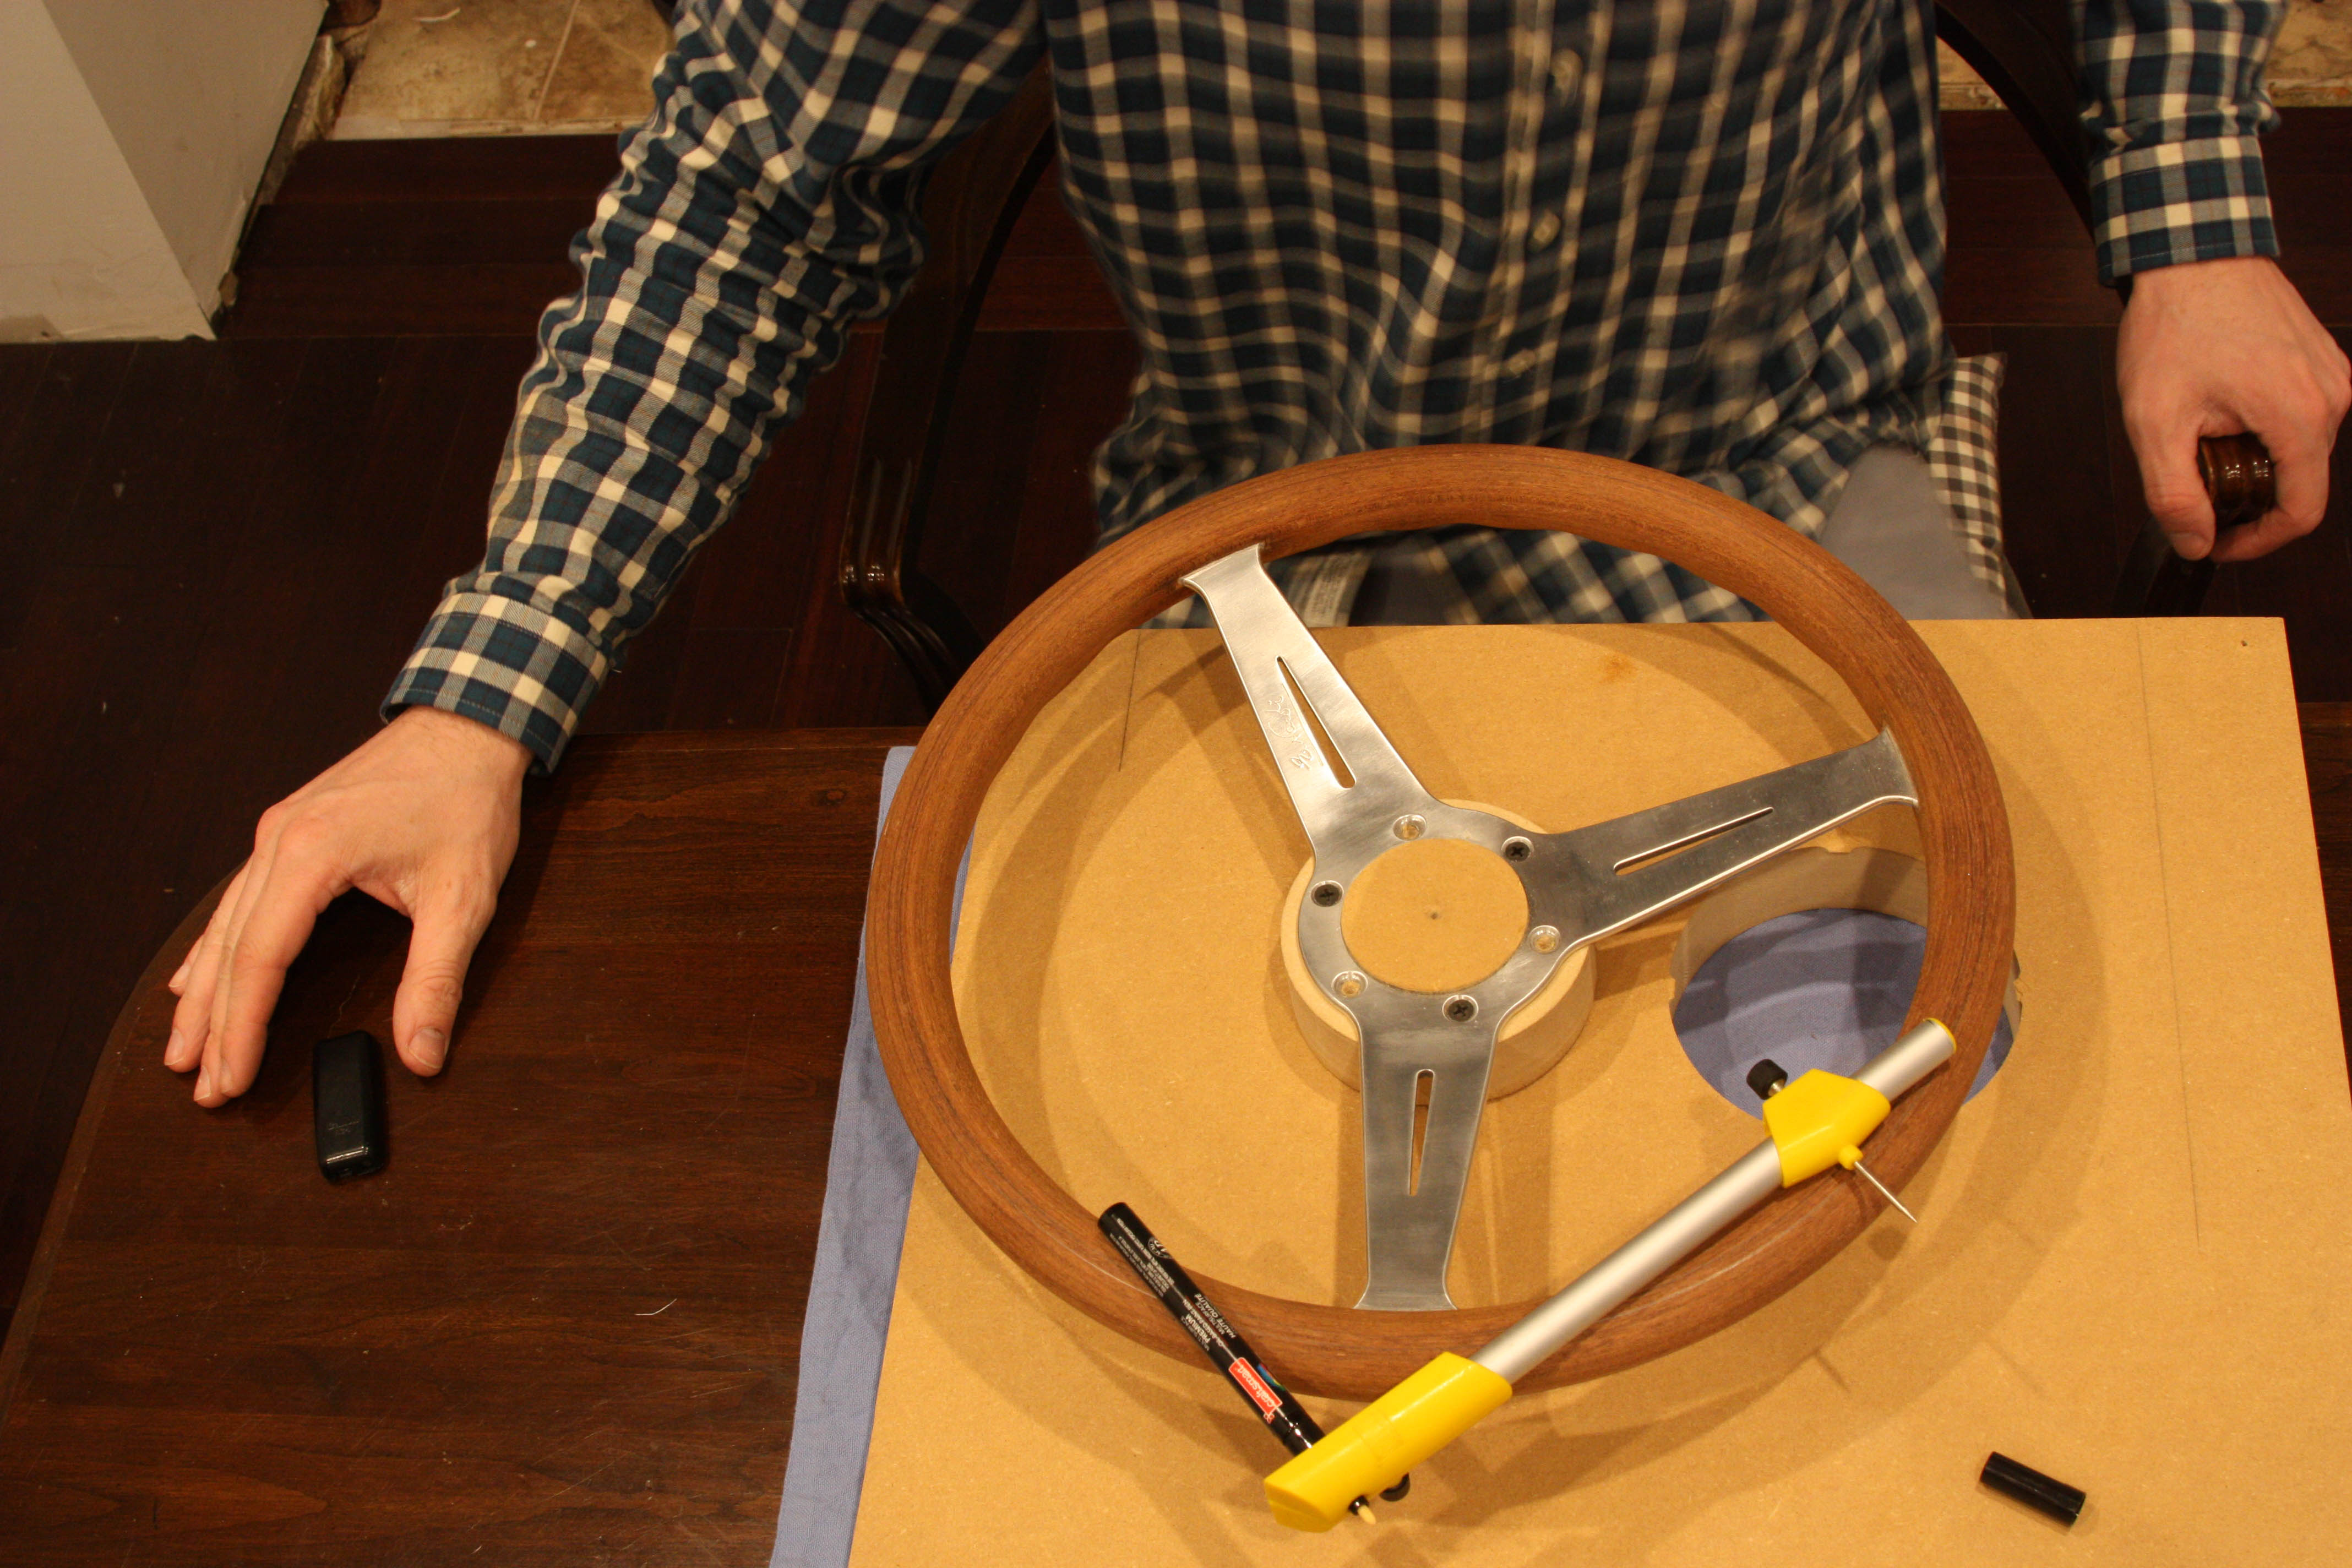
I then brought it home and got an oil based paint pen from Michaels. I kept the wheel in the MDF hub and did a few pencil tests with the compass and drew the circle.
Okay, now lets try it with the paint pen.
It finally went amazing! I just adjusted the paint pen out a little further each time and achieved my perfect 1/4″ stripe.
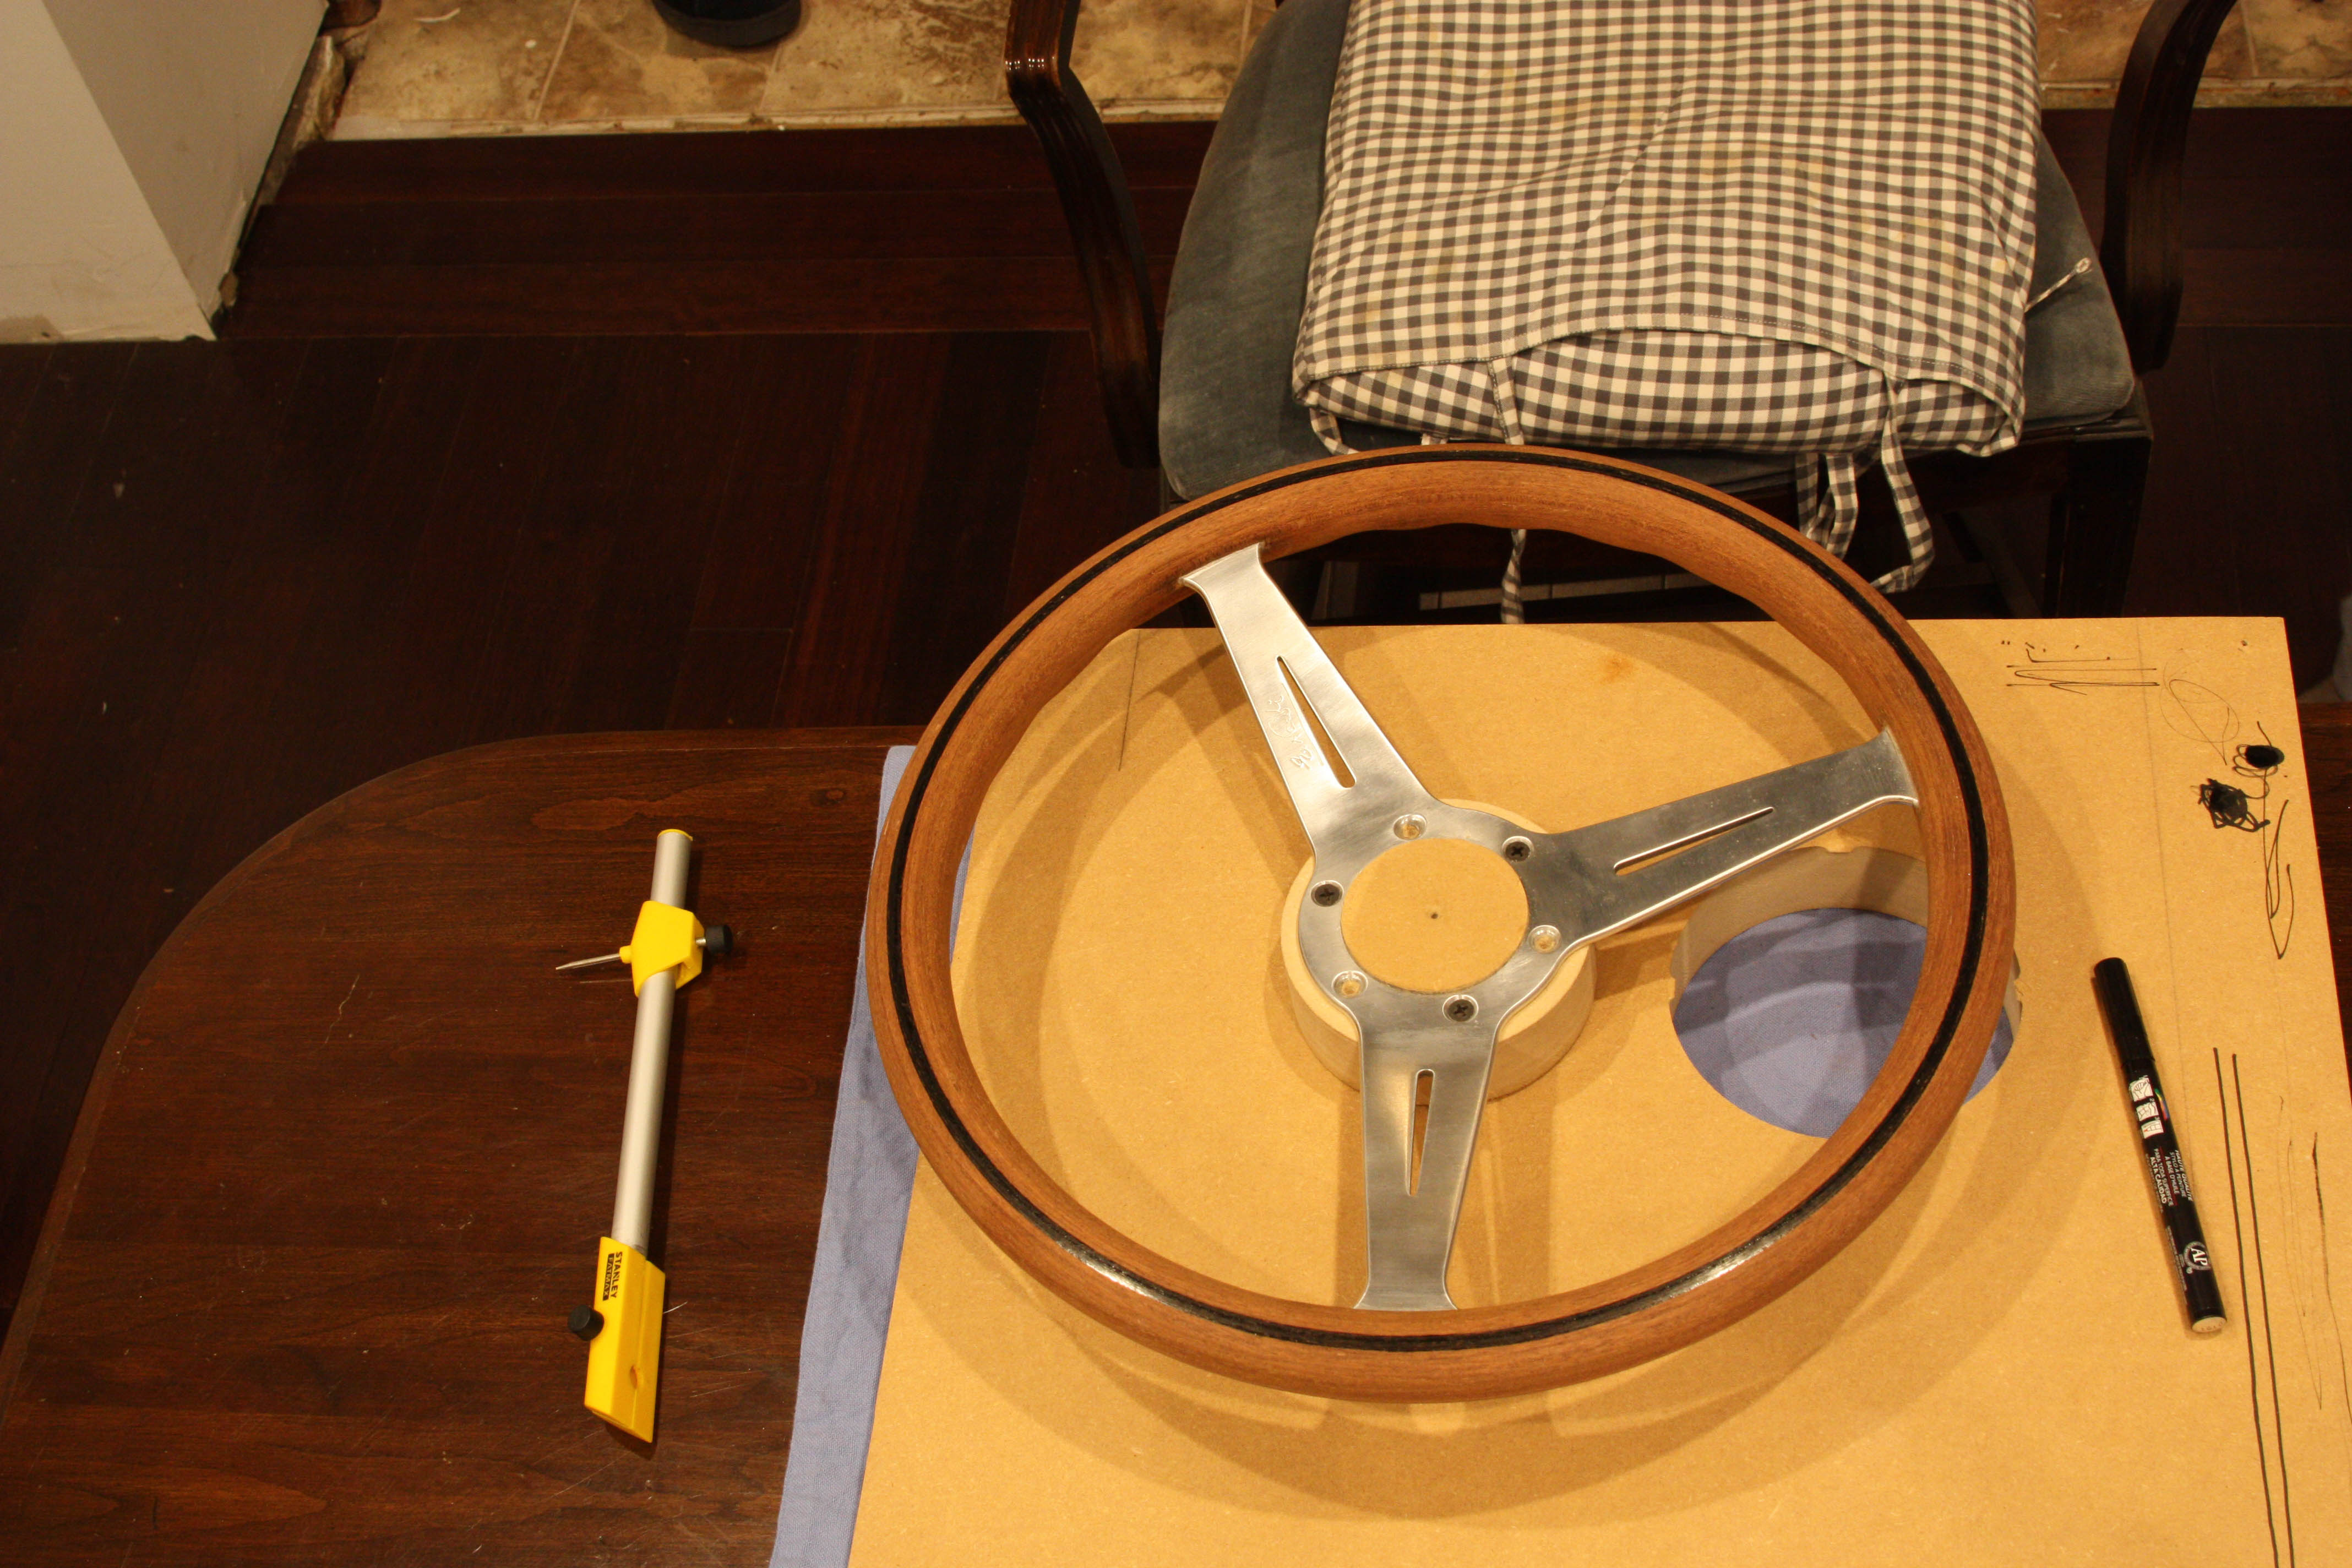
It looked awesome!
I waited a day or two for the paint to fully cure, and was ready for the Spar Urethane. I took my foam brush dipped it in the urethane and started applying it. The lighting in the space bouncing off the wet urethane looks like it was almost running. Turns out, it was.
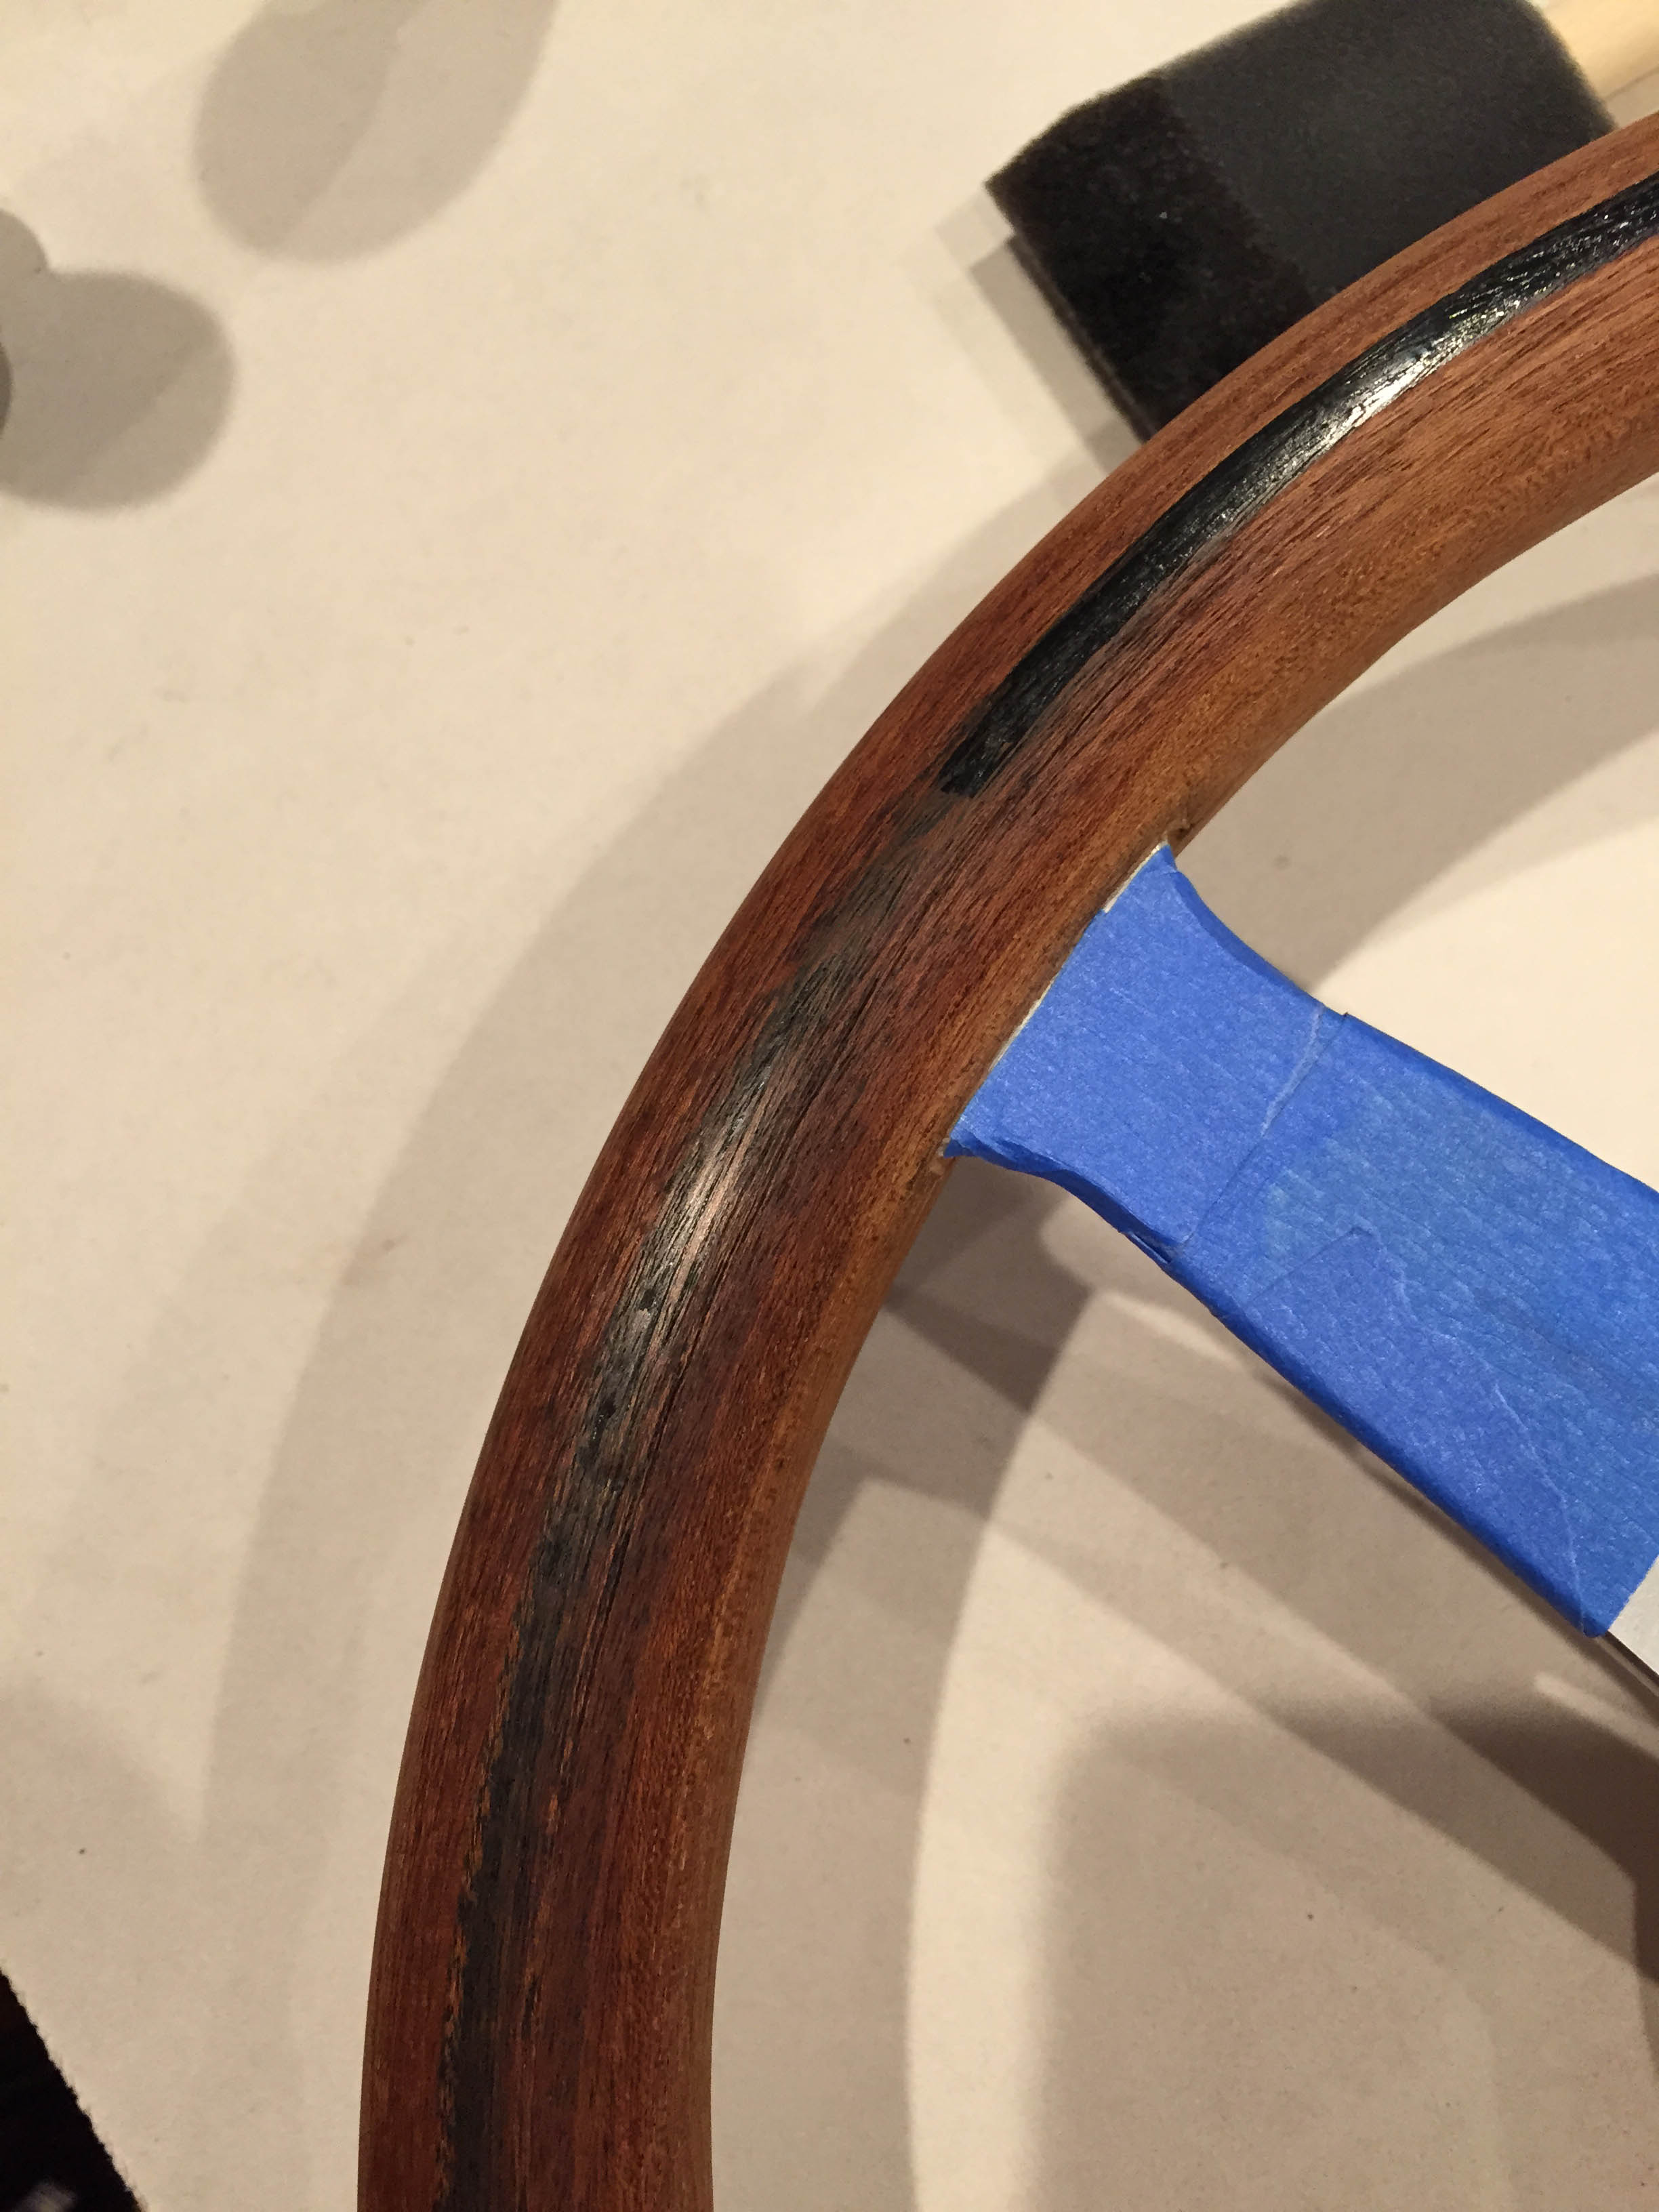
And this is why we test things before applying them to the final product.
I stopped in my tracks.
Shit, Shit, Shit.

The urethane made the oil based paint run for some reason, and I had to sand the whole thing off and start again with a different paint.
Take 6 million,
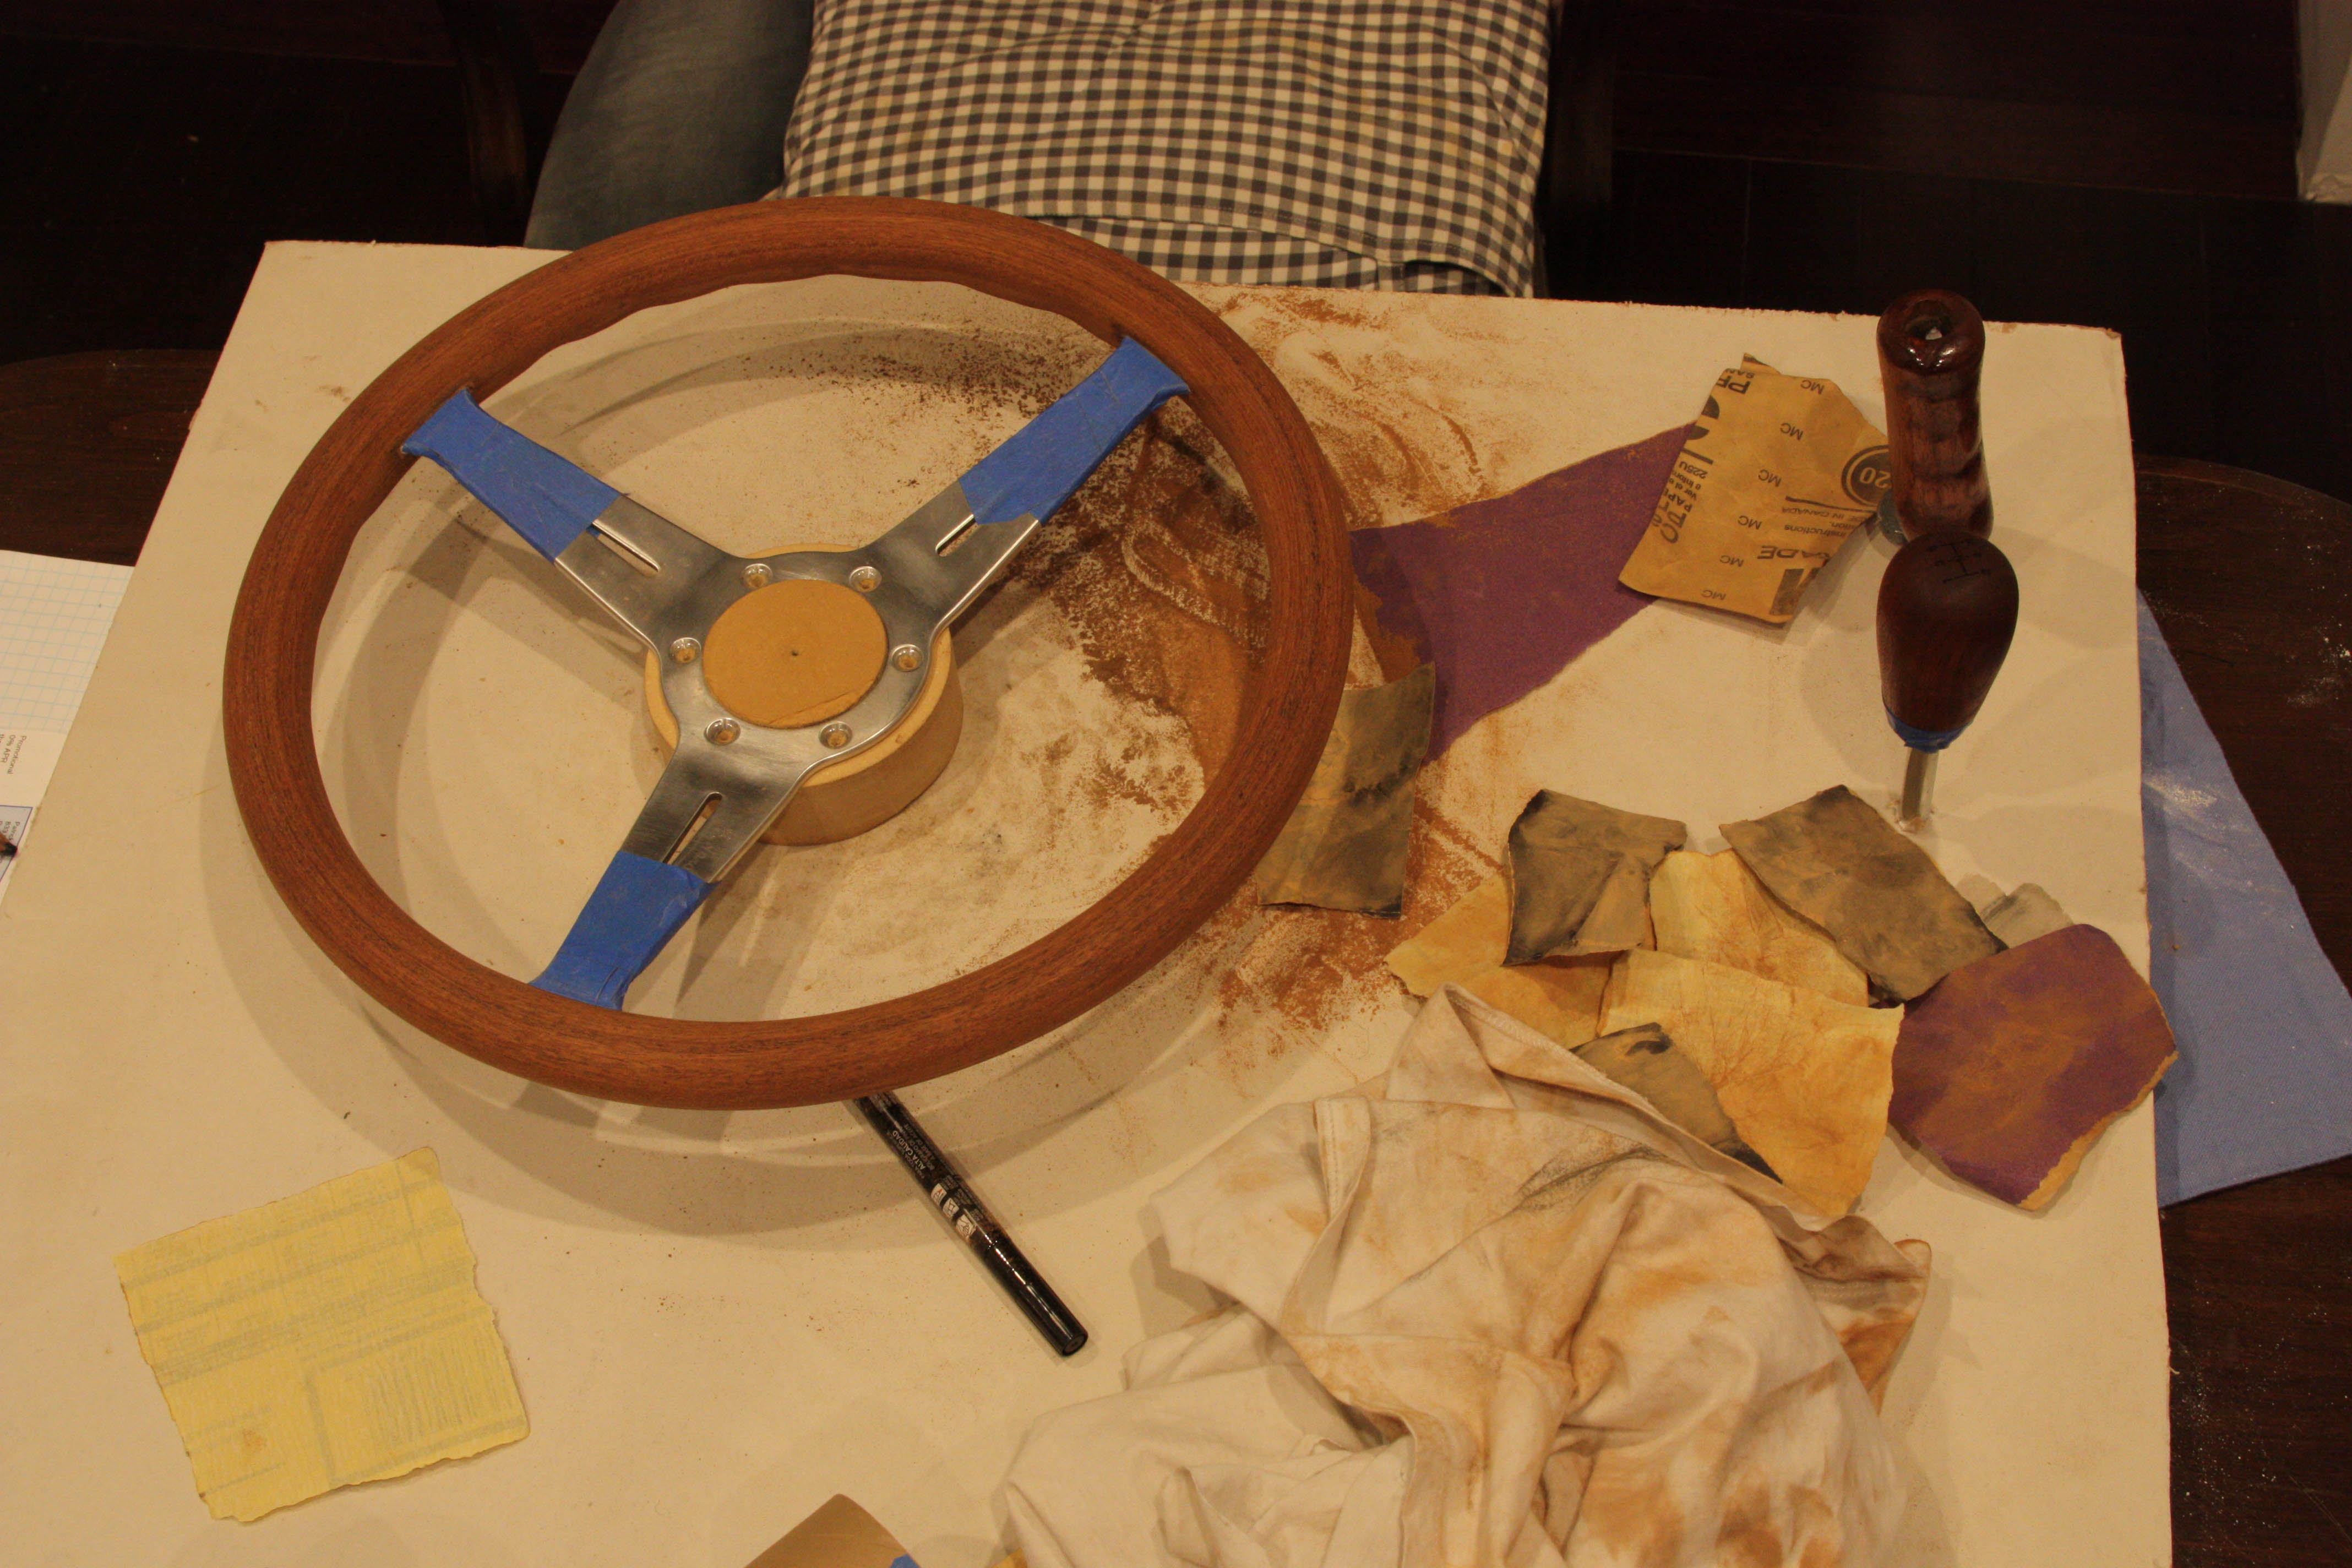
Okay, got a different paint pen, one that my buddy who runs an art store assured me wouldn’t run, and when through the process again. I did a small test, on a block of MDF no running. Long story short, it worked out great and took the urethane awesome.
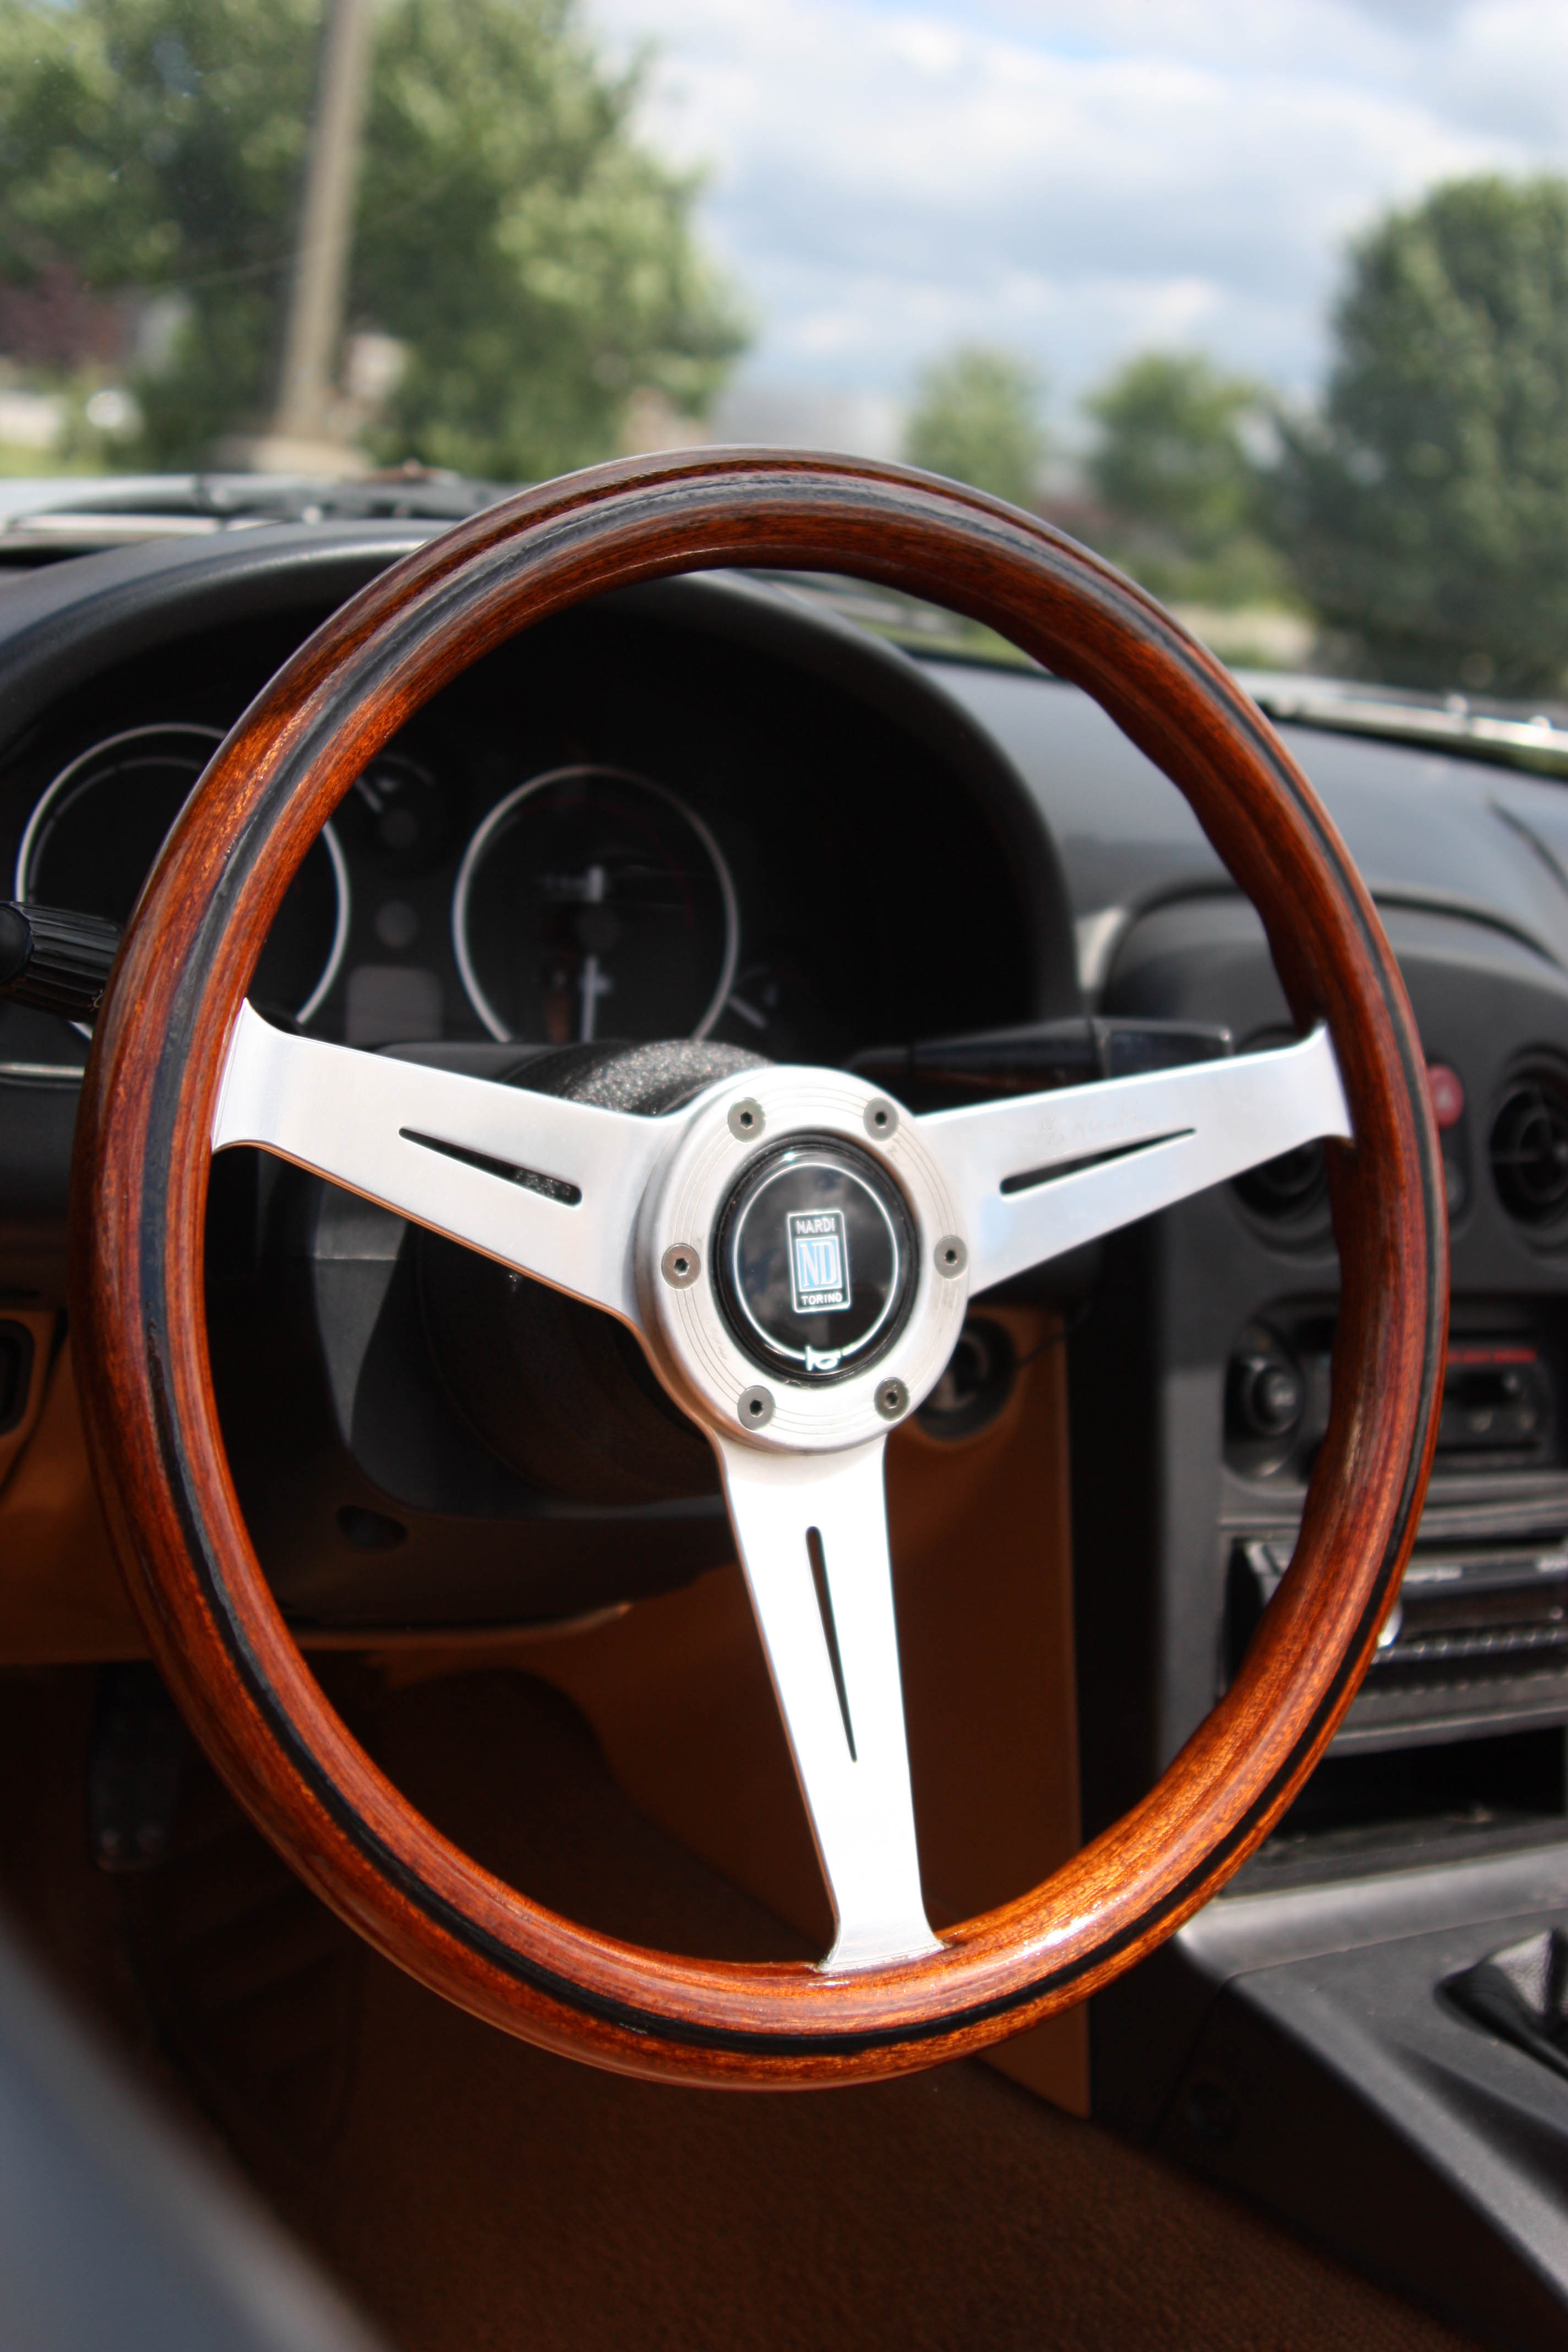
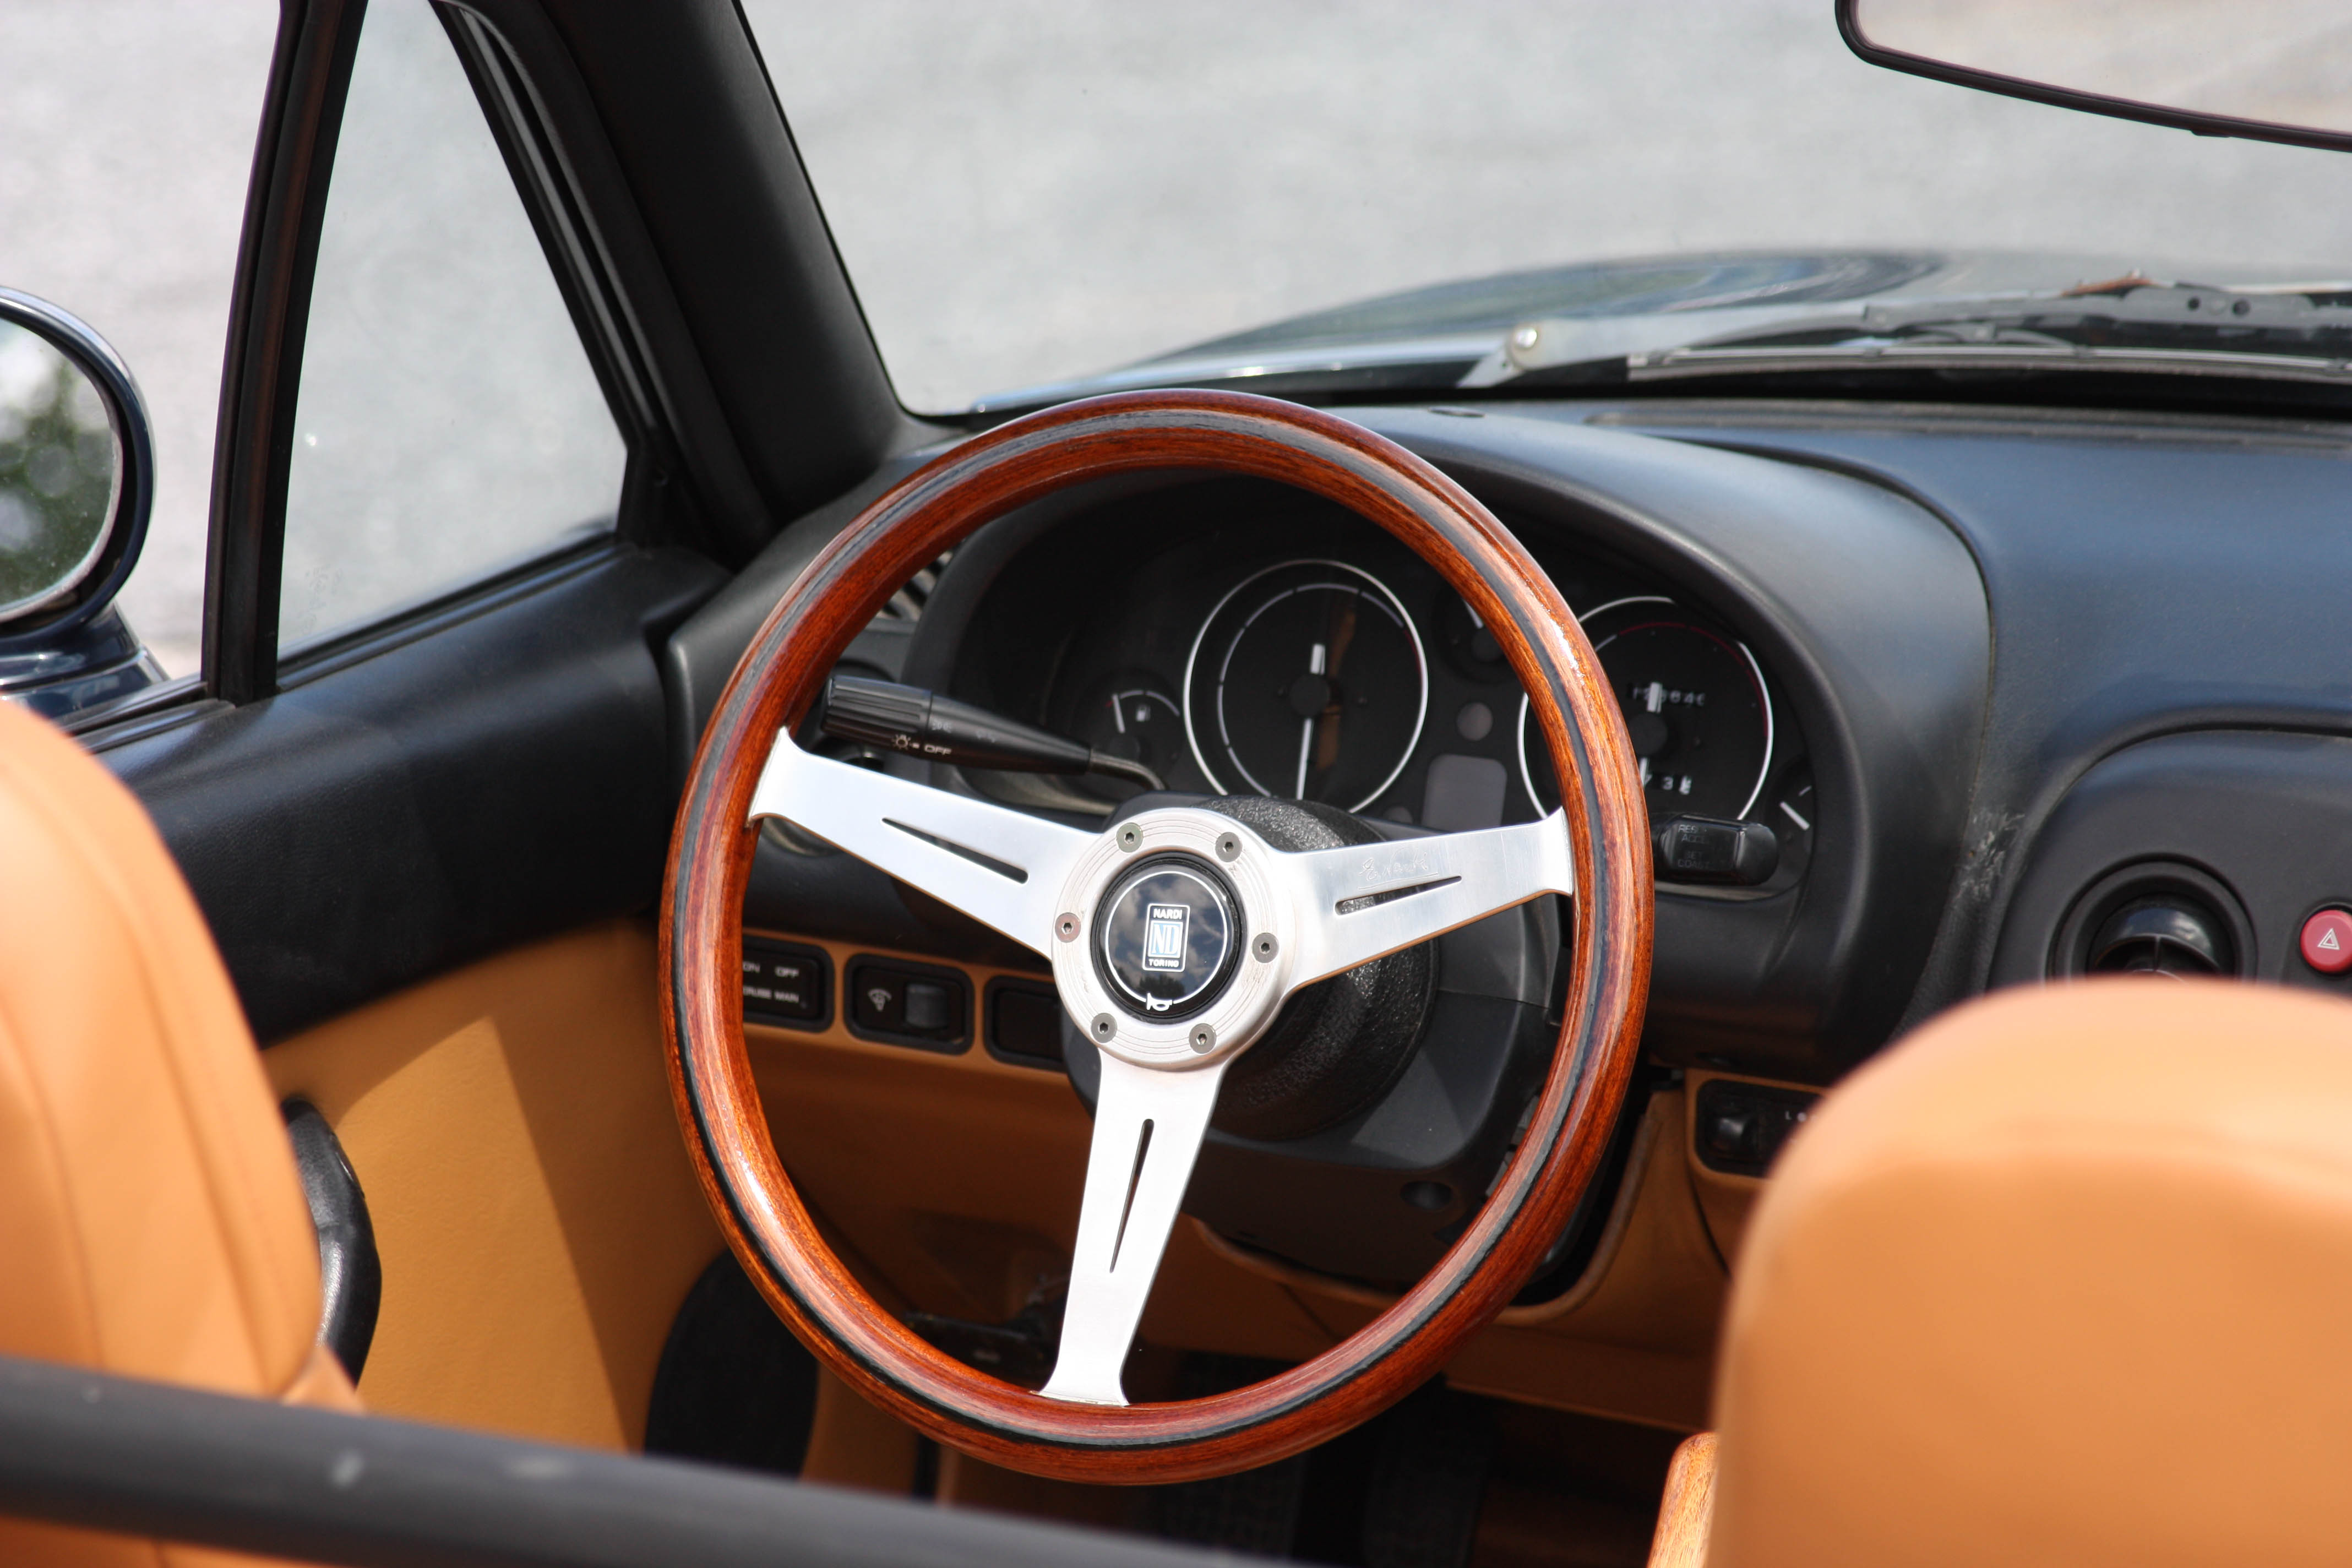
I applied 6 coats, sanding lightly in between each one. It turned out amazing, it really brought the mahogany grain and color out!
Side story—- Gear Shifter
I’ll keep this one short.
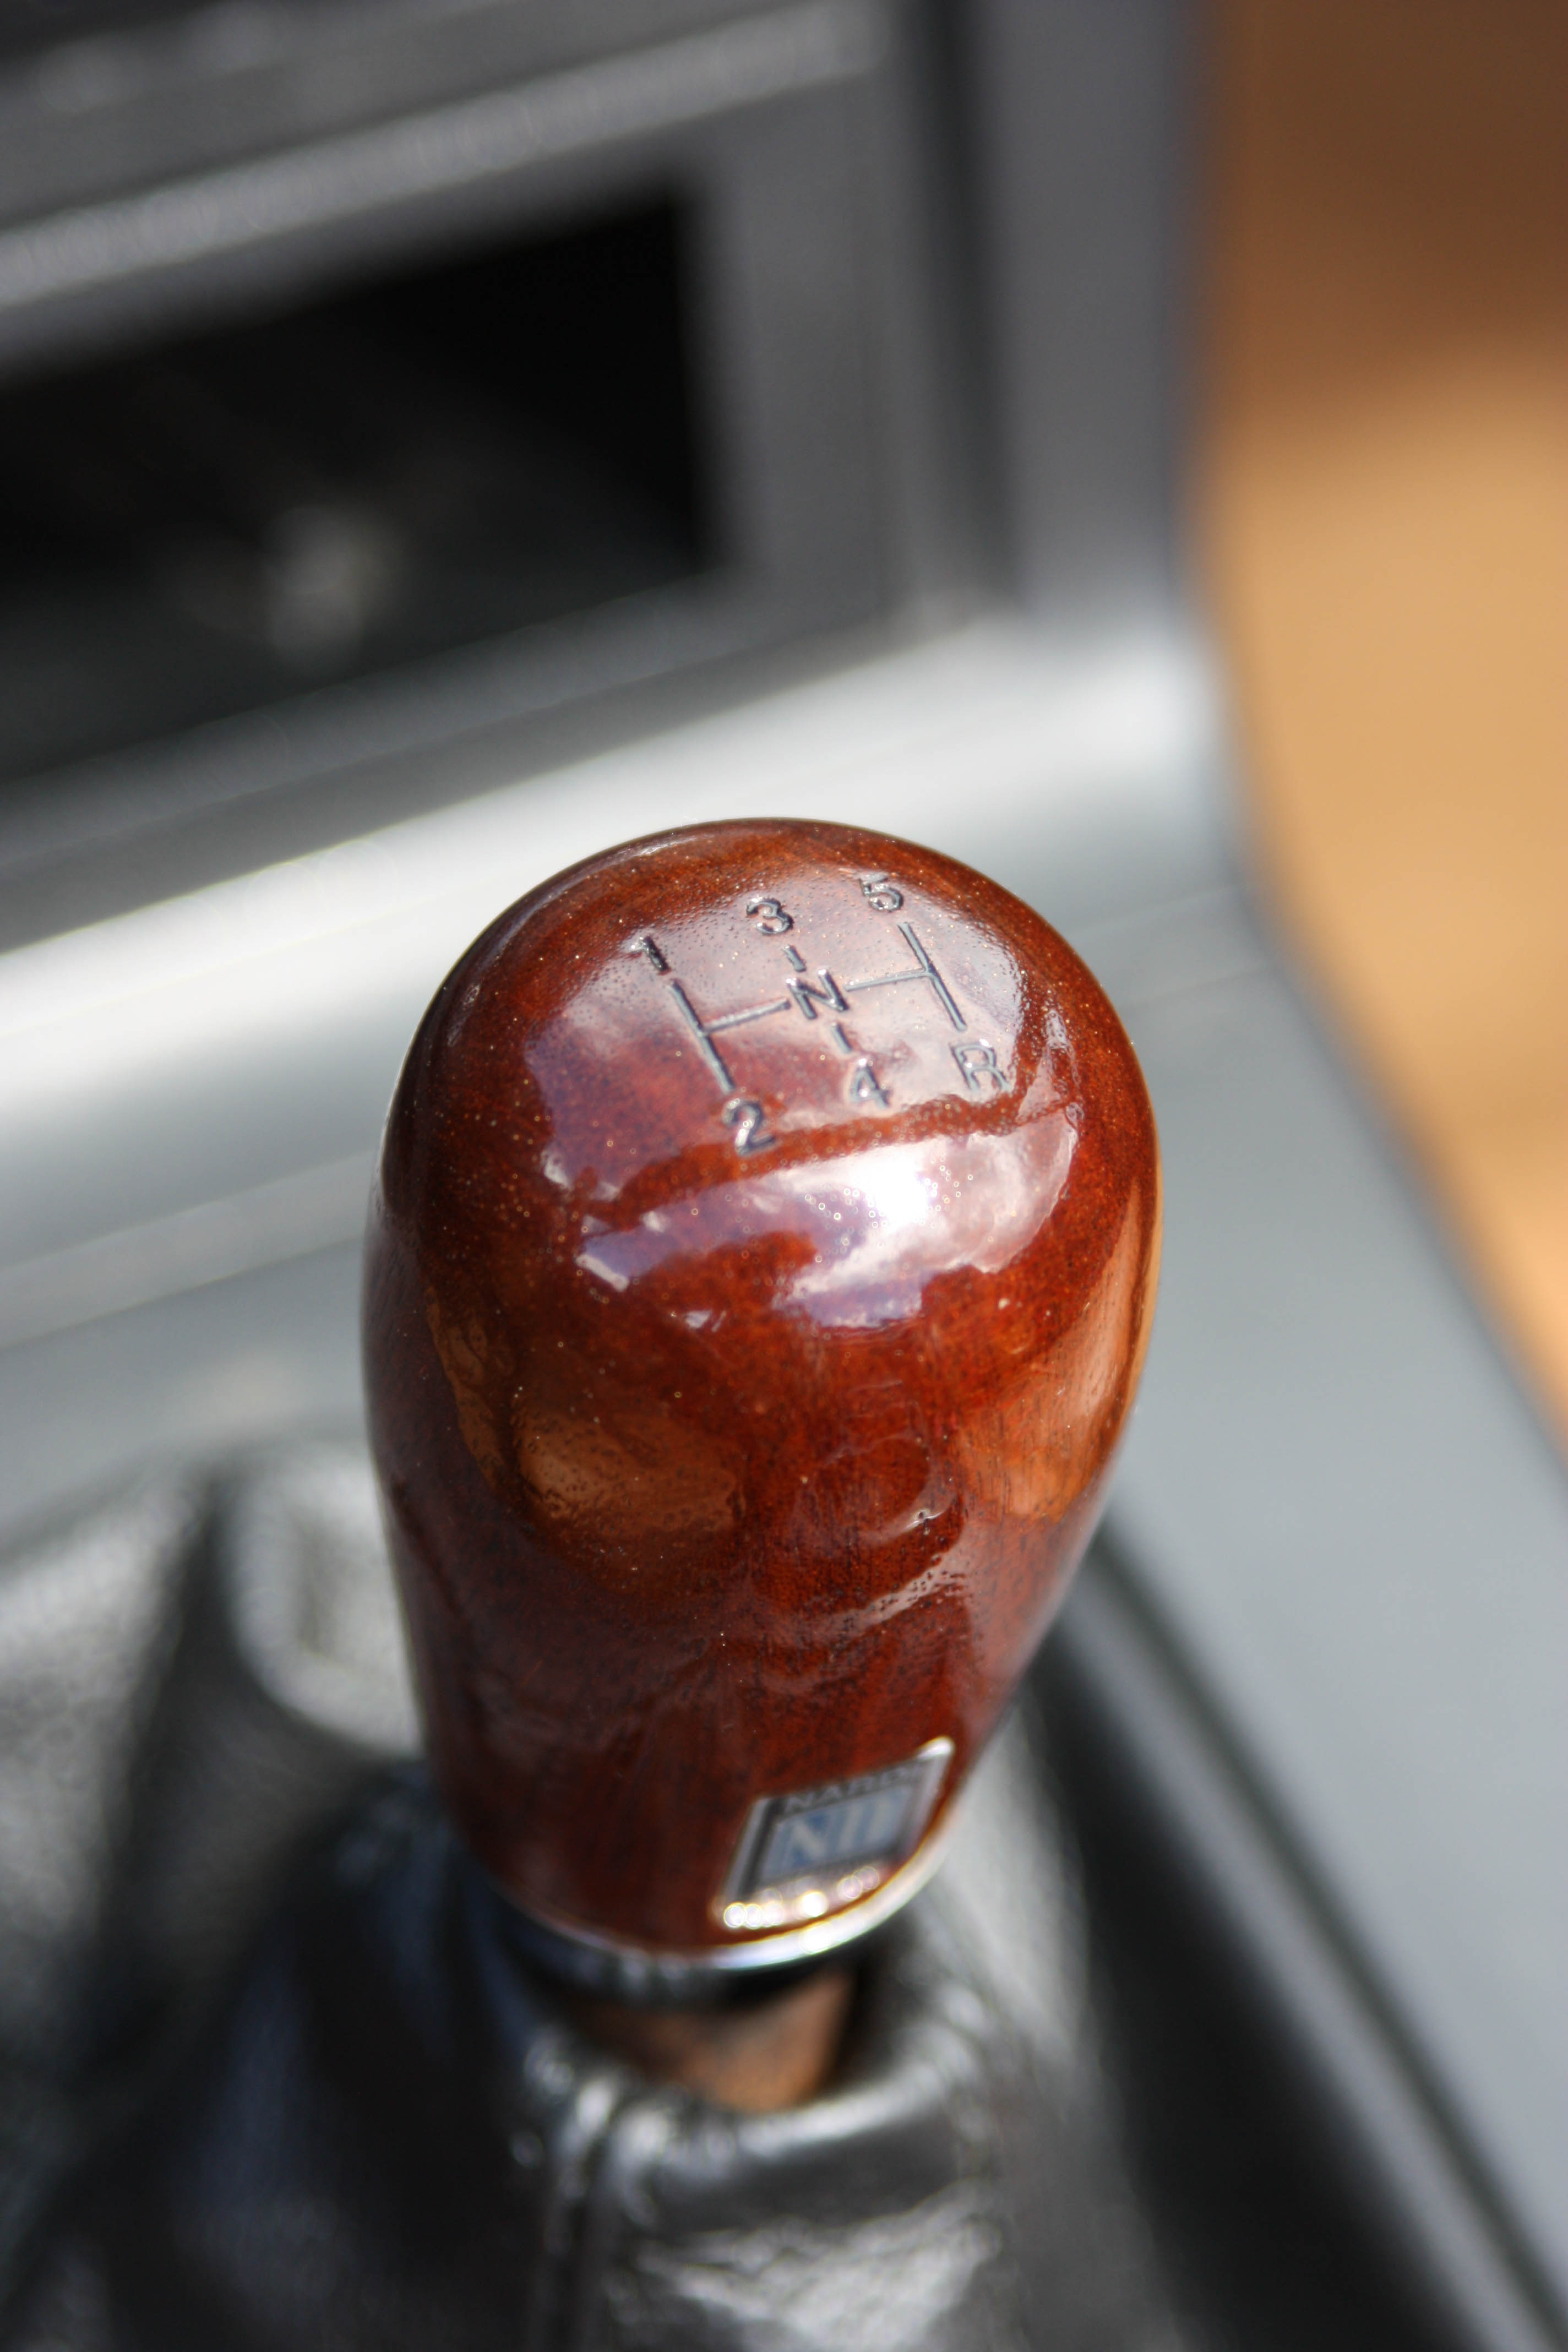
I wanted the shift knob to match the new steering wheel. The Nardi knob looked to be some kind of blonde wood. Once I got the finish off I realized it was mahogany as well! The only problem was when I sanded it down, it took off the shift pattern from the top of the knob.
To get the shift pattern back, I drew up a quick one in illustrator and brought it back to the shop. I added the N to the neutral position, thought it was a fun little touch.

Then I put the knob in the laser cutter bed and etched the pattern into the top. It came out awesome! worked perfectly the first time. (unlike the previous project).

I also sanded down the emergency brake handle. It was OEM, but some different kind of blonde wood. It looked similar to the old stock on my Norinco.
I urethaned everything at the same time.
Then installed it into the car!
Take a look at the final pictures!


That looks awesome and made me smile reading it all. The Miata is looking great ! Did you have the seats reupholstered?
It’s funny how seemingly simple projects can turn in to big ones when we are chasing machined perfection. Looks like you are getting your monies worth out of that maker space.
OMG! Amazing work! I just bought a Nardi wheel for my 2002 Titanium and Im searching for a Turino gear knob (just like yours). I love the idea of laser cutting the shift pattern. Did you use a tinted varnish for it?
Thanks Christian,
Sorry for the slow reply. I just got a second miata, 1991 BRG, and will need to repeat the refinishing again on that shifter. All the nardi torino wheels and shifters are a African Mahogany. So I didn’t use a tinted varnish, just a high gloss clear Spar Urethane. I did about 5 coats. I think I’ll do more next time. Good luck with your search!
I would check the numbers on your wheel, make shure it’s real Mine has a inlayed stripe not painted. Really nice!